Growing up in a Southern kitchen, there was always a sense of warmth that came from the oven. These Raspberry Thumbprint cookies are a staple of that tradition, combining a buttery shortbread base with a bright, sweet center that feels just like home. It is a recipe that bridges the gap between classic holiday baking and a simple afternoon treat, proving that comfort and flavor always go hand in hand.

The secret here is the subtle addition of almond extract, which gives the cookies a gentle depth that pairs beautifully with the fruit. You will find that these little bites are as much about the texture as they are about the taste, offering a soft crumb that melts away with every mouthful.
Comfort Meets Flavor
There is something incredibly grounding about a cookie that requires you to leave your mark. Rolling the dough between your palms and pressing your thumb into the center is a tactile joy that modern baking often forgets. This Raspberry Thumbprint recipe is a treasure because it celebrates that slow, intentional process while delivering a result that everyone in the family will reach for.
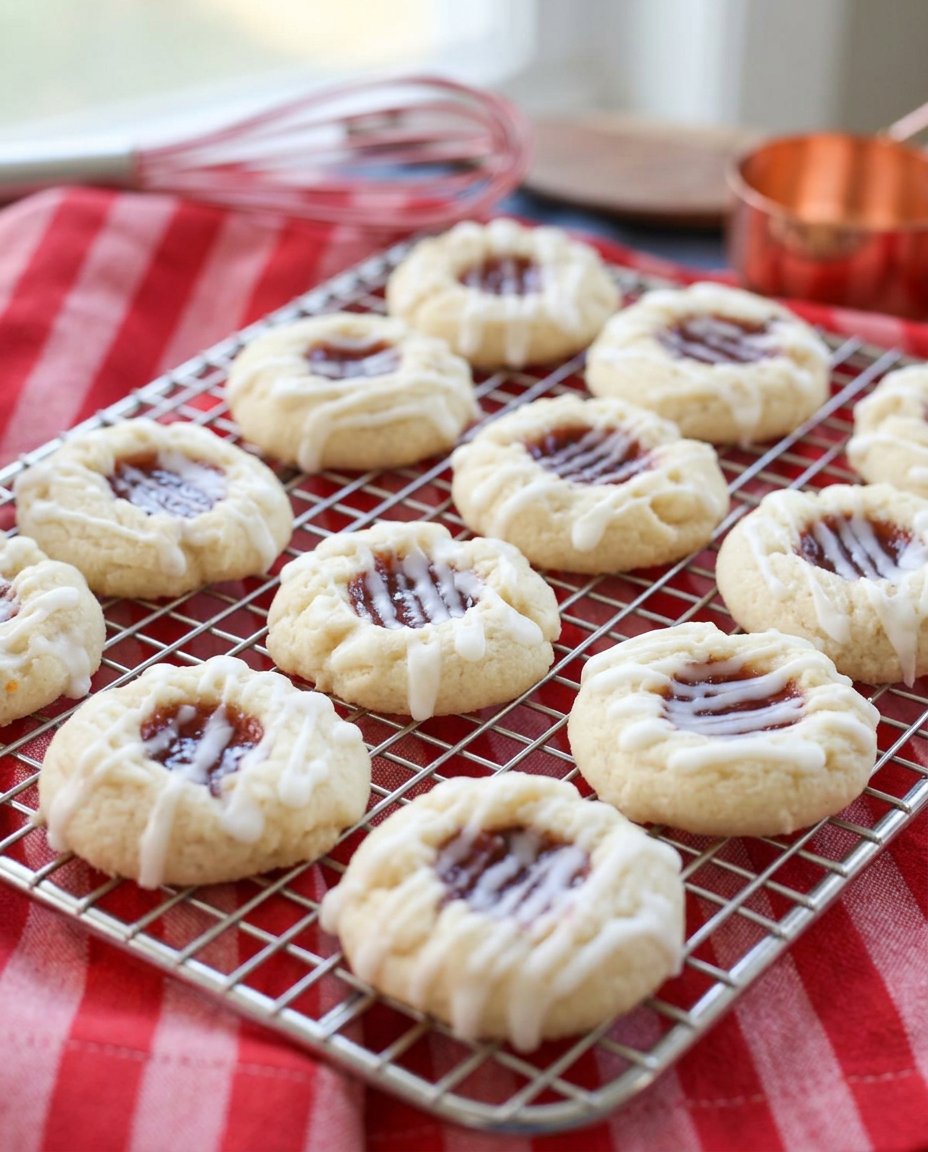
The contrast between the rich, pale shortbread and the jewel-toned raspberry jam makes these as beautiful to look at as they are to eat. You will love how the almond glaze adds a final touch of sweetness without being overwhelming, making these a sophisticated yet approachable addition to your cookie jar. It is the kind of recipe that makes people ask for the secret ingredient, though we know the real secret is the care put into every small batch.
Print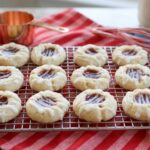
Raspberry Thumbprint
- Total Time: 25 mins
- Yield: 24 cookies
- Diet: Vegetarian
Description
These buttery shortbread cookies are infused with a delicate hint of almond and filled with a vibrant raspberry jam center. A classic treat that balances a soft, melt-in-your-mouth texture with a sweet, jeweled finish, they are perfect for holiday platters or everyday tea time.
Ingredients
- 1 cup salted butter, softened
- 2/3 cup granulated sugar
- 1/2 teaspoon almond extract
- 2 cups all-purpose flour (260g)
- 1/2 cup seedless raspberry jam
- 1 cup powdered sugar
- 1/2 teaspoon almond extract (for glaze)
- 1–2 teaspoons water
Instructions
- Preheat your oven to 350°F (175°C) and line two large cookie sheets with parchment paper.
- In a large bowl, cream together the softened butter, granulated sugar, and almond extract on medium speed for 1 to 2 minutes until light and fluffy.
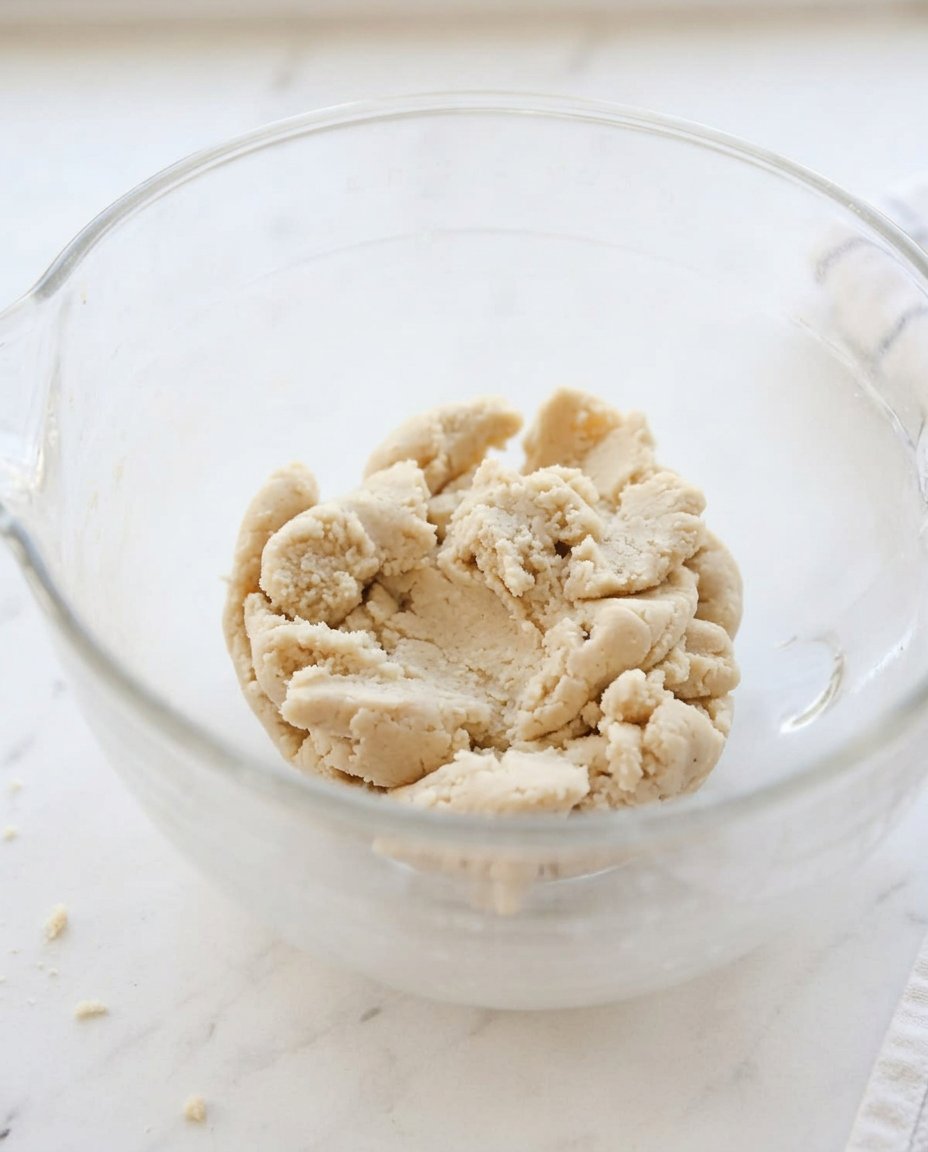
- Slowly add the all-purpose flour to the creamed mixture on low speed, mixing only until the dough is fully incorporated and cohesive.
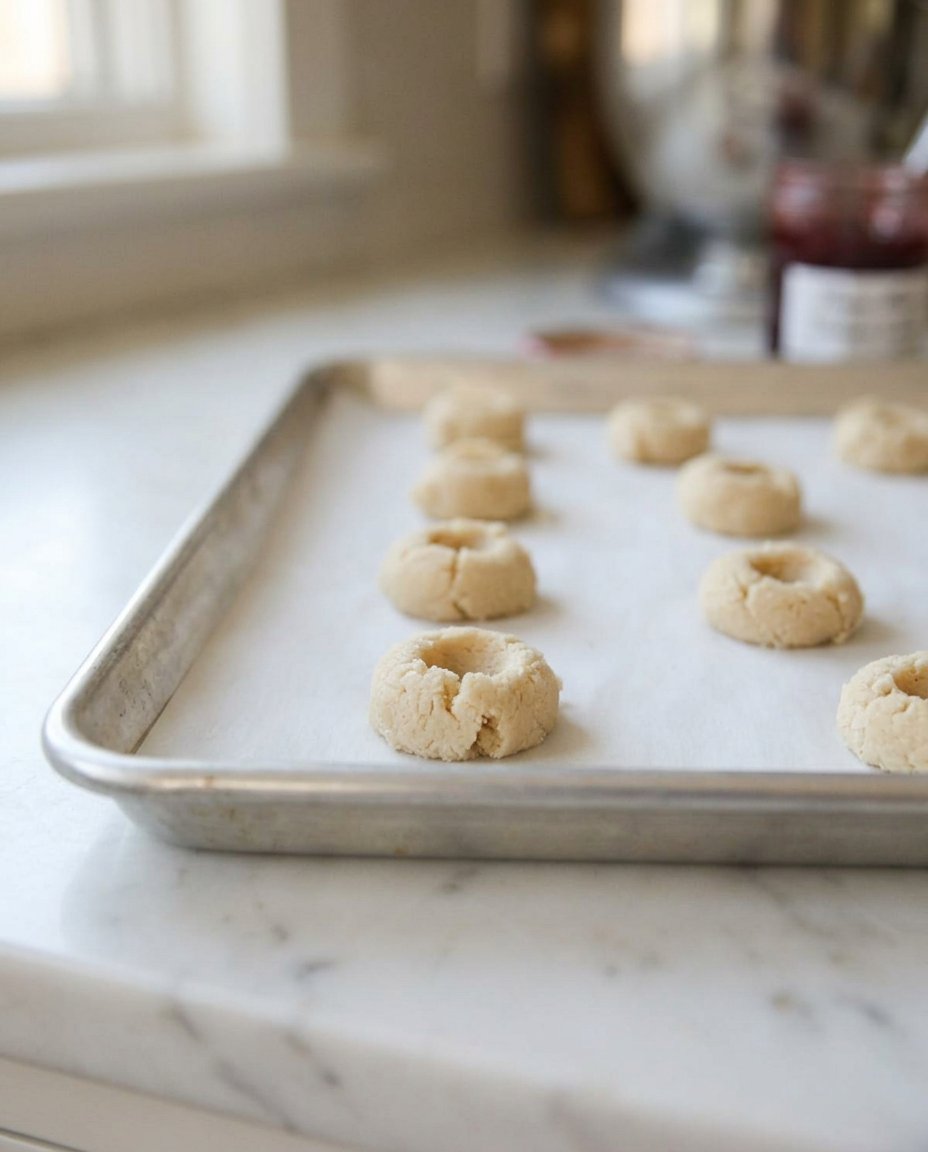
- Roll the dough into small balls, approximately 1 inch in diameter, and place them on the prepared cookie sheets about 2 inches apart.
- Use your thumb or a small rounded spoon to make a gentle indentation in the center of each ball, then fill each indent with approximately 1/4 teaspoon of raspberry jam.
- Bake for 9 to 11 minutes until the cookies are puffed and set, but before they turn golden brown.
- Cool on the pan for 5 to 10 minutes, then transfer to a wire rack; once completely cool, whisk the powdered sugar, additional almond extract, and water to create a glaze and drizzle over the cookies.
Notes
To ensure the best texture, always weigh your flour and make sure your butter is at room temperature but not greasy. If the dough becomes too warm while rolling, chill it for 10 minutes before baking to help the cookies maintain their thumbprint shape and prevent spreading.
- Prep Time: 15 mins
- Cook Time: 10 mins
- Category: Dessert
- Method: Baking
- Cuisine: American
Familiar Raspberry Thumbprint Ingredients
To make a batch of these cookies, you will want to start with quality ingredients that speak for themselves. The base is a classic shortbread, which relies heavily on the quality of your butter. I always suggest using a high-quality salted butter to give the cookies a bit of depth, but unsalted works perfectly fine if that is what you have on hand. The granulated sugar provides just enough sweetness without making the dough heavy, and the flour gives us that reliable structure we need for the perfect indent.
The Essentials
- Butter: Softened to room temperature for that light, fluffy creamed texture.
- Granulated Sugar: For sweetness and a bit of crispness on the edges.
- Almond Extract: This is the flavor bridge that makes the raspberry pop.
- All-Purpose Flour: I recommend weighing this (260g) to make certain your cookies are never dry or tough.
- Raspberry Jam: A seedless variety works best for a smooth, professional-looking center.
- Powdered Sugar: For the final drizzled glaze that ties everything together.
Using a hint of almond is a Southern trick that adds a layer of curiosity to a familiar cookie. It doesn’t scream for attention, but it makes the raspberry jam taste more like itself—bright, tart, and wonderfully sweet. When you are gathering your supplies, remember that the best cookies come from simple things done with a lot of heart.
The Comfort Method
Step 1: Prep Your Ingredients
Start by preheating your oven to 350 degrees Fahrenheit (175 degrees Celsius). While the oven warms up, line two large cookie sheets with parchment paper. This simple step makes certain your cookies don’t stick and helps them bake evenly without the bottoms getting too dark too fast.
Step 2: Cream the Base
In a large bowl, combine your softened butter, granulated sugar, and that wonderful almond extract. Use a hand mixer or a stand mixer at medium speed to cream these together for about 1 to 2 minutes. You are looking for a light and fluffy consistency that looks pale and airy. This stage is where you build the foundation for a soft, melt-in-your-mouth cookie.
Step 3: Add the Flour
Slowly add your all-purpose flour to the creamed mixture, a little bit at a time. Keep the mixer on a low speed to avoid a flour cloud in your kitchen. Mix only until the flour is fully incorporated. You will see the dough start to come together into a soft, cohesive mass that is easy to handle but not sticky.
Step 4: Roll the Dough
Take small portions of the dough and roll them into balls about 1 inch (2.5 cm) in diameter. You want to keep them small because these cookies are rich and make for the perfect single bite. Place the dough balls on your prepared cookie sheets, leaving about 2 inches of space between them so they have room to puff up.
Step 5: Fill the Centers
Using your thumb or a small rounded measuring spoon, make a gentle indentation in the center of each dough ball. If you see small cracks forming on the sides, just use your fingers to gently squeeze the dough back together. This makes certain the jam stays right where it belongs. Fill each indent with about 1/4 teaspoon of raspberry jam.
Step 6: Bake to Perfection
Slide the trays into the oven and bake for 9 to 11 minutes. Keep a close eye on them—my family loves these extra soft, so I pull them out when they are set and puffed but haven’t started to turn golden brown on the bottom. If you prefer a bit of crunch, you can let them go until the very edges show a hint of honey-gold.
Step 7: Cool and Glaze
Let the cookies rest on the pan for about 5 to 10 minutes. This allows them to firm up before you move them to a cooling rack. While they cool completely, whisk together your powdered sugar and almond extract with just a tiny bit of water. Drizzle this glaze over the cooled cookies using a spoon or a small zip-top bag with the corner snipped off.
Jesse’s Comfort Secrets
One of the most important things to remember when making these is the temperature of your butter. You want it soft enough to leave an indent when you press it, but not so soft that it is greasy. This helps the cookies keep their shape in the oven and prevents them from spreading too thin. For more ideas on how to master the art of the perfect bake, take a look at our Artisan Cookie Collection where we talk about the science of texture.
Another trick I have learned over the years is to warm the jam slightly before filling the cookies. A few seconds in the microwave makes it easier to spoon and helps it settle smoothly into the thumbprint. If you find your dough is getting too warm while you roll it, do not be afraid to pop it in the fridge for ten minutes. A cold dough often holds the shape much better during the initial minutes of baking. Making certain your measurements are accurate is the final key—using a kitchen scale for the flour will change your baking life for the better.
Comfort Variations and New Flavors
While raspberry is the classic choice, you can easily adapt this recipe to fit your own flavor curiosity. Swapping the raspberry for apricot jam or even a tart lemon curd can create a whole new experience while keeping that familiar buttery base. If you are looking for more ways to change up your routine for the holidays, you might enjoy browsing through our Seasonal Cookie Design guide.
For those who love a bit of texture, you can roll the dough balls in finely chopped pecans or walnuts before making the indentation. This adds a Southern nuttiness that works beautifully with the almond extract. You could even swap the almond extract for vanilla bean paste or a hint of orange zest to brighten up the dough. For a great resource on different jam pairings, you can see how others approach these Raspberry Thumbprint Cookies to find your favorite combination. The goal is always to find that balance where the new flavor honors the original classic.
Cozy Enjoyment and Sharing
These cookies were made for a slow afternoon with a hot cup of tea or coffee. They look stunning on a tiered tray for a baby shower or a holiday party, but they are just as good grabbed straight from the tin in the kitchen. If you want to make them a part of a larger gift, you can find inspiration in our Cookie Decorating Studio for packaging them beautifully.
I always suggest serving these in a single layer if the glaze is still fresh. Once the glaze has hardened completely, you can stack them between sheets of parchment paper to keep them looking pristine. They pair wonderfully with a cold glass of milk for the kids or a dark roast coffee for the adults. There is a simple hospitality in offering a homemade cookie that looks this pretty, and it never fails to make guests feel special and welcome in your home.
The Comfort Truth of Baking
At the end of the day, baking is about more than just the ingredients on the counter; it is about the stories we share and the comfort we provide. These cookies have been a part of many celebrations in my family, and I hope they find a permanent place in your kitchen too. For more recipes that bring a modern spark to your favorite treats, look through our Trending Cookie Creations and join our community of home bakers.
We would love to see your creations, so please share your photos with us on social media. Happy baking, and may your kitchen always be filled with the scent of something wonderful.
