I remember standing in a sun-drenched kitchen in Scandinavia, watching the delicate dance of metal hitting hot oil. The air smelled of sweet vanilla and sizzling dough, a scent that immediately transports me back to those crisp mornings where every flake felt like a discovery. It was there I learned that the Rosettes 2 recipe is more than just a fried cookie; it is a fragile piece of edible lace that carries centuries of tradition and aromatic joy.

These thin, crispy Scandinavian treats are as beautiful as they are delicious. By using a special iron mold, we create intricate floral shapes that shatter with a satisfying crunch. While they look intimidating, the process is rhythmic and deeply rewarding once you master the temperature of the oil and the gentle dip of the batter.
The Magic of Crispy Petals
There is a specific kind of magic that happens when a simple liquid batter transforms into a complex, golden flower in under thirty seconds. You will love how these cookies feel like a celebration of texture. They are impossibly light, offering a shatter-crisp experience that heavier baked goods simply cannot match. This recipe brings a sense of wonder to the kitchen, making it perfect for those who enjoy the process as much as the result.
The flavor profile is another reason to fall in love with these treats. While many fried doughs are heavy, these are delicate. The vanilla notes are front and center, providing a fragrant backdrop to the richness of the eggs and milk. Because they are dusted with sugar rather than soaked in syrup, the sweetness remains elegant. This balance makes them a fascinating addition to any dessert table.
Furthermore, the Rosettes 2 technique is a conversation starter. Each cookie is a work of art, with fine lines and intricate patterns that look like they belong in a professional pastry shop. Bringing these to a gathering shows a devotion to craft and a curiosity for global traditions. They represent a slow-food philosophy where patience and attention to detail yield a reward that is truly irreplaceable.
Finally, you will love the versatility of these crisps. While they are rooted in Nordic history, they welcome flavor innovation. Whether you stick to the classic vanilla or start to experiment with aromatic citrus or warm spices, the foundation is solid. They are cookies that invite you to stand by the stove, enjoy the fragrant steam, and appreciate the simple beauty of a tradition passed through generations.
Print
Rosettes
- Total Time: 40 mins
- Yield: 36 cookies
- Diet: Vegetarian
Description
These delicate Scandinavian cookies are created by dipping a heated iron into a thin vanilla batter and deep-frying it to golden perfection. Shatteringly crisp and dusted with snowy confectioners’ sugar, they make a stunning addition to any holiday platter.
Ingredients
- 2 large eggs
- 1 tablespoon granulated white sugar
- 1/4 teaspoon salt
- 1 cup sifted all-purpose flour
- 1 cup whole milk
- 1 teaspoon vanilla extract
- Vegetable oil for frying
- Confectioners’ sugar for dusting
Instructions
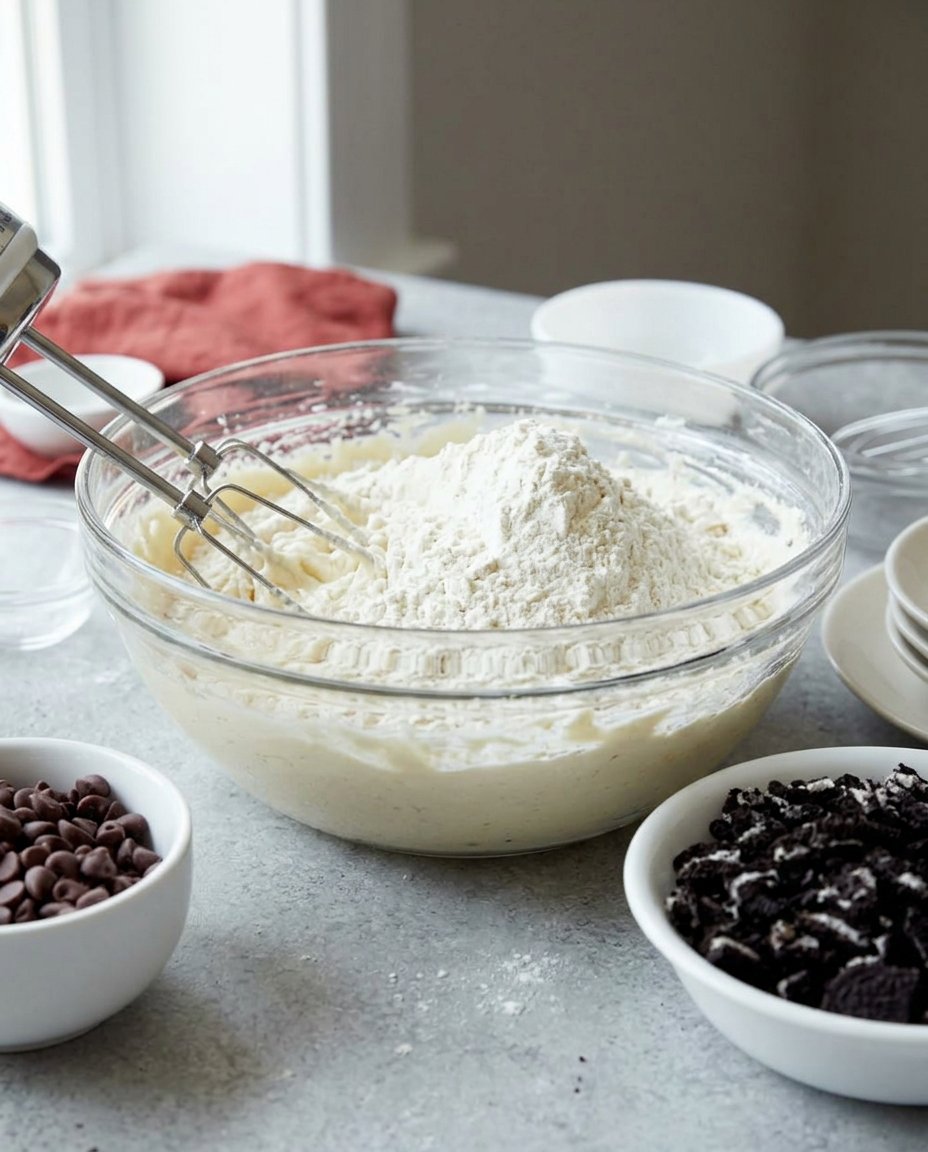
- In a large mixing bowl, whisk together the eggs, granulated sugar, and salt until well blended.
- Stir in the sifted flour, milk, and vanilla extract, whisking until the batter is completely smooth and free of lumps.
- Pour vegetable oil into a deep pot or heavy skillet to a depth of 2 inches and heat to 375°F (190°C).
- Submerge the metal rosette iron in the hot oil for at least 2 minutes to heat it thoroughly.
- Lift the hot iron, drain excess oil, and dip it into the batter so that it covers the bottom and sides but does not come over the top of the iron.
- Immediately place the batter-coated iron into the hot oil and fry for about 30 seconds until light golden brown and crisp.
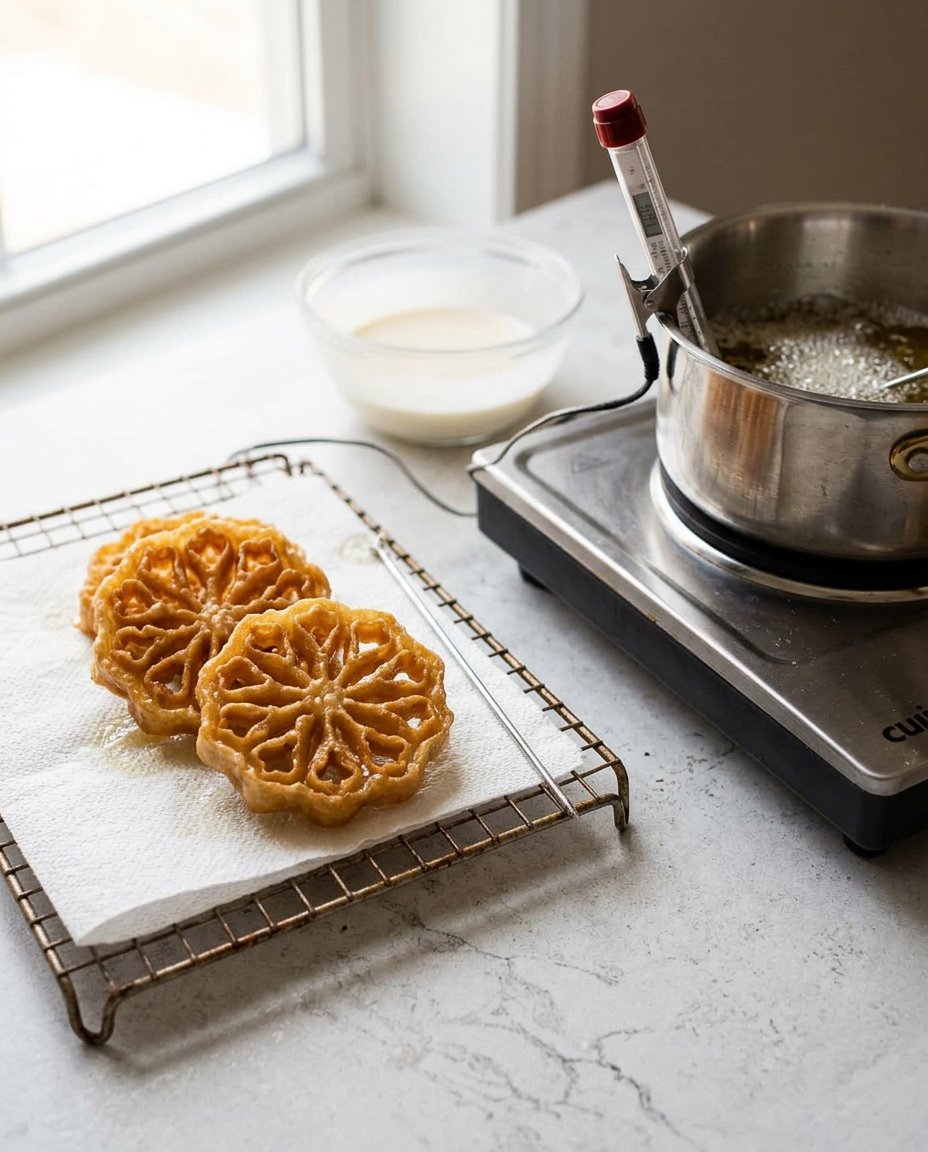
- Remove from oil, drain briefly upside down, and use a fork to gently slide the rosette onto a wire rack lined with paper towels.
- Reheat the iron in the oil for 1 minute before repeating the process; once cooled, dust generously with confectioners’ sugar.
Notes
For the best results, ensure your batter is kept cool; if it starts to thin out from the heat of the iron, place the bowl in an ice bath. Always use a thermometer to maintain the oil at a steady 375 degrees, as temperature fluctuations can cause the cookies to become either greasy or burnt.
- Prep Time: 10 mins
- Cook Time: 30 mins
- Category: Dessert
- Method: Deep-frying
- Cuisine: Scandinavian
The Spice Pantry and Flavor Stars
To create the perfect Rosette, we must look at our ingredients through the lens of quality and function. Each component plays a vital role in achieving that signature snap and aromatic depth.
- Large Eggs: These provide the essential structure and richness. Because rosettes have no chemical leavening like baking powder, the proteins in the eggs are what hold the intricate shape together as it hits the hot oil.
- Granulated White Sugar: A small amount is added to the batter to help with browning and to provide a base level of sweetness. We keep it minimal here because the heavy lifting for sweetness happens with the final dusting.
- Salt: A tiny pinch of salt is the secret to making the vanilla and milk flavors pop. It balances the richness of the frying process.
- Sifted All-Purpose Flour: Sifting is non-negotiable for this recipe. It removes any clumps and aerates the flour, which allows the batter to be smooth and thin enough to coat the iron properly without being heavy.
- Milk: This provides the liquid base. Using whole milk adds a subtle creaminess that water or lower-fat alternatives lack, contributing to the beautiful golden color of the fried cookie.
- Vanilla Extract: This is the aromatic heart of the cookie. Use a high-quality extract or even vanilla bean paste to see those beautiful dark flecks and taste the floral depth.
- Vegetable Oil: Choose a neutral oil with a high smoke point for frying. This allows the clean flavor of the batter to shine through without any greasy aftertaste.
- Confectioners’ Sugar: The final touch that looks like fallen snow. It clings to the ridges of the rosette, highlighting the pattern and providing that initial hit of sweetness.
The Method of Flavor Process
Step 1: Create the Aromatic Base
Gather all your ingredients on the counter. In a large mixing bowl, beat your eggs with the sugar and salt. You want to whisk until the mixture is cohesive but not necessarily foamy. This is about blending the structure-building proteins with the flavor-boosting sugar and salt to create a smooth foundation.
Step 2: Incorporate the Flour and Milk
Add the sifted flour, milk, and vanilla extract to your egg mixture. Use a whisk to beat the batter until it is completely smooth. The consistency should be similar to a thin heavy cream. If you see any lumps, keep whisking; a smooth batter is the only way to get a uniform coating on your iron. Let the batter rest for a few minutes to allow any air bubbles to rise and settle.
Step 3: Heat Your Frying Station
Pour about two inches of vegetable oil into a large, deep skillet or a heavy pot. Heat the oil to 375 degrees F (190 degrees C). Use a thermometer to keep track; if the oil is too cool, the rosettes will be greasy, and if it is too hot, they will burn before they are crisp. Place a wire rack over paper towels nearby to catch the finished cookies.
Step 4: Temper the Rosette Iron
This is a vital step that many beginners skip. Place your metal rosette iron into the hot oil for at least two minutes. Heating the iron allows the batter to cling to it momentarily when dipped. Lift the iron and let the excess oil drain off for a second before moving to the next step.
Step 5: The Delicate Dip
Carefully dip the hot iron into your batter. It is crucial that you only dip it to 1/4 inch from the top of the iron. If the batter goes over the top of the iron, the cookie will be trapped and won’t release into the oil. You should hear a satisfying sizzle as the cold batter meets the hot metal.
Step 6: The Transformation
Immediately plunge the batter-coated iron into the hot oil. Fry the rosette until it is crisp and turns a light, golden brown. This usually takes about 30 seconds. You will see the batter expand and firm up into the shape of the mold right before your eyes.
Step 7: Release and Drain
Lift the iron out of the oil and tip it upside down for a moment to drain the oil from the crevices. Use a fork to gently push the rosette off the iron onto your prepared wire rack. If the iron was heated correctly, it should slide off with very little resistance.
Step 8: Reheat and Repeat
Before making the next cookie, put the iron back into the hot oil for about one minute to bring it back up to temperature. Continue this rhythm until all the batter is used. Once the cookies have cooled slightly, sprinkle them generously with confectioners’ sugar. Enjoy the aromatic crunch!
Aromatic Wisdom for Perfect Crisps
The secret to success with the Rosettes 2 recipe lies in the temperature control. If you find your batter isn’t sticking to the iron, it’s likely because the iron isn’t hot enough between dips. Make sure to give it a full minute in the oil before each new cookie. Also, if you want to see how these fit into a wider array of traditional bakes, check out our Artisan Cookie Collection for more inspiration. Another tip is to blot the hot iron on a paper towel very quickly after taking it out of the oil and before dipping it into the batter; this prevents excess oil from thinning the batter. Always keep your batter in a small, deep bowl so that you can dip the iron deeply without hitting the bottom of the container. If the batter becomes too warm from the hot iron, place the bowl in a larger bowl of ice water to keep it cool and consistent.
Other Flavor Twists and Aromatic Options
While the classic vanilla is stunning, I often find myself wanting to add a bit of unexpected warmth to the mix. You can add half a teaspoon of ground cardamom to the flour for a truly Scandinavian aromatic adventure. Alternatively, try adding the finely grated zest of one lemon to the batter for a bright, zesty finish that cuts through the richness of the fried dough. For those who love a bit of visual flair, check out our Seasonal Cookie Design tips to learn how to incorporate natural colors into your batters. You might also try replacing the vanilla with almond extract or rose water for a floral, global twist. If you are feeling bold, a tiny pinch of saffron soaked in the milk before mixing will give your rosettes a vibrant golden hue and a hauntingly beautiful aroma.
Aromatic Enjoyment and Flavor Pairings
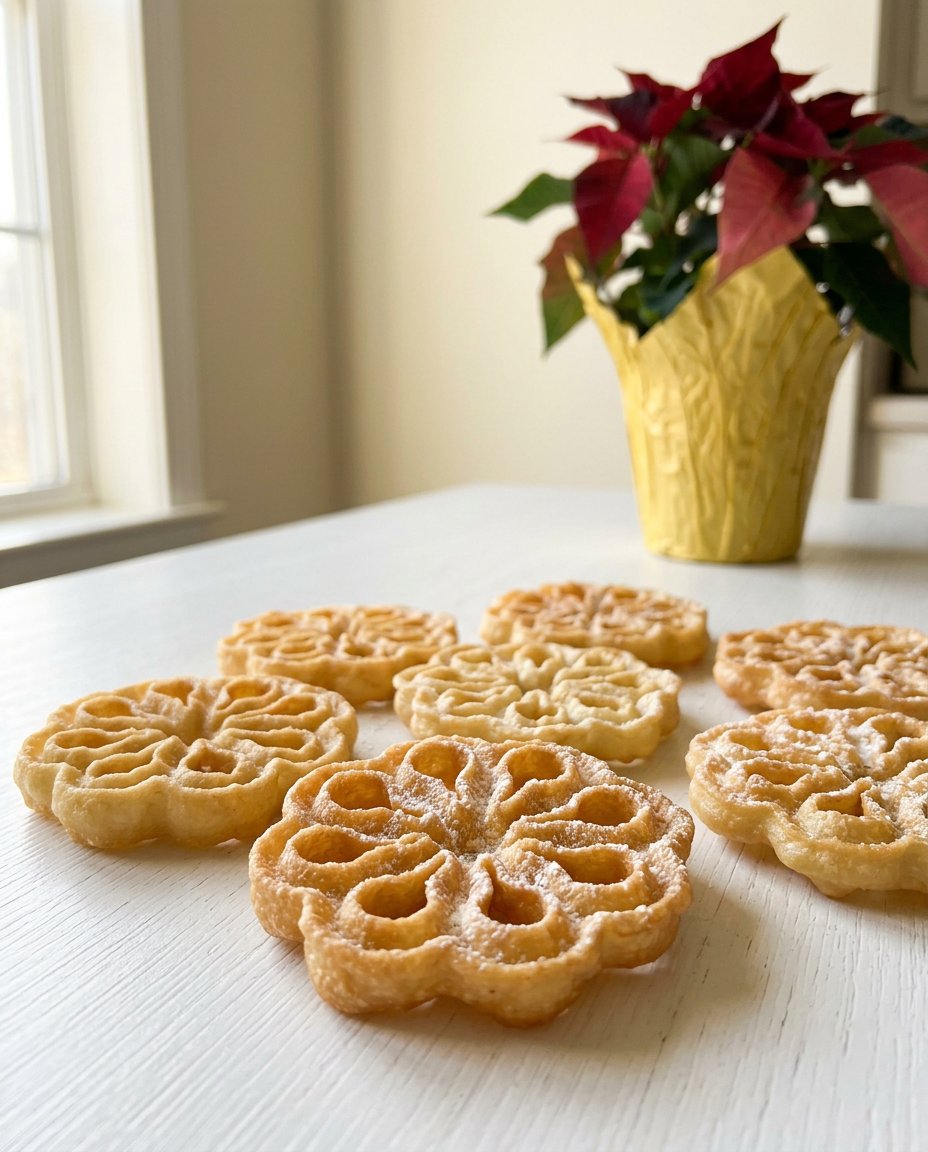
Serving these cookies is all about highlighting their delicate nature. They look breathtaking when piled high on a vintage silver platter, each one looking like a unique snowflake. For a more modern presentation, you can find ideas in our Cookie Decorating Studio. I love pairing these with a strong cup of dark roast coffee or a fragrant Earl Grey tea. The tannins in the tea provide a beautiful counterpoint to the sweetness of the sugar. If you are serving these as a more substantial dessert, try placing a single rosette on top of a scoop of vanilla bean ice cream or alongside a bowl of fresh berries tossed in mint. The crunch of the cookie against the cold cream is a texture discovery you won’t forget. For an extra layer of flavor, you can find more inspiration at AllRecipes to see how others enjoy these traditional treats.
Aromatic Joy and Continued Discovery
Making rosettes is a journey into the heart of flavor and tradition. It requires us to slow down, watch the oil, and appreciate the fragile beauty of a perfectly fried cookie. I hope this recipe brings a sense of wonder to your kitchen and inspires you to continue looking for the unexpected warmth in every bake. For more modern twists on these classics, be sure to visit our Trending Cookie Creations. Don’t forget to share your beautiful results with our community! You can find us and share your photos on Instagram and Pinterest. Happy baking, and may your kitchen always be filled with aromatic revelations!
