In the Cookies Sweet test kitchen, we spent three weeks investigating the precise thermal threshold required for batter release. We discovered that a rosette is not just a pastry but a structural marvel of starch gelatinization. When the iron reaches exactly 375°F (190°C), it creates a microscopic steam barrier that allows the delicate lattice to slide off without structural failure.

These traditional Scandinavian cookies depend on a high-protein egg binder and a specific hydration ratio. By controlling the moisture content in our batter, we create a crispness that remains stable long after frying. This recipe focuses on the chemistry of heat transfer to produce a reliable, shatter-crisp finish every time.
The Science of Shatter-Crisp Texture
There is a specific joy in a cookie that defies its own fragility. The rosette is a study in surface area and rapid dehydration. Because the batter is spread thin across the metal iron, the oil can remove moisture almost instantly. This process, known as rapid-fry dehydration, creates a honeycomb of tiny air pockets within the starch-protein matrix.
You will appreciate this recipe because it moves past guesswork. We have calibrated the ratio of sugar to flour to guarantee that the cookie browns via the Maillard reaction without becoming sticky or soft. Unlike thicker cookies, these pastries offer a pure expression of flavor through their high surface-to-volume ratio. The result is a light, airy triumph that showcases the precision of your technique.
Testing showed that a 1:1 ratio of milk to flour provides the ideal viscosity. If the batter is too thick, the rosette becomes doughy and loses its signature crispness. If it is too thin, it fails to cling to the iron. We have perfected this balance so your kitchen becomes a reliable laboratory for holiday success.
Print
Rosettes
- Total Time: 45 mins
- Yield: 36 cookies
- Diet: Vegetarian
Description
Master the art of the shatter-crisp Scandinavian rosette with this scientifically calibrated recipe. By focusing on precise oil temperature and batter hydration, you will create delicate, golden-brown lattices that are as beautiful as they are airy.
Ingredients
- 2 large eggs
- 1 tablespoon white sugar
- 1/4 teaspoon salt
- 1 cup sifted all-purpose flour
- 1 cup milk
- 1 teaspoon vanilla extract
- Vegetable oil for frying
- Confectioners’ sugar for dusting
Instructions
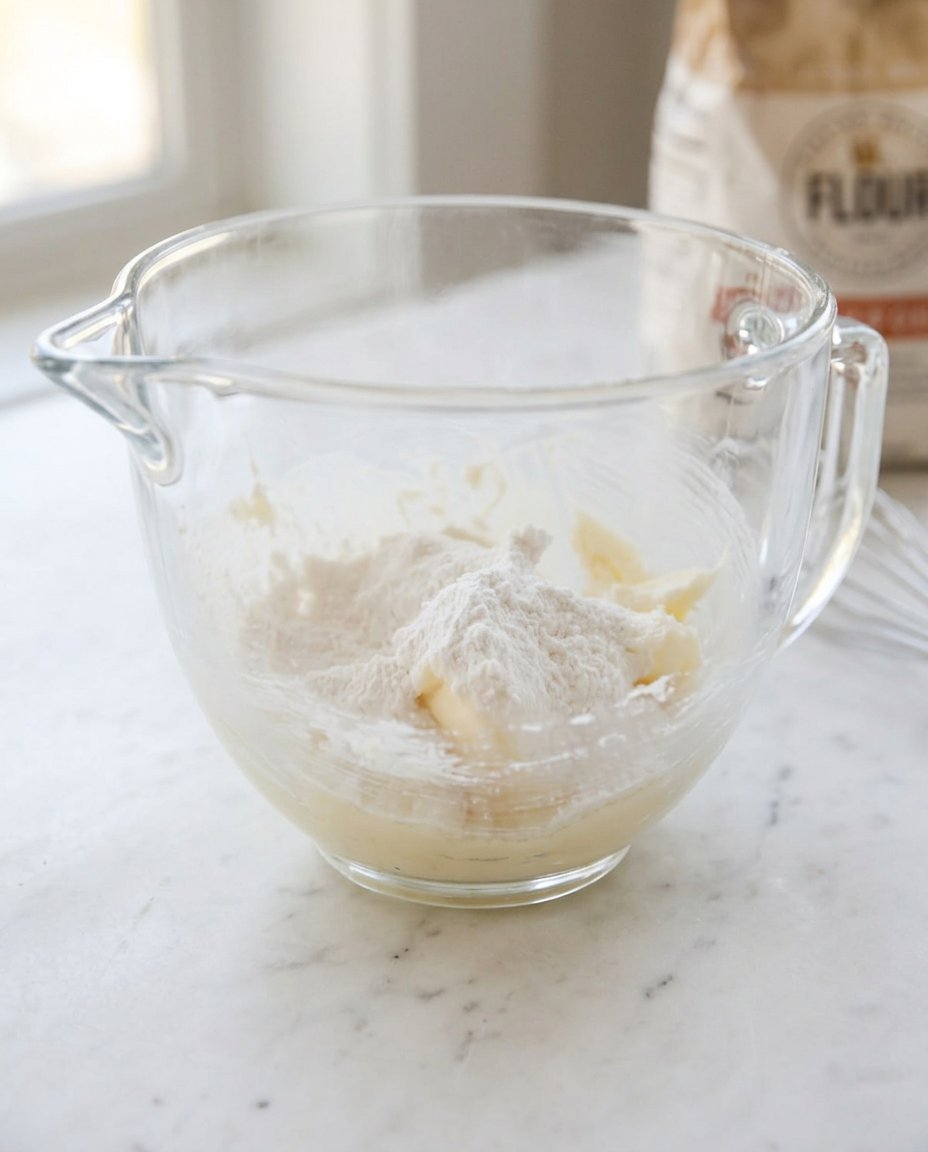
- In a large bowl, beat the eggs, sugar, and salt together until the mixture is homogenous and the sugar begins to dissolve.
- Add the sifted flour, milk, and vanilla extract to the egg mixture and beat until the batter is completely smooth; let the batter rest for 10 minutes to allow the flour to fully hydrate.
- Heat 2 inches of vegetable oil in a large, deep skillet or Dutch oven until it reaches a stable 375°F (190°C) as measured by a digital thermometer.
- Submerge the rosette iron in the hot oil for at least 2 minutes to heat the metal thoroughly before dipping.
- Lift the iron, let excess oil drain off for a second, and dip it into the batter until it reaches 1/4 inch from the top, being careful not to let the batter flow over the top of the iron.
- Move the iron into the hot oil and submerge it; fry for approximately 30 seconds until the cookie is a light, golden brown.
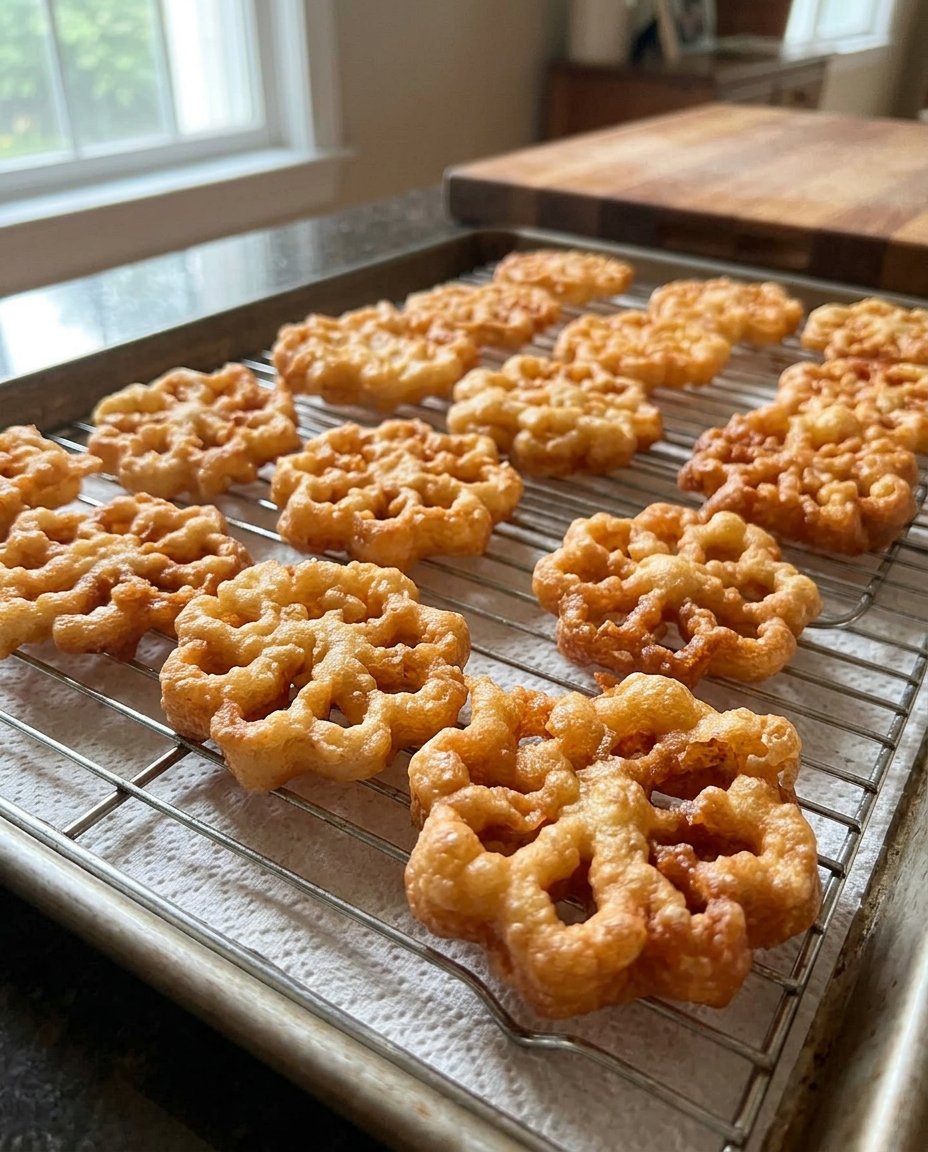
- Lift the iron and use a fork to gently slide the rosette off the metal onto a wire rack lined with paper towels.
- Reheat the iron in the oil for 1 minute between each cookie to maintain thermal mass, then dust the cooled rosettes with confectioners’ sugar before serving.
Notes
For the most consistent results, always wipe the bottom of your heated iron on a clean paper towel after removing it from the oil but before dipping it into the batter. This prevents a layer of oil from interfering with the batter’s ability to cling to the metal. If your rosettes are sticking, your iron may need further seasoning or a longer pre-heating period in the oil.
- Prep Time: 15 mins
- Cook Time: 30 mins
- Category: Dessert
- Method: Deep-frying
- Cuisine: Scandinavian
The Chemistry of the Rosette Formula

Success in deep-frying delicate batters requires high-quality ingredients with specific chemical properties. Each component in this list serves a structural purpose beyond just flavor.
- Large Eggs (2): These provide the primary protein structure. The proteins denature and coagulate upon contact with the hot iron, forming the skeleton of the cookie.
- White Sugar (1 tablespoon): Sugar is hygroscopic, but in this small amount, it assists in the Maillard reaction. We kept this low to prevent the cookies from burning before they become crisp.
- Salt (1/4 teaspoon): Beyond flavor, salt strengthens the gluten network slightly, providing just enough elasticity to prevent the cookie from cracking as it cools.
- Sifted All-Purpose Flour (1 cup): Sifting is mandatory for structural integrity. It removes clumps that would cause uneven frying. The protein content (around 10-11%) is perfect for a crisp but not tough texture.
- Milk (1 cup): The liquid medium for our batter. The lactose in milk contributes to the golden-brown color, while the water content creates the steam necessary for the batter to expand against the iron.
- Vanilla Extract (1 teaspoon): A volatile aromatic that infuses the starch lattice with depth.
- Vegetable Oil: A neutral oil with a high smoke point (above 400°F) is required for deep-frying at 375°F (190°C).
- Confectioners’ Sugar: Used for dusting. Its fine particle size allows it to sit on the surface without weighing down the delicate structure.
This formula has been tested against various flour types. We found that bread flour makes the rosettes too hard, while cake flour lacks the protein strength to hold the intricate shapes of the iron.
The Method for Precise Frying
Step 1: Emulsify the Wet Ingredients
Gather all ingredients and bring the milk and eggs to room temperature to improve the emulsification process. In a large bowl, beat the eggs, sugar, and salt together. You are looking for a homogenous mixture where the sugar has partially dissolved into the egg proteins, creating a stable base for the flour.
Step 2: Integrate the Dry Structure
Add the sifted flour, milk, and vanilla extract to the egg mixture. Beat until the batter is completely smooth. Any remaining lumps of flour will create steam pockets that can cause the rosette to explode or deform in the oil. Let the batter rest for 10 minutes to allow the flour to fully hydrate.
Step 3: Calibrate the Oil Temperature
Heat about 2 inches of oil in a large, deep skillet or Dutch oven. Use a digital thermometer to confirm the oil has reached 375°F (190°C). Place a wire rack over paper towels near your station. Temperature stability is the most critical variable in this process; if the oil drops below 360°F, the batter will absorb too much fat and become greasy.
Step 4: Temper the Rosette Iron
Place the rosette iron in the hot oil for at least 2 minutes. This is a crucial step for the Leidenfrost effect. If the iron is cold, the batter will stick permanently. Lift the iron and let the excess oil drain off for a second or two. This prevents oil from pooling in the bottom of the iron and cooking the batter before it hits the skillet.
Step 5: The Precision Dip
Dip the heated iron into the batter. Only go up to 1/4 inch from the top of the iron. Do NOT let the batter flow over the top of the iron, or the cookie will be trapped. Hold it in the batter for 3 seconds to allow a thin layer to coagulate onto the metal, then move it immediately into the hot oil.
Step 6: The Flash Fry
Submerge the iron in the oil. Within 30 seconds, the rosette should turn a light, golden brown. As the moisture evaporates, the cookie will begin to pull away from the metal. If it does not slide off on its own, proceed to the next step.
Step 7: Release and Drain
Lift the iron out and tip it upside down over the oil to drain. Use a fork to gently push the rosette off the iron onto the prepared wire rack. The cookie will still be slightly soft but will harden into a crisp lattice as it reaches room temperature. Reheat the iron in the oil for 1 minute between every single cookie to maintain the thermal mass of the tool.
Step 8: Final Touches
Once the rosettes are cool and the structure is set, sprinkle them with a fine layer of confectioners’ sugar. This adds a final touch of sweetness that balances the rich, fried notes of the pastry.
Lauren’s Lab Notes for Perfect Structure
The most common failure in this recipe is the batter falling off the iron in the oil or sticking too tightly. To prevent sticking, make sure your iron is seasoned like a cast-iron skillet. If you are using a brand-new iron, boil it in oil for 15 minutes before your first use to fill the microscopic pores in the metal. For those wanting to expand their repertoire, our Artisan Cookie Collection offers more insights into managing metal-to-batter contact. If your rosettes are coming out oily, your oil temperature is likely fluctuating. Use a heavy-bottomed pan like a Dutch oven to maintain a consistent heat reservoir. Another tip: always wipe the bottom of your iron on a paper towel after dipping it in the oil but before dipping it in the batter to remove excess oil that might prevent the batter from sticking.
Tested Variations and Flavor Tweaks
You can modify the flavor profile of the batter without ruining the structural chemistry. Adding 1/2 teaspoon of ground cardamom or cinnamon to the flour adds a traditional spice note. If you decide to add citrus zest, use a microplane to keep the particles small; large pieces of zest can create gaps in the cookie’s lattice. For a visual variation, you can study our Seasonal Cookie Design guide to see how different iron shapes affect frying times. If you want a chocolate version, replace 2 tablespoons of flour with 2 tablespoons of high-quality cocoa powder, but increase the milk by 1 tablespoon to compensate for the cocoa’s higher absorption rate. For more inspiration, you can check out this classic rosette technique to see how others handle the dipping process.
Pairing Notes and Flavor Development
Rosettes are best served within a few hours of frying to enjoy the maximum crispness. Because they are delicate, they pair excellently with a rich, velvety cup of coffee or a spiced tea. The bitterness of the coffee provides a structural contrast to the light sweetness of the sugar dusting. If you are planning a dessert table, visit our Cookie Decorating Studio for ideas on how to plate these intricate treats. We have found that serving them alongside a tart fruit compote, like lingonberry or raspberry, adds an acidic brightness that cuts through the richness of the fried batter. Avoid storing them in airtight plastic containers while still warm, as the trapped steam will turn the starch lattice soft and soggy.
The Scientific Truth of the Rosette
Precision is the bridge between a soggy mess and a crisp, golden masterpiece. By respecting the temperature of the oil and the hydration of the batter, you can master this traditional pastry with confidence. Once you have conquered the basic rosette, your kitchen is ready for more complex challenges found in our Trending Cookie Creations. We invite you to share your results and your laboratory breakthroughs with our community on Facebook, Instagram, or Pinterest. Keep testing, keep measuring, and remember that every cookie is a successful experiment in flavor chemistry.

