In our test kitchen, we found that the secret to the best Struffoli lies not just in the honey, but in the precise resting time of the dough. We tested batches with and without the hour-long rest, and the difference in gluten relaxation was remarkable. This resting period allows the flour to fully hydrate, resulting in a dough that rolls into uniform ropes without snapping back or losing its shape.

Known by many names across Italy like Cicerchiata or Pignolata, these tiny fried dough balls are a staple of the holiday season. By understanding the ratio of fat to flour, you can create a treat that stays crisp under a glossy honey glaze for days. This scientific approach guarantees that each ball puffs correctly in the oil, creating a light, airy structure rather than a dense, heavy crumb.
The Chemistry of the Perfect Honey Glaze
What makes this recipe a success is the delicate balance between the crispy fried exterior and the viscous, floral coating. Unlike standard cookies, the structure of these honey balls relies on a high surface-area-to-volume ratio. Because the balls are small, the heat from the frying oil penetrates the center almost instantly, forcing the steam to expand the dough quickly. This rapid expansion creates a honeycomb-like interior that acts as a reservoir for the honey glaze.
The honey coating itself is a study in sugar concentration. By simmering the honey with a specific amount of granulated sugar, we increase the brix level (sugar content). This prevents the glaze from being too runny and sliding off the dough. Instead, it creates a tacky, professional finish that sets as it cools. You will love how the orange zest oils interact with the lipids in the olive oil, providing a bright citrus note that cuts through the sweetness of the honey.
Print
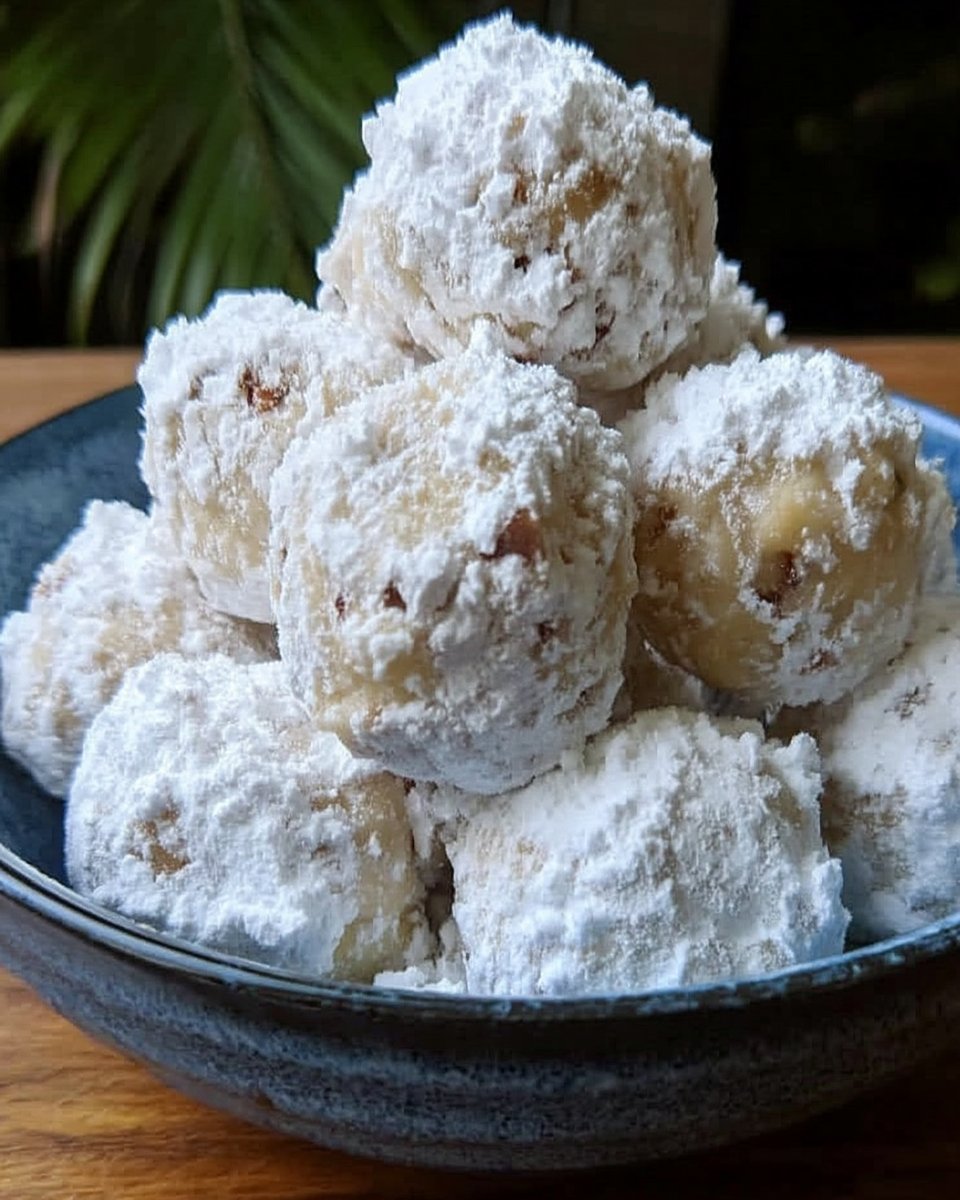
Struffoli
- Total Time: 2 hours
- Yield: 8 servings
- Diet: Vegetarian
Description
Struffoli are traditional Italian honey balls that feature light, airy fried dough coated in a citrus-infused honey glaze. This holiday staple delivers a perfect balance of crispy exterior and tender interior, finished with a glossy, professional sheen.
Ingredients
- 3 Large Eggs
- 1 tablespoon Granulated Sugar
- 1 tablespoon Extra Virgin Olive Oil
- 300 grams (2.5 cups) All-Purpose Flour
- Orange Zest
- Pinch of Salt
- Light Olive Oil for Frying
- 240 mls (1 cup) Honey
- 1/4 cup Granulated Sugar
- Sprinkles
Instructions
- In a large mixing bowl, whisk together the eggs, 1 tablespoon of sugar, olive oil, salt, and orange zest until well combined and emulsified.
- Gradually add the all-purpose flour to the wet mixture, folding it in with a spatula until a firm, cohesive dough forms.
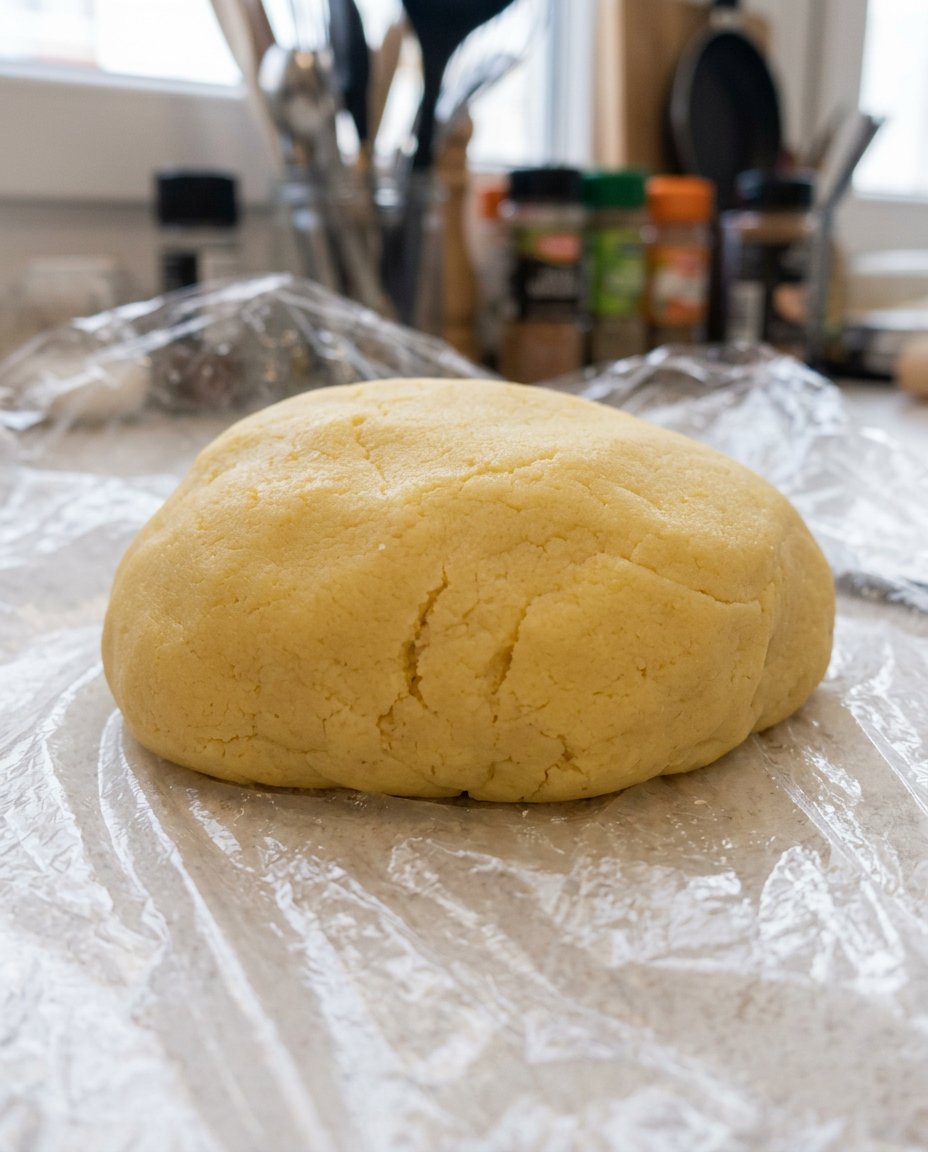
- Transfer the dough to a lightly floured surface and knead for approximately 10 minutes until it is smooth and slightly tacky.
- Wrap the dough tightly in plastic wrap and allow it to rest at room temperature for exactly one hour to relax the gluten.
- Divide the rested dough into 8 equal portions, keeping the unused pieces covered to prevent dehydration.
- Roll each portion into a long rope approximately 18 inches in length and 1/2 inch in diameter.
- Cut the ropes into small pieces roughly 1/2 inch in length, keeping them uniform for even cooking.
- Heat 1 inch of light olive oil in a deep skillet until it reaches 375°F (190°C) on an instant-read thermometer.
- Fry the dough balls in small batches for 1-2 minutes, stirring constantly with a slotted spoon until golden brown, then drain on paper towels.
- In a wide skillet, combine the honey and 1/4 cup of sugar, simmering over medium heat for 3-5 minutes until the sauce is glossy and slightly thickened.
- Add the fried balls to the honey glaze and stir over low-medium heat for 5 minutes, then cool slightly before shaping and decorating with sprinkles.
Notes
To ensure the best results, maintain a strict oil temperature of 375°F; if the oil cools too much, the dough will become greasy rather than crisp. Using a wide skillet for the glazing phase is essential as it allows for better evaporation, resulting in a thicker, tackier honey coating that sets perfectly. Always allow the dough the full hour of resting time, or you will find it difficult to roll into consistent ropes.
- Prep Time: 1 hour 40 mins
- Cook Time: 20 mins
- Category: Dessert
- Method: Frying
- Cuisine: Italian
The Formula for Structural Success
To achieve the perfect Struffoli, every ingredient must be measured with precision to maintain the correct chemical balance. Here is what you will need for this formula:
- Large Eggs (3): Eggs provide both the moisture and the protein structure. The proteins coagulate during frying to set the shape of the balls quickly.
- Granulated Sugar (1 tablespoon): A small amount of sugar in the dough helps with the Maillard reaction, giving the balls a golden-brown hue without making the dough too soft.
- Extra Virgin Olive Oil (1 tablespoon): This liquid fat coats the flour proteins, limiting gluten development just enough to keep the dough tender while adding a subtle Mediterranean depth.
- All-Purpose Flour (300 grams / 2.5 cups): We use a medium-protein flour to provide enough strength for rolling ropes but enough tenderness for a pleasant bite.
- Orange Zest: The zest contains essential oils that are fat-soluble. Grating them directly into the oil and egg mixture allows the flavor to distribute evenly through the fat.
- Light Olive Oil for Frying: A high smoke point oil is necessary. Light olive oil is stable at the 375°F (190°F) temperature required for a quick fry.
- Honey (240 mls / 1 cup): The primary flavoring and structural glue. Choose a high-quality floral honey for the best results.
- Pinch of Salt: Crucial for balancing the high sugar content in the glaze.
The Scientific Process
Step 1: Emulsifying the Wet Ingredients
In a large mixing bowl, combine the eggs, sugar, olive oil, and salt. Use a whisk to break down the egg proteins and combine them with the fat. Grate the orange zest directly into this mixture. The mechanical action of grating releases the volatile oils, which immediately bond with the fat in the olive oil, preserving the citrus aroma.
Step 2: Incorporating the Solids
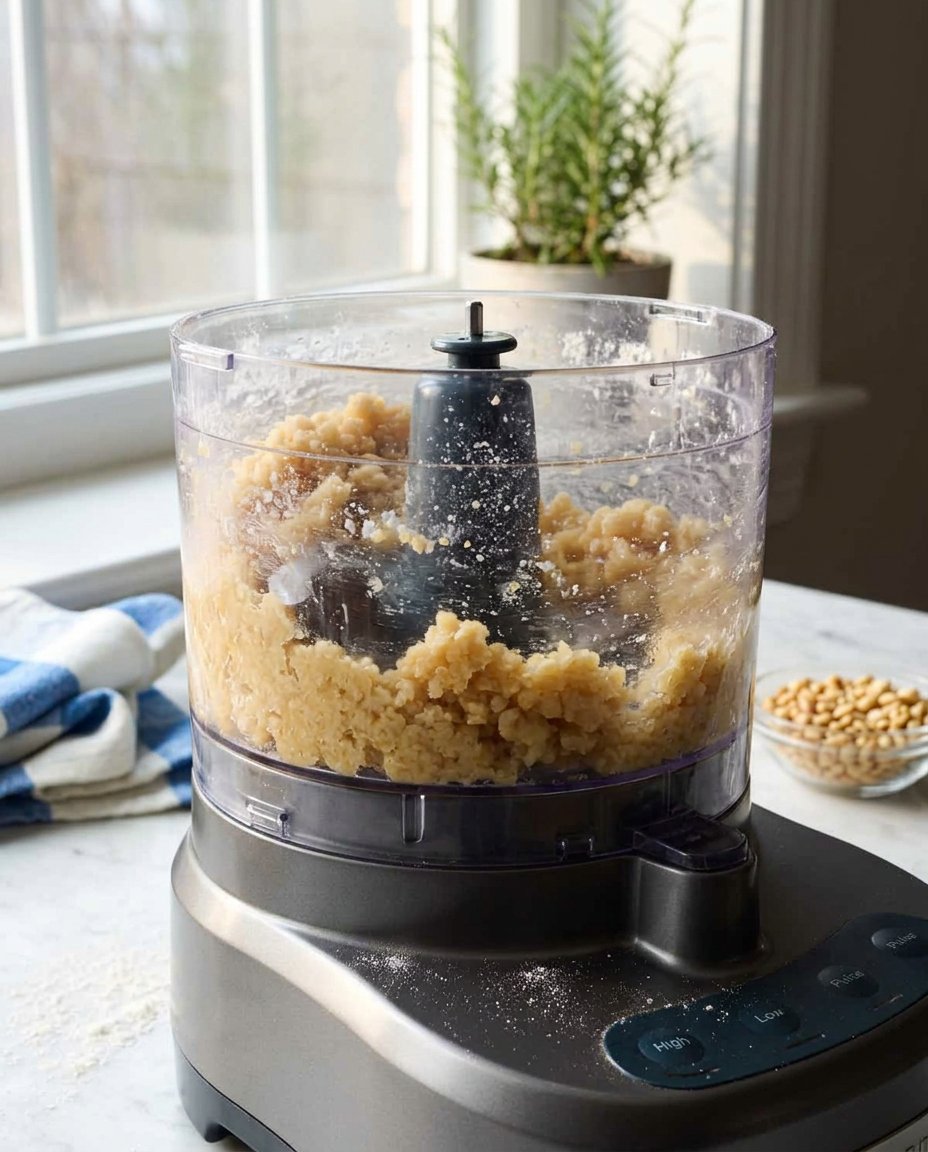
Gradually add the all-purpose flour to the egg mixture. Use a sturdy spatula or a wooden spoon to fold the flour in. As the flour hydrates, a firm dough will begin to form. Avoid overworking at this stage; we simply want to move from a slurry to a cohesive mass.
Step 3: Gluten Development and Kneading
Turn the dough out onto a lightly floured surface. Knead the dough for approximately 10 minutes. This mechanical work aligns the gluten strands, providing the elasticity needed to roll the dough into long, thin ropes later. The dough should feel smooth and slightly tacky but not sticky.
Step 4: The Hydration Rest
Wrap the dough tightly in plastic wrap. Let it rest at room temperature for exactly one hour. This is a non-negotiable step in the test kitchen. Resting allows the gluten to relax and the flour to fully absorb the moisture from the eggs. If you skip this, the dough will be elastic and difficult to roll.
Step 5: Segmenting the Dough
Divide the rested dough into 8 equal portions. Keep the pieces you are not working with covered under the plastic wrap or a damp cloth. This prevents the surface from dehydrating, which would create a leathery skin that ruins the texture of the fried balls.
Step 6: Rolling the Ropes
Take one piece of dough and roll it into a long rope, approximately 18 inches (45 cm) in length. Aim for a consistent diameter of about 1/2 inch. Precision here leads to even cooking in the oil.
Step 7: Precision Cutting
Cut the rope into small pieces, roughly 1/2 inch in length (slightly smaller than a marble). Remember that the dough contains moisture that will turn into steam in the fryer, causing the balls to puff up. Small pieces result in a better crunch-to-center ratio.
Step 8: Preparing the Frying Station
Fill a deep skillet or frying pan with about 1 inch of light olive oil. Use an instant-read thermometer to bring the oil to 375°F (190°C). Maintaining this temperature is critical; if the oil drops below 350°F, the dough will absorb excess fat and become greasy.
Step 9: Flash Frying
Fry the dough balls in small handfuls. Use a slotted spoon to stir them constantly. This prevents them from sticking together and allows for even heat distribution. They will puff up and turn a light golden brown in about 1-2 minutes. Drain them on a baking sheet lined with paper towels to remove surface lipids.
Step 10: Concentrating the Honey Sauce
In a wide skillet, combine the honey and the 1/4 cup of sugar. Heat the mixture over medium heat until the sugar dissolves. Bring it to a gentle simmer for 3-5 minutes. We are looking for a glossy, slightly thickened consistency. Do not allow it to reach the hard-crack stage or turn into dark caramel.
Step 11: The Glazing Phase
Add all the fried balls into the honey sauce. Reduce the heat to low-medium and stir for 5 minutes. This allows the honey to penetrate the outer crust slightly while creating a thick, protective coating. Remove from heat and let them cool for a few minutes before shaping and adding sprinkles.
Lauren’s Lab Notes for Success
Temperature control is the most frequent point of failure in this recipe. When you add a handful of dough to the hot oil, the temperature will naturally drop. I recommend frying in small batches to maintain that 375°F threshold. If the oil is too hot, the exterior will brown before the interior structure has set, leading to a collapse once they cool. For more advanced techniques on maintaining dough integrity, see our Artisan Cookie Collection.
Another tip involves the honey sauce. If your honey is crystallization-prone, adding the granulated sugar actually helps stabilize the solution when heated correctly. Ensure you use a wide skillet for the glazing phase; this provides more surface area for the water to evaporate from the honey, which leads to a crisper final product. If the balls feel too soft initially, do not worry. The sugar in the glaze will set as it cools, providing that signature crunch by the following morning.
Tested Structural Variations
In the test kitchen, we experimented with several flavor profiles to see how they affected the dough chemistry. One popular variation involves adding a tablespoon of anisette or sambuca to the wet ingredients. Because alcohol evaporates at a lower temperature than water, this creates an even lighter, more aerated crumb. If you choose this path, reduce the flour by one tablespoon to maintain the correct hydration levels. For more inspiration on seasonal adjustments, explore our Seasonal Cookie Design guide.
You can also incorporate toasted pine nuts or slivered almonds into the final honey-tossing phase. The fats in the nuts complement the olive oil in the dough. However, be sure to toast the nuts separately first to activate their natural oils, as they will not have enough time to brown once they are coated in the honey sauce. For a citrus twist, try substituting the orange zest with lemon zest, though keep in mind that lemon zest is more acidic and may slightly affect the brix level of your honey glaze.
Pairing and Presentation Science
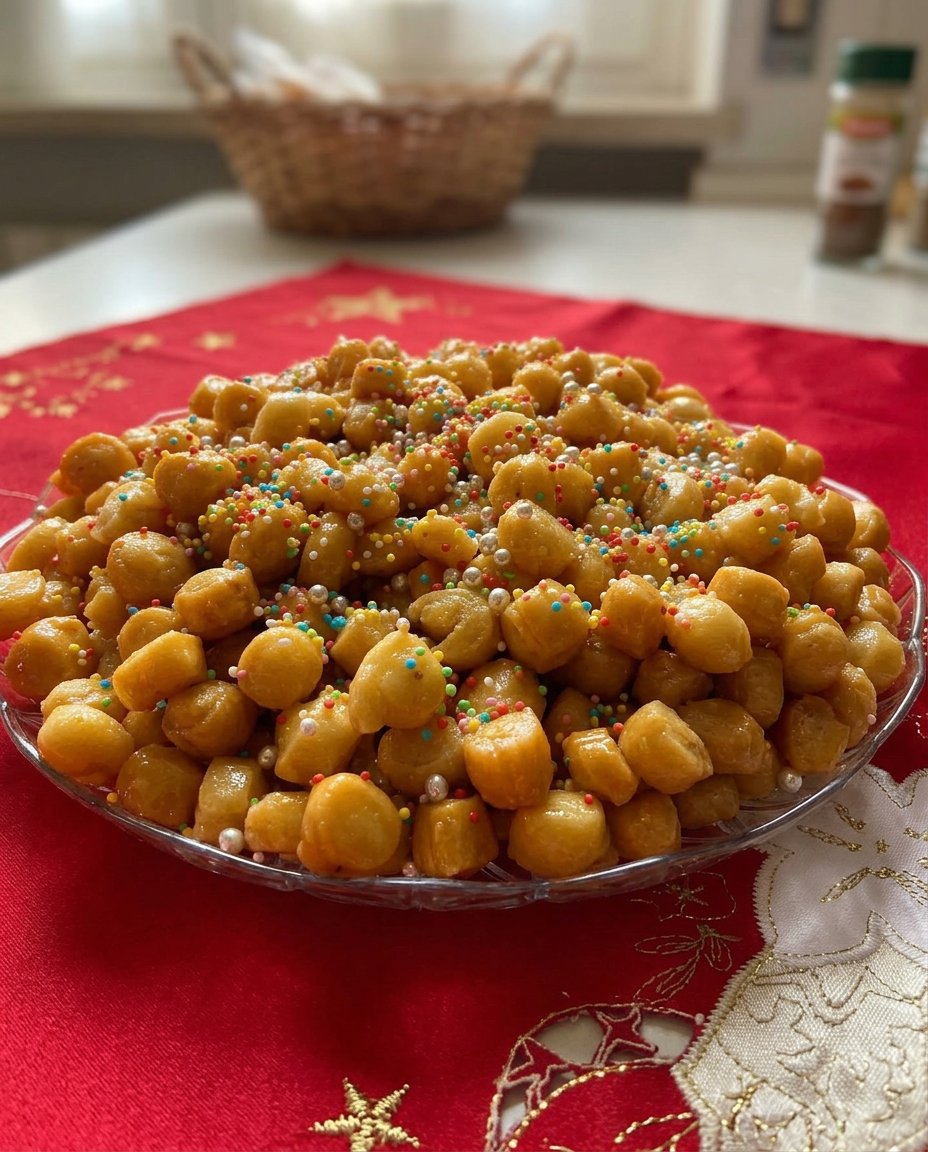
For the best sensory experience, I recommend serving these honey balls at room temperature. The honey glaze undergoes a physical change as it sits; it transitions from a sticky liquid to a tacky semi-solid. This process, known as cold-setting, is what allows you to stack the balls into a festive mound or ring shape. For creative ways to present your treats, check out our Cookie Decorating Studio.
Pairing these with a bitter espresso or a dry sparkling wine helps balance the high sugar content. The acidity in a dry wine cuts through the lipids from the frying oil, refreshing the palate between bites. If you are serving them as part of a larger dessert spread, keep them away from high-moisture items like fruit salads, as the honey is hygroscopic and will absorb moisture from the air, potentially softening the crispy shells.
The Scientific Truth of Tradition
Mastering Struffoli is a victory of patience and precision. By respecting the resting times and monitoring your oil temperatures, you transform humble ingredients into a breakthrough holiday dessert. This recipe proves that when we understand the science of frying and the chemistry of sugar, we can preserve traditions with perfect results every time. For more innovative ways to use these techniques in your kitchen, visit our Trending Cookie Creations.
You can also find more inspiration on this classic challenge at Marcellina in Cucina. We would love to see your holiday bakes! Share your structural triumphs with us on Instagram, Facebook, or Pinterest. Keep testing and happy baking!

