Recreating my mother Pauline’s thumbprint cookies required a deep dive into the specific ratios of fat to flour that create that elusive melt-in-your-mouth texture. I spent weeks in the test kitchen adjusting the balance until I discovered a recipe from a great-grandma named Mitzi, which perfectly matched the structural profile of the cookies from my childhood. Testing confirmed that the exact proportions of powdered sugar and butter are what prevent the shortbread from becoming too crumbly or too tough.

This specific formula for Thumbprint Cookies 3 offers two distinct structural outcomes depending on how you shape the dough. Whether you prefer a rounder cookie with a deep jam well or a flatter, jam-heavy version, the chemistry of the dough remains stable and reliable. We tested these variations side-by-side to verify that the moisture from the jam doesn’t compromise the crisp edges of the shortbread base.
The Architecture of the Perfect Shortbread Well
These cookies succeed because they respect the delicate balance of moisture and structure. By using an egg yolk instead of a whole egg, we introduce fat and lecithin as emulsifiers without adding the excess water found in egg whites. This results in a dough that is pliable enough to be indented without shattering, yet sturdy enough to hold its shape during the 15-minute bake time.
The use of unsifted powdered sugar is a specific choice for texture. The trace amounts of cornstarch typically found in commercial powdered sugar act as a tenderizer, interfering with gluten formation. This creates a fine-crumbed cookie that yields easily when bitten, providing the perfect contrast to the chewy, concentrated fruit jam center. We found that this ratio of 1 stick of butter to 1.25 cups of flour creates the ideal shortbread density.
Print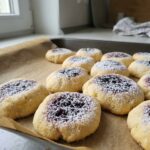
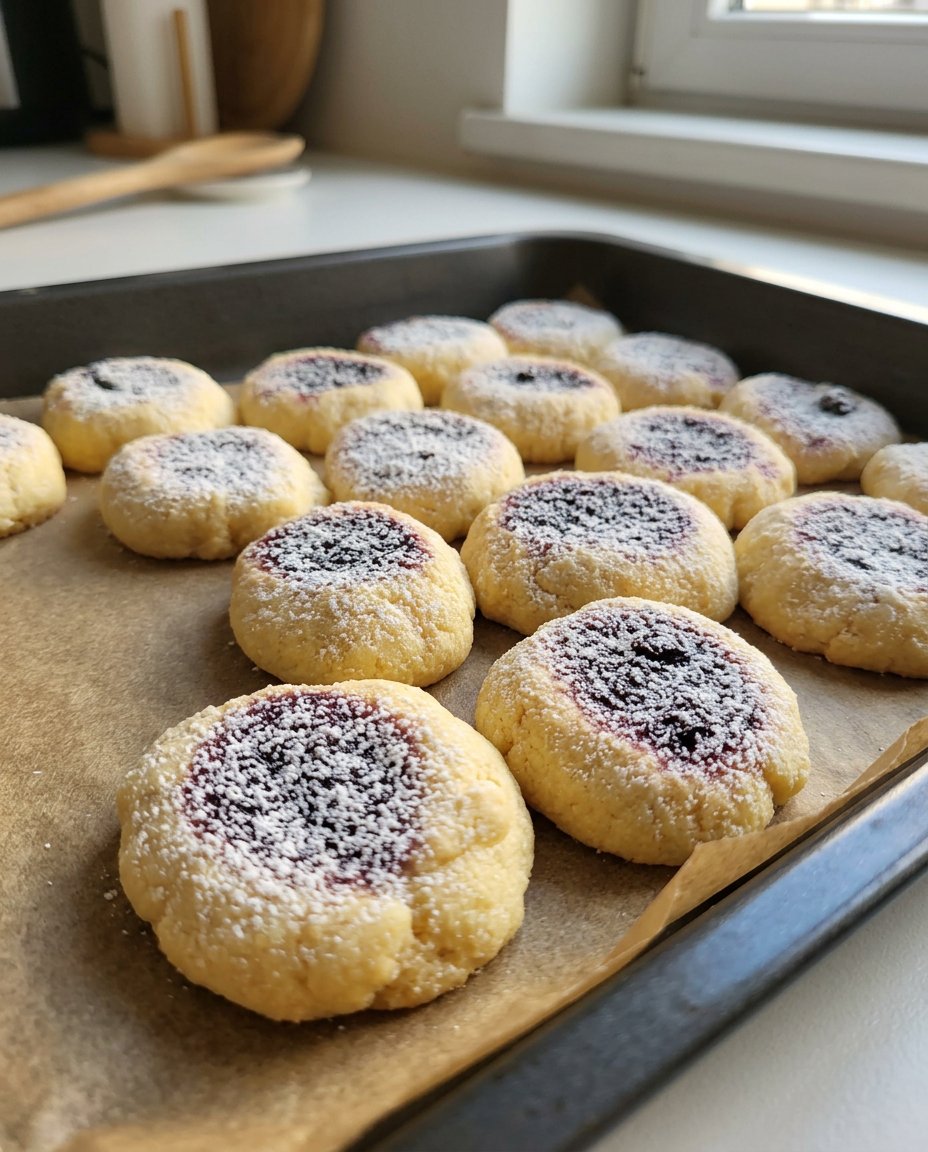
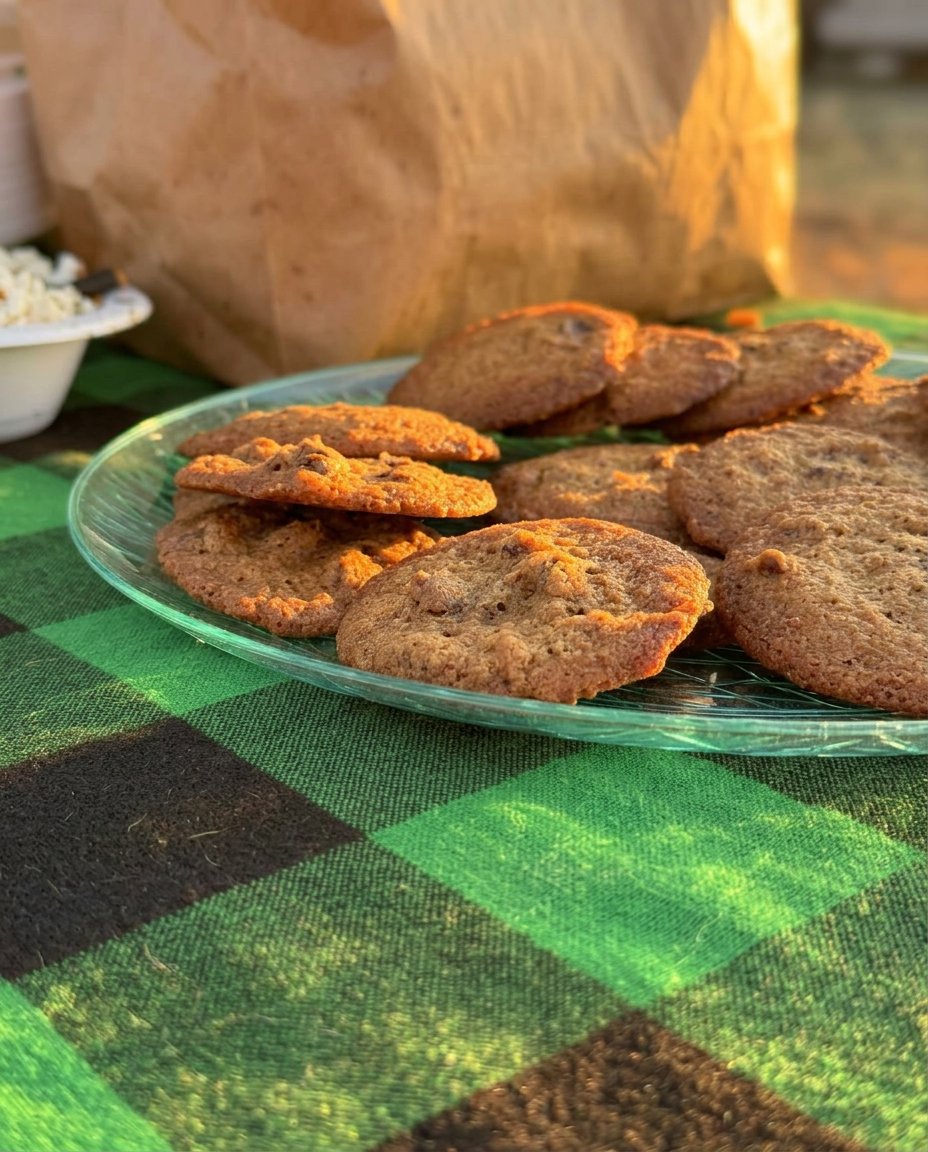
Thumbprint Cookies
- Total Time: 40 mins
- Yield: 24 cookies
- Diet: Vegetarian
Description
These delicate shortbread cookies feature a tender, fine-crumb base made with powdered sugar and rich egg yolk, finished with a sweet fruit jam center and a light vanilla glaze. They are perfectly balanced for a melt-in-your-mouth texture that pairs beautifully with holiday tea or coffee.
Ingredients
- 1/2 cup unsalted butter, room temperature
- 1/3 cup powdered sugar
- 1 large egg yolk
- 1 teaspoon vanilla extract
- 1/8 teaspoon almond extract
- 1 pinch salt
- 1 1/4 cups all-purpose flour
- Granulated sugar, for rolling
- 1/2 cup fruit jam or preserves
- 1 cup powdered sugar, for glaze
- 1 tablespoon milk, for glaze
Instructions
- Preheat your oven to 325°F (165°C) and line a baking sheet with a silicone mat for even heat distribution.
- In a large bowl, use a rubber spatula to cream together the room-temperature butter and 1/3 cup of powdered sugar until smooth.
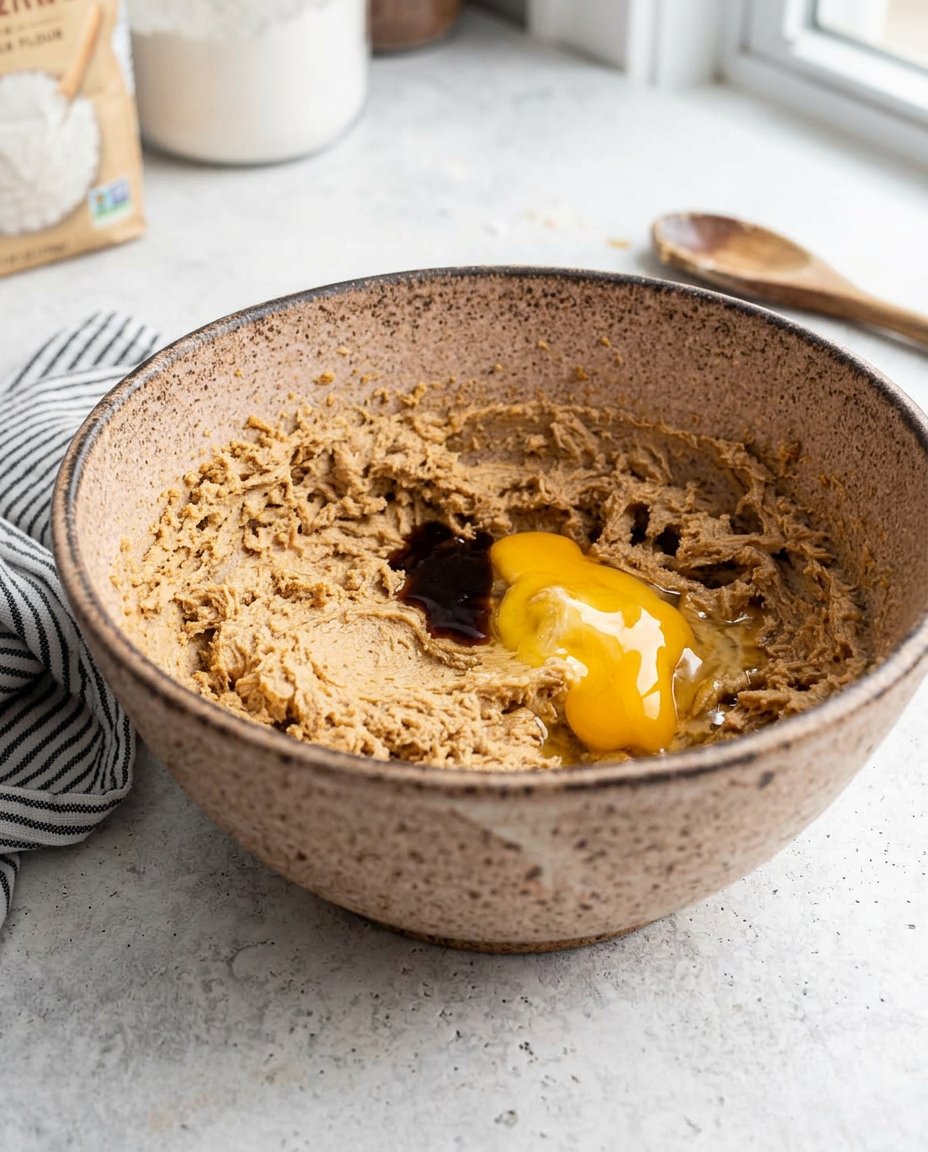
- Incorporate the egg yolk, salt, vanilla extract, and almond extract, mixing thoroughly to achieve a stable emulsion.
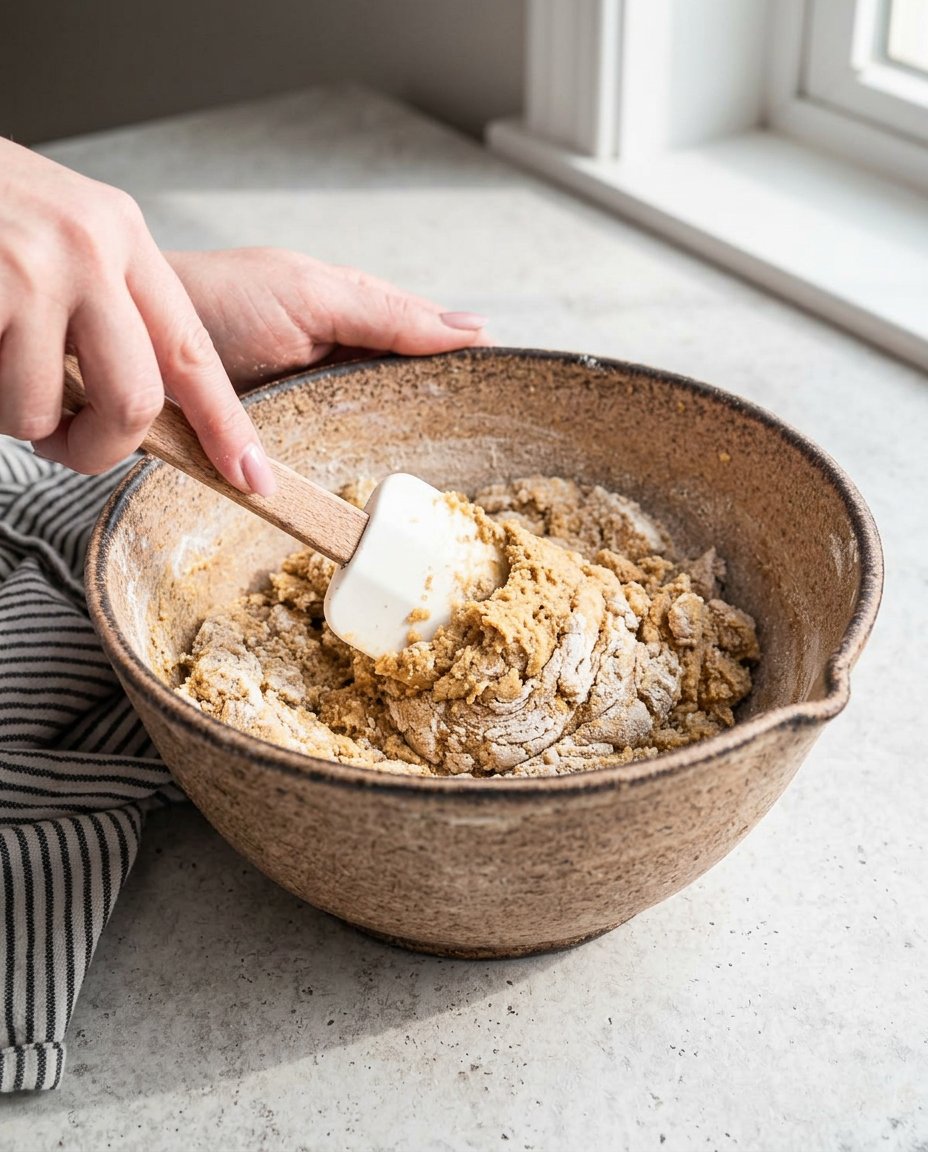
- Add the flour and mix until just combined; avoid over-mixing to ensure the cookies remain tender.
- Portion the dough into 1/2-ounce balls and roll them first in granulated sugar, then between your palms to secure the coating.
- Arrange on the baking sheet and use a thumb or a wooden spoon handle to create a deep indentation in each ball.
- Spoon the jam into the wells and lightly tap the sheet on the counter to settle the filling.
- Bake for 15 minutes until edges are lightly golden, then let rest for 5 minutes before transferring to a wire rack.
- Once completely cool, whisk the 1 cup of powdered sugar with 1 tablespoon of milk and drizzle over the cookies.
Notes
To prevent the dough from cracking when you create the thumbprint, ensure the butter is fully softened to room temperature before mixing. If the dough feels too firm, work it slightly with your hands to warm it up before shaping the balls, which ensures a smoother indentation without jagged edges.
- Prep Time: 25 mins
- Cook Time: 15 mins
- Category: Dessert
- Method: Baking
- Cuisine: American
Precision Components for Structural Integrity
Every ingredient in this formula serves a specific chemical purpose to maintain the cookie’s shape and mouthfeel. We have tested these ratios to confirm they produce a consistent result every time you bake.
- Unsalted Butter (1 stick): Must be at room temperature to allow for proper aeration during the creaming process without melting.
- Powdered Sugar (1/3 cup): Provides sweetness while maintaining a tight, tender crumb structure.
- Egg Yolk (1 large): Adds richness and stabilizes the emulsion of fat and sugar.
- Vanilla and Almond Extracts: The combination of 1 teaspoon of vanilla and 1/8 teaspoon of almond extract creates a complex flavor profile that mimics professional bakery results.
- All-Purpose Flour (1 1/4 cups): Provides the necessary protein structure to support the weight of the jam.
- Fruit Jam (1/2 cup): The high sugar content in the jam allows it to set slightly during baking, creating a tacky, flavorful center.
- Granulated Sugar (for rolling): Adds a structural crunch and prevents the cookies from sticking to each other.
The Scientific Method for Consistent Cookies
Step 1: Prepare the Baking Environment
Preheat your oven to exactly 325°F (165°C). Use a silicone mat on your baking sheet to provide even heat distribution and prevent the bottoms of the cookies from browning too quickly before the centers are set.
Step 2: Emulsify the Fats and Sugars
In a large bowl, use a rubber spatula to combine 1/3 cup powdered sugar and the room-temperature butter. Mix until the texture is creamy and uniform. Add the egg yolk, salt, vanilla, and almond extract. It is vital to mix well at this stage to achieve a stable emulsion before the flour is introduced.
Step 3: Incorporate the Dry Ingredients
Add the 1 1/4 cups of all-purpose flour. Mix only until the flour is just combined. Over-mixing at this stage will develop gluten, which will make the cookies tough rather than tender. The dough should be soft but not sticky.
Step 4: Portion and Shape
Using a sorbet scoop or a scale, portion the dough into 1/2-ounce (approximately 14 grams) balls. This precision keeps the baking time consistent for the entire batch. Roll each ball in granulated sugar, then roll again between your palms to press the sugar into the surface.
Step 5: Create the Indentations
Place the balls several inches apart. For rounder cookies, use a powdered-sugar-dusted wooden spoon end to poke a deep well. For flatter cookies, use your thumb to create a wider, shallow indentation. This choice affects the jam-to-cookie ratio in every bite.
Step 6: Fill and Level
Spoon the jam into the wells. A light tap of the baking sheet against the counter will help the jam settle and remove any trapped air bubbles, preventing the jam from bubbling over during the bake.
Step 7: The Controlled Bake
Bake for 15 minutes until the edges are a light golden brown. The internal temperature of the cookie should reach approximately 175°F (80°C). Let them rest on the sheet for 5 minutes to allow the structure to firm up before moving them to a wire rack.
Step 8: Apply the Final Glaze
Whisk 1 cup of powdered sugar with 1 tablespoon of milk until it reaches a piping consistency. Drizzle in a zigzag pattern once the cookies are completely cool to the touch. This prevents the icing from melting into the cookie.
Lab Notes for Crumb Perfection
One of the most important findings in our test kitchen was the impact of temperature on dough elasticity. Unlike many shortbread recipes, you should not chill this dough before shaping. We found that room-temperature dough is much more resilient when creating the thumbprint indentation, resulting in fewer cracks. If you notice the edges splitting, the dough is likely too cold or the flour was packed too tightly in the measuring cup.
To achieve the most professional finish, we recommend using a high-quality preserve with a high fruit-to-sugar ratio. For more ideas on achieving high-end results, check out our Artisan Cookie Collection. You can also substitute water for milk in the icing if you prefer a more translucent finish that dries faster. For another chemistry-perfected base, see the Perfect Thumbprint Cookies reference guide.
Tested Formula Modifications
While jam is the traditional choice for Thumbprint Cookies 3, the structural integrity of this dough allows for several alternatives. We tested lemon curd and Nutella as replacements. When using lemon curd, we observed that it remains more liquid than jam, so we recommend slightly smaller indentations to prevent overflow. If you are interested in more seasonal adaptations, view our Seasonal Cookie Design category for inspiration.
Another successful variation involves adding 1 tablespoon of finely ground nuts to the flour. This adds a savory note that balances the sweetness of the icing. If you modify the fat content—for example, by using a flavored nut butter—keep in mind that you may need to reduce the butter by a corresponding amount to maintain the correct ratio of lipids to starches.
Optimization for Flavor and Texture
These cookies reach their peak flavor approximately two hours after baking, once the jam has fully set and the icing has hardened. The moisture from the jam will slowly migrate into the surrounding shortbread, softening the center while the sugar-coated edges remain crisp. This creates a multifaceted texture that is a hallmark of high-quality baking. For more tips on presentation, visit our Cookie Decorating Studio.
When serving, consider the pairing chemistry. The slight bitterness of a black tea or the acidity of a light-roast coffee can cut through the sweetness of the icing and the density of the butter. If you are serving these at a gathering, they are best kept at room temperature in a single layer to maintain the integrity of the piped icing.
Final Observations on Baking Tradition
Mastering Thumbprint Cookies 3 is about respecting the proportions that have been passed down through generations. By applying test-kitchen rigor to Mitzi’s family recipe, we have verified that precision is the key to honoring these traditions. If you enjoy the process of perfecting structural classics, you will find our Effortless Cookie Elegance guide very helpful. Stay connected with us for more scientific baking discoveries on Facebook, Instagram, and Pinterest.

