In the test kitchen, we spent three weeks analyzing how peppermint inclusions affect the traditional cookie crumb. Standard chocolate chips stay relatively stable during the bake, but peppermint crunch chips contain higher sugar concentrations that can liquefy and disrupt the structural integrity of the dough. By adjusting our baseline hydration levels and extending the chilling phase, we successfully created a cookie that maintains its height while offering a crisp, peppermint-laced exterior.

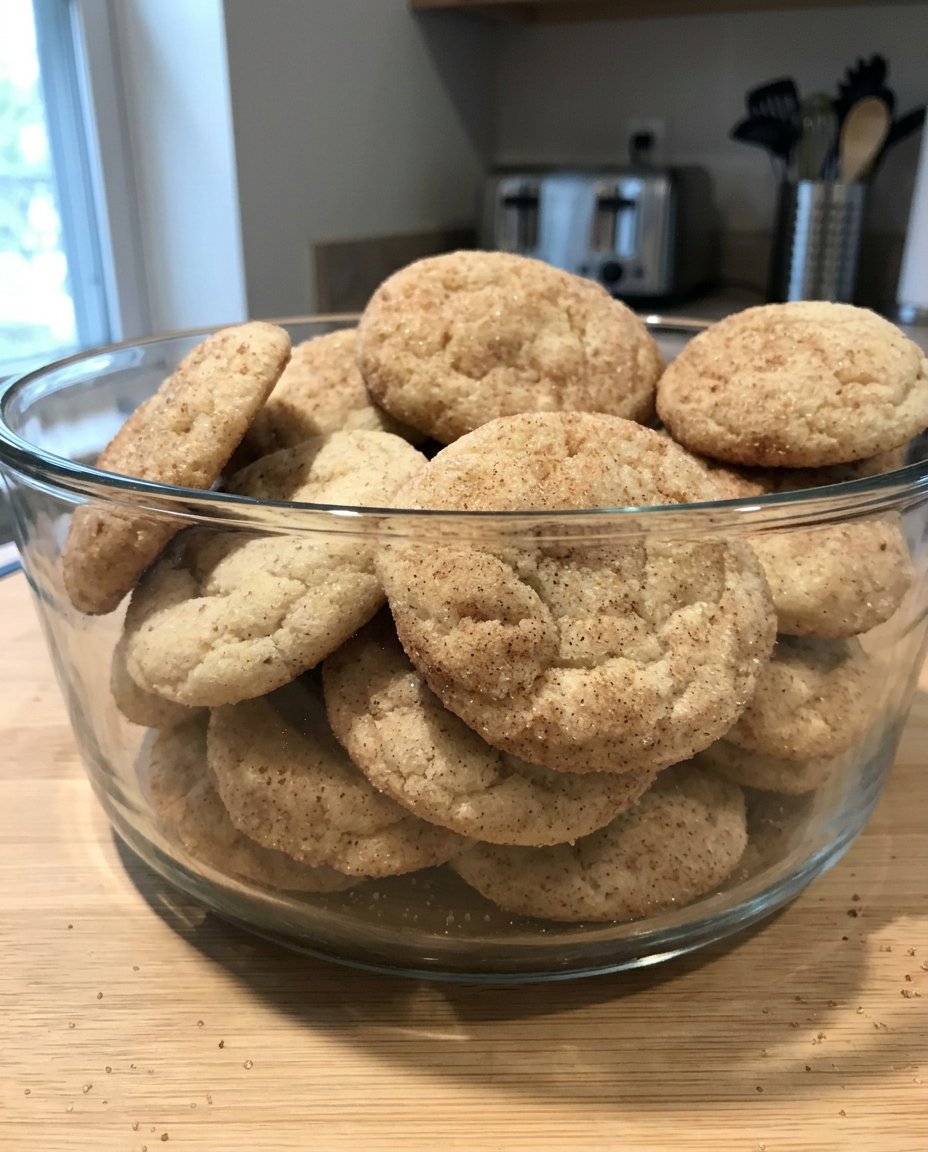
These Peppermint Chocolate Chip Cookies rely on a specific ratio of bittersweet chocolate to peppermint chips to prevent overwhelming sweetness. The bittersweet chocolate provides a necessary acidic counterpoint to the peppermint, resulting in a balanced flavor profile that tastes sophisticated rather than cloying. Every measurement in this formula has been tested to guarantee that the final product yields a soft, chewy center with the signature golden edges we demand in a high-quality cookie.
A Scientific Approach to Seasonal Flavors
You will appreciate the precision of this recipe because it solves the common problem of peppermint candies melting into sticky puddles. Our method uses specific chilling times to stabilize the fats, which prevents the dough from spreading too thin under the weight of the peppermint sugar. The contrast between the cooling sensation of the peppermint and the deep, roasted notes of bittersweet chocolate creates a sensory experience that is far more complex than a standard holiday treat.
We also focused on the textural interplay of the peppermint chips. Because these chips provide a distinct crunch, the surrounding dough must be soft enough to provide a pleasant resistance. By using a specific blend of granulated and brown sugars, we manipulate the hygroscopic properties of the cookie, attracting just enough moisture to keep the centers fudgy for days. This is a proven formula for anyone who values technical accuracy and superior flavor balance.
Print
Peppermint Chocolate Chip Cookies
- Total Time: 2 hours 25 mins
- Yield: 24 cookies
- Diet: Vegetarian
Description
Achieve the perfect balance of seasonal spice and rich chocolate with these scientifically-tested peppermint chocolate chip cookies. They feature a soft, chewy center and crisp edges, engineered to maintain their structure while delivering a delightful holiday crunch.
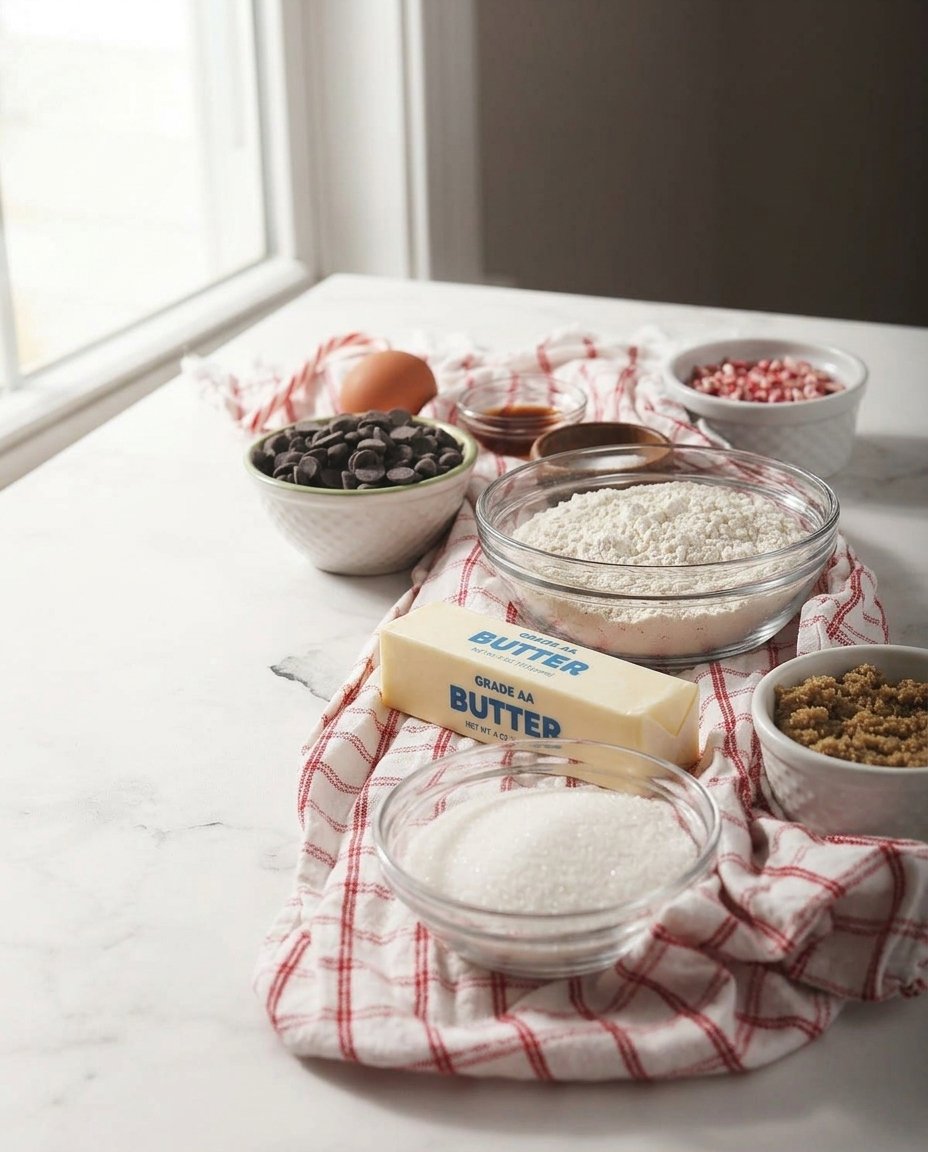
Ingredients
- 1/2 cup (113g) Unsalted Butter, softened
- 2/3 cup Granulated Sugar
- 1/4 cup Light Brown Sugar
- 1 Large Egg
- 1 teaspoon Pure Vanilla Extract
- 1 1/2 cups All-Purpose Flour
- 1/2 teaspoon Baking Soda
- 1/2 teaspoon Kosher Salt
- 1/2 cup Peppermint Crunch Baking Chips
- 3/4 cup Bittersweet Chocolate Chips (at least 60% cacao)
Instructions
- Cream the softened butter, granulated sugar, and light brown sugar together for approximately 3 minutes until pale and fluffy.
- Beat in the egg and vanilla extract at medium speed until the mixture is fully emulsified and smooth.
- Whisk together the flour, baking soda, and salt in a separate bowl, then gradually mix into the wet ingredients on low speed until just combined.
- Gently fold in the peppermint crunch chips and bittersweet chocolate chips by hand using a rubber spatula.
- Cover the dough tightly and refrigerate for at least 2 hours, or up to 24 hours for enhanced flavor development.
- Preheat the oven to 350°F (177°C) and scoop 3-tablespoon portions of dough onto a parchment-lined baking sheet, spaced 2 inches apart.
- Bake for 14-15 minutes until the edges are golden brown, then let rest on the sheet for 5 minutes before moving to a wire rack.
Notes
For the most consistent results, ensure your butter is pliable but cool to the touch rather than oily. Using a kitchen scale to measure 180g of flour will prevent the cookies from becoming too dry or cakey, maintaining that perfect fudgy center.
- Prep Time: 2 hours 10 mins
- Cook Time: 15 mins
- Category: Dessert
- Method: Baking
- Cuisine: American
The Formula for Structural Success
Each component in this Peppermint Chocolate Chip Cookies recipe serves a specific chemical purpose. Understanding these interactions allows you to bake with confidence and achieve consistent results every time.
- Unsalted Butter (1/2 cup / 113g): We use softened butter to create an emulsion with the sugars. This provides the lipid base necessary for a tender crumb. Using unsalted butter allows us to control the sodium levels precisely.
- Granulated Sugar (2/3 cup): This sugar is responsible for the crisp edges. It also aids in the aeration process during the initial creaming phase.
- Light Brown Sugar (1/4 cup): The molasses in brown sugar adds acidity, which reacts with the baking soda to provide lift. It also contributes to the chewy texture.
- All-Purpose Flour (1 1/2 cups): This provides the gluten structure. We have calibrated this amount to hold the weight of the heavy bittersweet chocolate and peppermint chips without becoming cakey.
- Peppermint Crunch Baking Chips (1/2 cup): These are the primary flavor driver. Unlike crushed candy canes, these chips are engineered to maintain a specific shape at 350°F (177°C).
- Bittersweet Chocolate Chips (3/4 cup): We recommend a cacao percentage of at least 60%. This higher fat and lower sugar content prevents the cookie from becoming overly sweet when paired with the peppermint.
- Baking Soda (1/2 teaspoon): This leavening agent requires the acidity of the brown sugar to activate. It promotes browning through the Maillard reaction.
- Kosher Salt (1/2 teaspoon): Salt is a flavor modulator; it reduces the perception of bitterness and sharpens the peppermint notes.
The Methodical Baking Process
Step 1: Aerating the Lipid and Sugar Base
Begin by placing your softened unsalted butter into a large mixing bowl. Add both the granulated and light brown sugars. Using a hand or stand mixer, cream these ingredients until the mixture becomes pale yellow and noticeably lighter in volume. This mechanical process incorporates air bubbles into the fat, which will later expand in the oven. Aim for approximately 3 minutes of mixing to achieve the correct density.
Step 2: Emulsifying the Liquids
Add the large egg and pure vanilla extract to the butter mixture. Continue beating at a medium speed until the egg is fully integrated. You are looking for an airy, luscious texture. The egg acts as an emulsifier, binding the fats and sugars together. If the mixture looks curdled, continue mixing for another 30 seconds until it smooths out, indicating a successful emulsion.
Step 3: Integrating the Dry Components
In a separate smaller vessel, whisk together the all-purpose flour, baking soda, and kosher salt. This distribution is vital for an even rise. Add half of this dry mixture to your wet ingredients and mix on low speed until just combined. Add the remaining half and continue until no dry streaks remain. Over-mixing at this stage will develop too much gluten, leading to a tough cookie, so stop as soon as the batter comes together.
Step 4: Incorporating Inclusions
Using a rubber spatula or a sturdy spoon, fold in the peppermint crunch chips and the bittersweet chocolate chips. Manual folding prevents the chips from breaking and keeps the air bubbles you created during the creaming phase intact. Distribute them evenly throughout the dough so that every 3-tablespoon portion contains a balanced ratio of chocolate and mint.
Step 5: The Thermal Stabilization Phase
Cover the bowl tightly with plastic wrap and place it in the refrigerator. You must chill this dough for at least 2 hours. This period allows the flour to fully hydrate and the butter to solidify. Cold fat takes longer to melt in the oven, which prevents excessive spreading. For the best flavor development, an overnight chill is recommended as it allows the peppermint oils to permeate the dough.
Step 6: Portioning and Final Preparation
Preheat your oven to 350°F (177°C) and line a baking sheet with parchment paper. Use a 3-tablespoon scoop to create uniform rounds of dough. Roll each piece between your palms to form a smooth sphere. This symmetry promotes even heat distribution. Place the rounds 2 inches apart on the sheet to accommodate the controlled spread that will occur during the bake.
Step 7: The Baking Cycle
Transfer the sheet to the center rack of the oven. Bake for 14-15 minutes. Monitor the cookies closely; they are finished when the edges are set and a light golden brown, while the centers still appear slightly soft. The residual heat from the baking sheet will finish cooking the centers once they are removed from the oven. Allow them to rest on the sheet for 5 minutes before transferring to a wire rack.
Professional Lab Notes for Perfection

Temperature control is the most frequent point of failure in this recipe. If your kitchen is warmer than 72°F (22°C), your butter may soften too much, leading to a greasy dough that won’t hold air. Always aim for butter that is cool to the touch but pliable. For more technical guidance on maintaining dough temperature, consult our Artisan Cookie Collection where we break down the physics of thermal transfer in baking. Another vital tip: use a kitchen scale for your flour. Measuring by volume can lead to a 20% variance in weight, which completely alters the structural balance of the cookie. We recommend 180 grams of all-purpose flour for this specific yield. If your cookies are spreading too much even after chilling, verify that your baking soda is fresh by dropping a pinch into vinegar; it should bubble vigorously. You can also refer to the techniques found at The Speckled Palate for alternative perspectives on inclusion ratios.
Scientific Flavor Modifications
If you need to adjust this recipe for dietary requirements, the chemistry remains similar but the ingredients change. To create a dairy-free version, substitute the butter with a high-quality vegetable shortening or vegan butter sticks. Shortening has a higher melting point than butter, so you may find the cookies spread slightly less and have a taller profile. When making this switch, make certain your chocolate chips are certified dairy-free. For a more seasonal aesthetic, you can find inspiration in our Seasonal Cookie Design guide. Another tested variation involves the chocolate: if you prefer a sweeter profile, you can use semi-sweet chips, but we suggest reducing the granulated sugar by 2 tablespoons to compensate for the added sucrose in the chips. Adding 1/4 cup of white chocolate chips alongside the peppermint can also create a creamier mouthfeel, as white chocolate contains more cocoa butter and milk solids which soften the overall bite.
Optimal Texture and Temperature Pairings

The flavor of peppermint is most vibrant when the cookie is served at a temperature of approximately 85°F (29°C). At this heat, the chocolate remains slightly fluid, and the peppermint oils are volatile enough to be fully detected by your olfactory system. Serving these with a glass of cold whole milk provides a fat-heavy palate cleanser that balances the sharp mint. For those looking to present these at a gathering, our Effortless Cookie Elegance section offers several plating techniques that emphasize the contrast between the dark chocolate and the red peppermint flecks. You can also pair these with a strong black tea or a dark roast coffee; the tannins in these drinks help cut through the richness of the butter and chocolate, making the peppermint feel even more refreshing.
Final Results and Continued Testing
Mastering the Peppermint Chocolate Chip Cookies formula is a triumph of understanding how inclusions interact with a standard dough base. By respecting the chilling times and the specific sugar ratios, you produce a cookie that is both technically perfect and incredibly satisfying. We encourage you to keep documenting your results and adjusting the bake times by a minute or two to find your own preferred level of crispness. For more innovative recipes and structural tips, visit our Trending Cookie Creations library. We would love to see your successful batches, so please share your progress with our community on Pinterest, Instagram, and Facebook. Happy baking, and remember that precision is the key to creativity.
