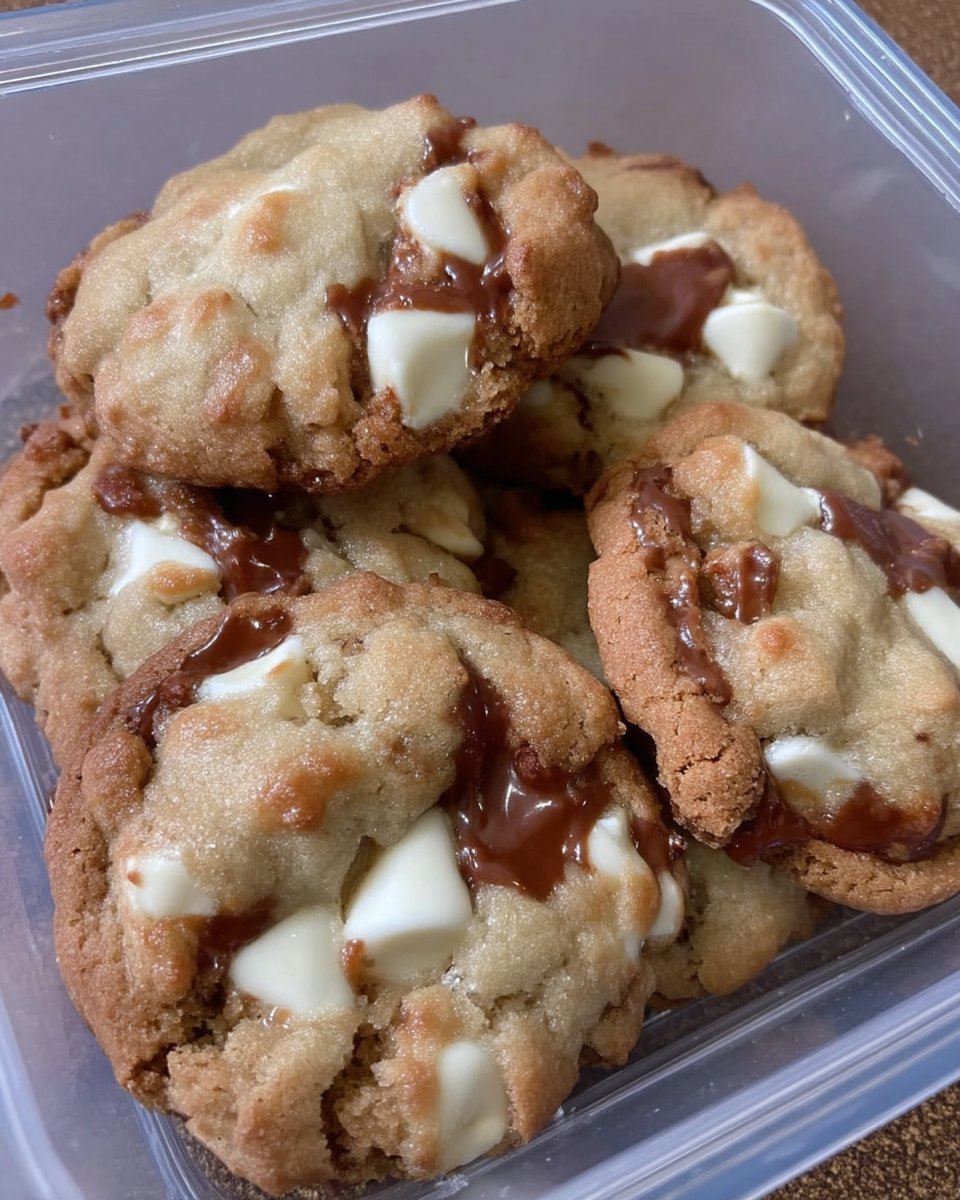
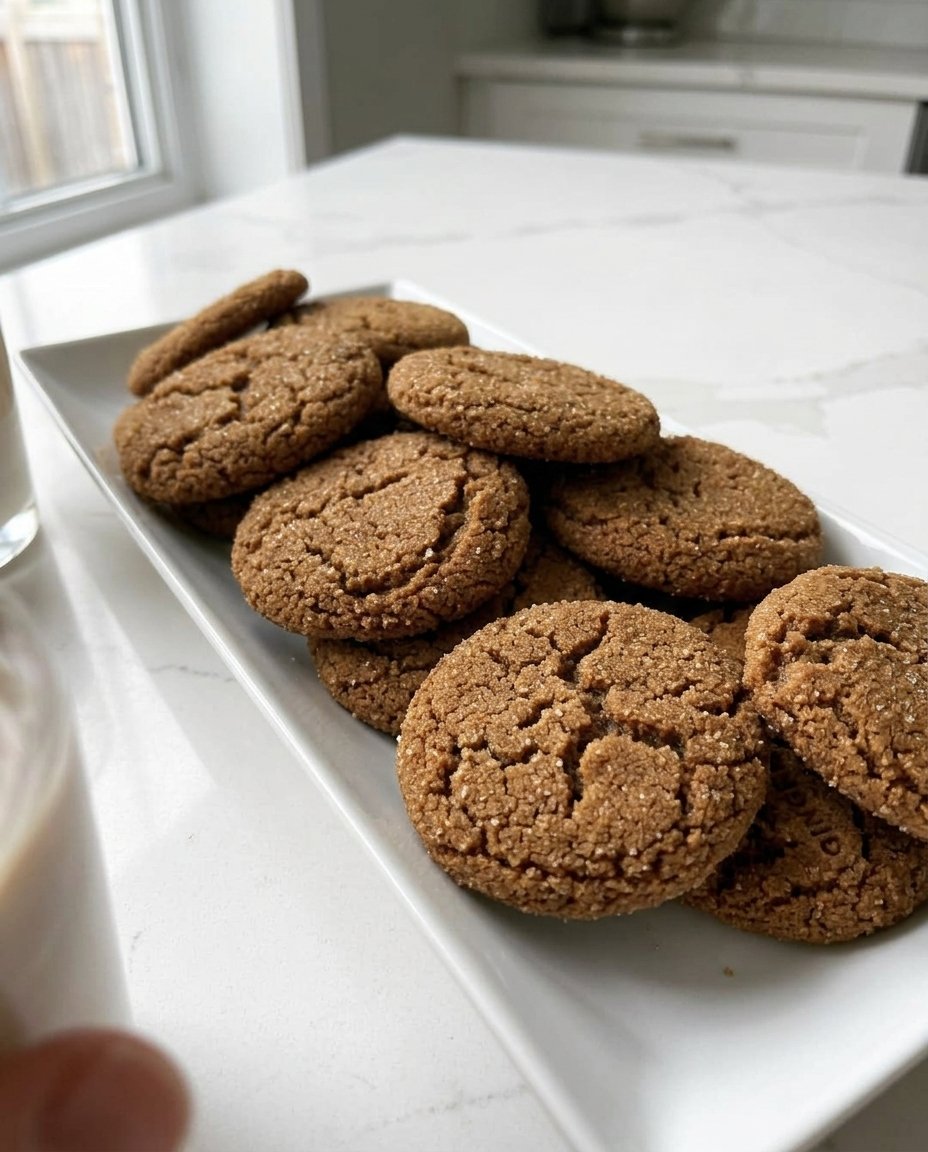
In our test kitchen, we analyzed the structural differences between standard home-baked treats and the towering, crinkly-edged wonders found in professional pastry shops. We discovered that achieving a true bakery style chocolate chip cookies 3 texture requires a specific ratio of proteins and a strictly controlled fat-to-sugar emulsion. This recipe represents the victory of precision over guesswork, using a blend of two flours to hit a exact protein percentage that supports massive 3-ounce (85 gram) dough balls without collapsing.

The secret to the characteristic bakery height lies in the thermal management of the dough. By combining melted and cooled butter with a minimum three-hour refrigeration cycle, we allow the flour to fully hydrate and the fats to solidify. This scientific approach prevents the cookies from spreading too quickly in the oven, resulting in a thick, soft center surrounded by a crisp, golden-brown perimeter that holds its shape even after cooling.
Precision Meets Flavor
When you master the chemistry of these bakery style chocolate chip cookies 3, you gain the ability to produce consistent results every single time. Unlike standard recipes that often yield thin or greasy results, this formula prioritizes structural integrity. The combination of all-purpose and cake flour creates a tender crumb that is robust enough to suspend 12 ounces (340 grams) of chocolate chips without the dough becoming fragile.
This method also harnesses the power of the Maillard reaction by using a higher ratio of brown sugar to granulated sugar. The acidity in the light brown sugar reacts with the baking soda to create a light, airy rise while the molasses content contributes to a deep, caramelized flavor profile. You will appreciate how the extra egg yolk adds lecithin, a natural emulsifier that creates a richer mouthfeel and a more stable dough structure during the baking process.
Print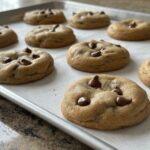
Bakery Style Chocolate Chip Cookies
- Total Time: 3 hours 35 mins
- Yield: 16 cookies
- Diet: Vegetarian
Description
Experience the science of professional pastry with these towering, crinkle-edged chocolate chip cookies that feature a soft, dense center and crisp golden perimeter. This precision-based recipe utilizes a dual-flour blend and a controlled hydration cycle to ensure each massive three-ounce cookie maintains its structural integrity and deep caramelized flavor.
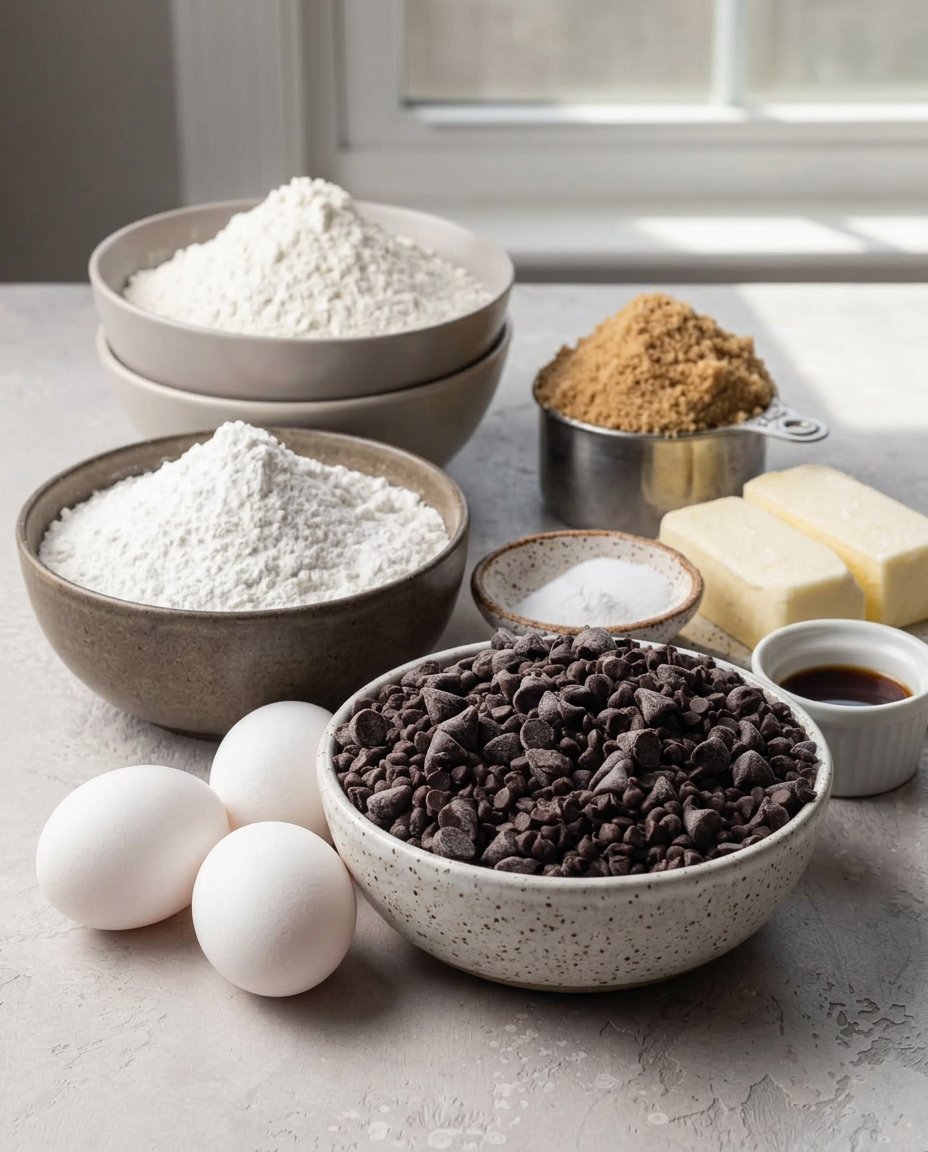
Ingredients
- 250g all-purpose flour
- 150g cake flour
- 1 teaspoon baking soda
- 1 teaspoon salt
- 230g unsalted butter, melted and cooled
- 200g light brown sugar, firmly packed
- 100g granulated sugar
- 2 large eggs, room temperature
- 1 large egg yolk, room temperature
- 1 teaspoon vanilla extract
- 340g semi-sweet chocolate chips (mixture of regular and mini)
Instructions
- Line a large baking sheet with professional-grade parchment paper or a silicone baking mat to ensure even heat distribution.
- In a large mixing bowl, whisk together the all-purpose flour, cake flour, baking soda, and salt for 30 seconds to fully distribute the leavening agents.
- In a separate vessel, stir the melted and cooled butter with the brown and granulated sugars until a smooth paste forms, then mix in the eggs, extra yolk, and vanilla extract.
- Gradually fold the dry ingredients into the wet mixture using a spatula just until no streaks of flour remain, then fold in the chocolate chips.
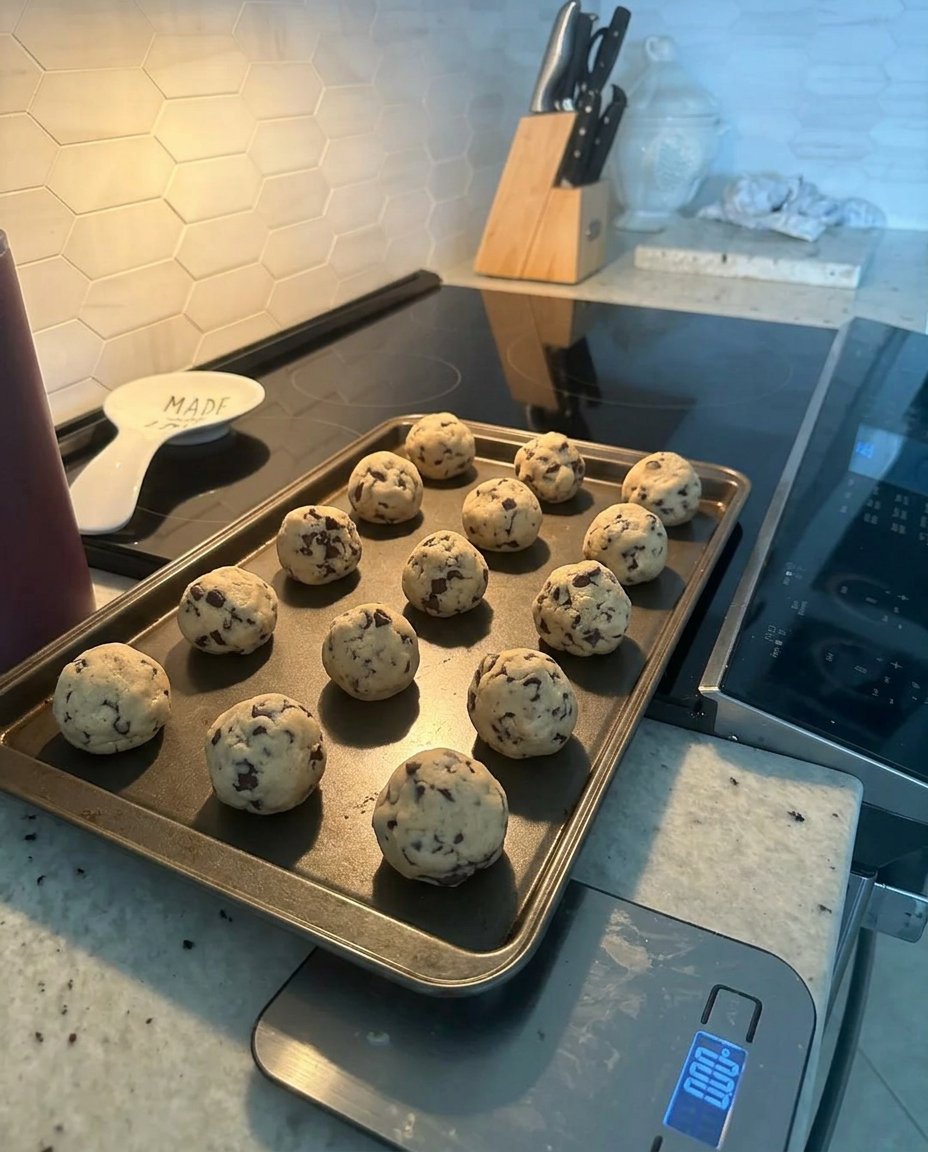
- Portion the dough into 3-ounce (85 to 90 gram) balls using a 1/3 cup measuring tool or large scoop and place them on the prepared baking sheet.
- Cover the dough balls tightly with plastic wrap and refrigerate for a minimum of 3 hours to allow the flour to fully hydrate and the fats to solidify.
- Preheat your oven to 350°F (180°C) and prepare two additional baking sheets with parchment paper.
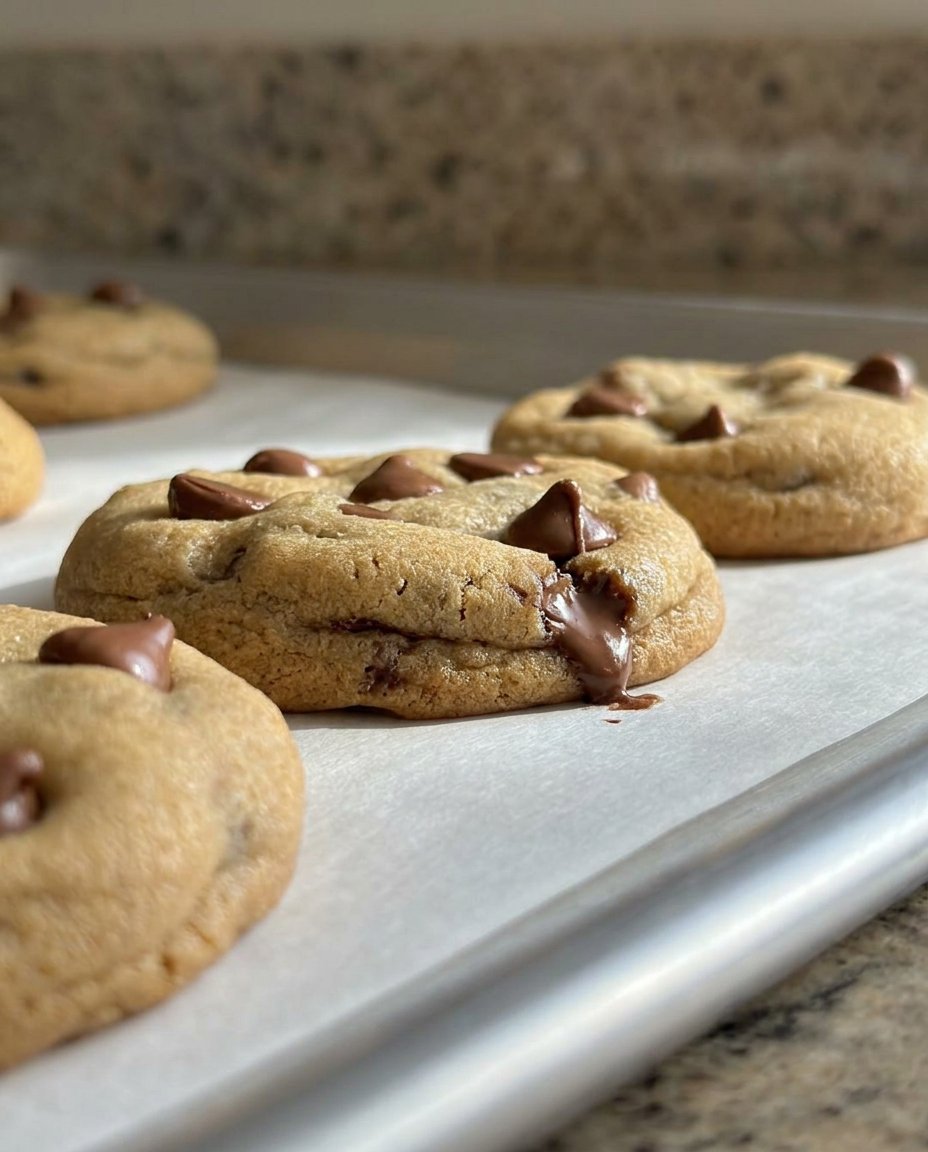
- Space 5 to 6 dough balls per sheet and bake for 14 to 17 minutes until the edges are light golden brown and the centers remain slightly pale.
- Allow the cookies to rest on the hot baking sheet for exactly 15 minutes to set the structure before transferring them to a wire rack to finish cooling.
Notes
To achieve the most consistent results, always use a digital kitchen scale to measure ingredients in grams, as volume measurements for flour can vary significantly and affect the final spread of the cookie. Ensure your eggs are at room temperature before mixing to prevent the melted butter from seizing, which helps maintain the emulsion necessary for a smooth dough texture.
- Prep Time: 20 mins
- Cook Time: 15 mins
- Category: Dessert
- Method: Baking
- Cuisine: American
The Formula for Success
Understanding the role of each component is vital for maintaining the balance of these bakery style chocolate chip cookies 3. We have tested various flour combinations and found that the 250g to 150g ratio provides the ideal density.
- All-Purpose Flour (250g): This provides the gluten backbone required for the cookie’s structure. We recommend spooning and leveling to avoid packing the flour, which would lead to a dry, crumbly texture.
- Cake Flour (150g): With its lower protein content, cake flour softens the overall crumb, preventing the bakery style chocolate chip cookies 3 from becoming too tough or bread-like.
- Unsalted Butter (230g): Melting the butter changes the way it interacts with the sugar. It must be cooled for 15-20 minutes to prevent the eggs from cooking upon contact.
- Light Brown Sugar (200g): The primary source of moisture and chewiness. It is essential to pack it firmly to get an accurate measurement.
- Granulated Sugar (100g): This helps the edges crisp up through crystallization.
- Egg Yolk (Extra): By adding one additional yolk, we increase the fat content and emulsification power without adding the water found in egg whites, which can lead to a cakey texture.
- Semi-Sweet Chocolate Chips (340g): Using a mix of regular and mini chips fills the gaps in the dough, providing a consistent chocolate-to-cookie ratio in every bite.
The Scientific Process
Step 1: Prepare the Surface and Base
Start by lining a large baking sheet with professional-grade parchment paper or a silicone baking mat. This provides a non-stick surface that facilitates even heat distribution and prevents the bottoms from over-browning before the centers are set.
Step 2: Dry Ingredient Homogenization
In a large mixing bowl, whisk together the 250 grams of all-purpose flour, 150 grams of cake flour, 1 teaspoon of baking soda, and 1 teaspoon of salt. It is important to whisk for at least 30 seconds to distribute the leavening agent evenly, preventing uneven rising or metallic-tasting pockets.
Step 3: Fat and Sugar Emulsification
In a separate vessel, stir together the melted and cooled butter with both sugars. You are not looking for a light and fluffy texture here; instead, you want a smooth, cohesive paste. Once integrated, mix in the room-temperature eggs, the extra yolk, and the vanilla extract. Room temperature eggs are a requirement to prevent the butter from seizing.
Step 4: Component Integration
Gradually fold the dry ingredients into the wet mixture using a sturdy spatula. Stop mixing the moment no streaks of flour remain. Over-mixing at this stage will develop excess gluten, leading to a tough cookie rather than a soft, bakery-style crumb. Fold in the 12 ounces (340 grams) of chocolate chips until they are distributed throughout the dough.
Step 5: Precision Portioning
Using a 1/3 cup measuring tool or a large scoop, portion the dough into 3-ounce (85 to 90 gram) balls. This large volume is what creates the contrast between the crispy exterior and the soft interior. Place them on the prepared sheet closely together for the chilling phase.
Step 6: The Hydration Cycle
Cover the dough balls tightly with plastic wrap and refrigerate for a minimum of 3 hours. During this time, the flour proteins fully hydrate, and the sugar absorbs moisture from the eggs. This step is a scientific necessity for flavor development and prevents the fats from melting too rapidly in the oven.
Step 7: Thermal Calibration
Preheat your oven to 350°F (180°C). Use an oven thermometer to verify that the internal temperature is exact. Line two additional baking sheets with parchment. Place only 5 to 6 dough balls per sheet to allow for airflow and heat circulation.
Step 8: The Baking Phase
Bake for 14 to 17 minutes. Look for the edges to turn a light golden brown while the centers remain slightly pale and appear underdone. The residual heat will continue to cook the center once the cookies are removed from the oven.
Step 9: Structural Setting
Allow the cookies to rest on the hot baking sheet for exactly 15 minutes. This allows the starches to set and the structure to firm up. If you move them too early, the centers may collapse. Transfer them to a wire rack to finish cooling completely.
Lauren’s Lab Notes
To achieve the most consistent bakery style chocolate chip cookies 3, I recommend using a digital scale for all measurements. Volume measurements can vary by up to 20% depending on how the flour is packed, which directly impacts the spread of the cookie. If you notice your cookies are spreading more than desired, it is often a sign that the butter was too warm when mixed or the dough did not chill long enough. For more advanced structural techniques, visit our Artisan Cookie Collection to see how protein ratios affect different dough types. Another secret is to avoid using dark non-stick pans, which absorb more heat and can scorch the bottoms of these large cookies before the middle is baked. You can also refer to Live Well Bake Often for further insights on the classic bakery aesthetic.
Tested Variations
Our test kitchen evaluated several modifications to this base formula to suit different flavor profiles. If you prefer a more intense chocolate experience, replace 50 grams of the all-purpose flour with high-quality Dutch-processed cocoa powder. This change increases the acidity, so you should add an additional 1/8 teaspoon of baking soda to maintain the rise. For those interested in seasonal aesthetics, our Seasonal Cookie Design guide provides data on adding botanical elements without disrupting the fat-to-flour ratio. If you choose to add nuts, reduce the chocolate chips by 1/4 cup to keep the total inclusions at a level the dough can structurally support. Remember that adding saltier inclusions like pretzels may require a slight reduction in the added table salt to maintain the flavor balance.
Flavor Science and Pairing
Temperature plays a massive role in how we perceive the flavors of these bakery style chocolate chip cookies 3. Serving them slightly warm—around 100°F (38°C)—allows the cocoa butter in the chips to remain in a liquid state, which coats the palate and enhances the perception of sweetness. If you are preparing these for an event, check our Trending Cookie Creations for advice on maintaining texture during transport. A light dusting of Maldon sea salt on top immediately after baking can also trigger the tongue’s SGLT1 receptors, which makes the sugar in the cookie taste even more pronounced and complex.
The Scientific Truth
Achieving the perfect bakery style chocolate chip cookies 3 is a triumph of chemistry over chance. By respecting the protein content of your flour and the thermal requirements of your fats, you can produce a bakery-quality treat in a home kitchen. We encourage you to keep testing these ratios to find your perfect balance. For further inspiration on finishing techniques, examine our Cookie Decorating Studio. You can also find more professional baking tips at Live Well Bake Often. We would love to see your results, so please share your successes with our community on Facebook, Instagram, or Pinterest. Happy baking!
