We recently tested whether you could transform a standard boxed dessert into structurally sound cookies without losing that signature fudgy center. The challenge was balancing the existing sugar-to-flour ratio so the dough wouldn’t spread into flat puddles on the baking sheet. By calculating the exact hydration needed and adding exactly 1/2 cup (60g) of all-purpose flour, we achieved perfect structural integrity. These Brownie Mix Cookies deliver testing-approved precision in every single bite.

If you love the crinkly tops of traditional brownies but prefer the portable nature of a cookie, this recipe bridges the gap beautifully. We rely on the established cocoa matrix in the box mix, deliberately modifying the hydration levels to create a scoopable, stable dough. The result is a crisp outer edge with a chewy, deeply chocolate interior that comes together in mere minutes. Grab your scale, preheat your oven, and let’s start baking.
Precision Meets Flavor
Box mixes are engineered for pan-baking, meaning they contain high moisture ratios meant to be supported by the walls of a baking dish. By decreasing the liquid and reinforcing the starch network with additional flour, we successfully create a dough that supports its own weight. This process gives you the intense, concentrated chocolate flavor of a brownie with the caramelized, chewy edges of a standard drop cookie.
The convenience factor here is remarkable, but the structural science is what makes it a triumph. You bypass the need to melt chocolate or perfectly aerate butter and sugar. The dry mix already contains emulsifiers that bind the fat and water quickly, making this a reliable, foolproof formula.
You will also appreciate how forgiving the cocoa matrix is once you understand the bake time. The edges undergo the Maillard reaction, developing a delicate crispness, while the center remains dense and fudgy due to the short baking duration. It is a stunning example of how controlling heat and moisture dictates the final texture of your baked goods.
Print
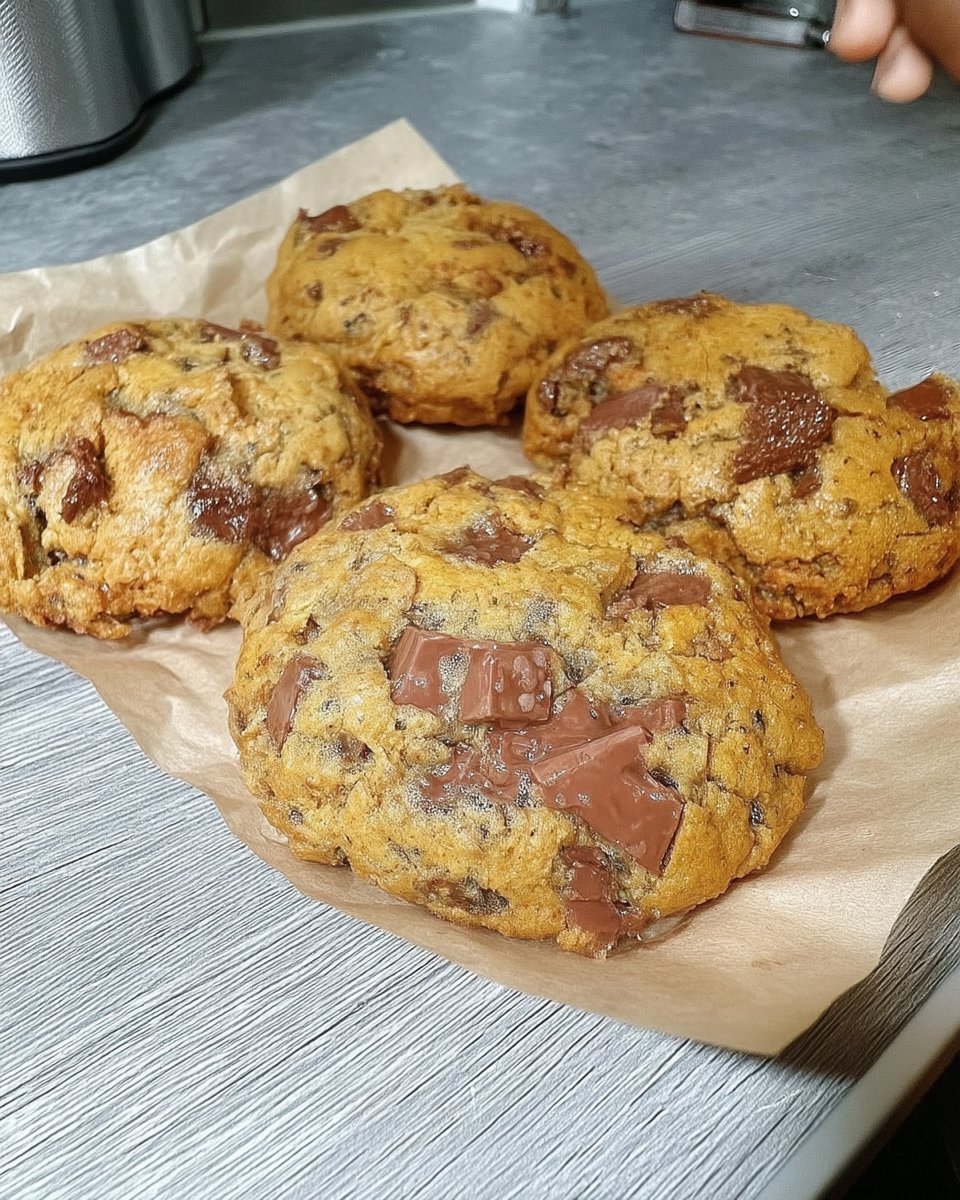
Brownie Mix Cookies
- Total Time: 25 mins
- Yield: 24 cookies
- Diet: Vegetarian
Description
Transform a standard box of brownie mix into gourmet, fudgy cookies with a signature crinkle top and dense chocolate center. This recipe uses specific ingredient adjustments to ensure the cookies maintain their structural integrity while delivering a decadent, melt-in-your-mouth texture.
Ingredients
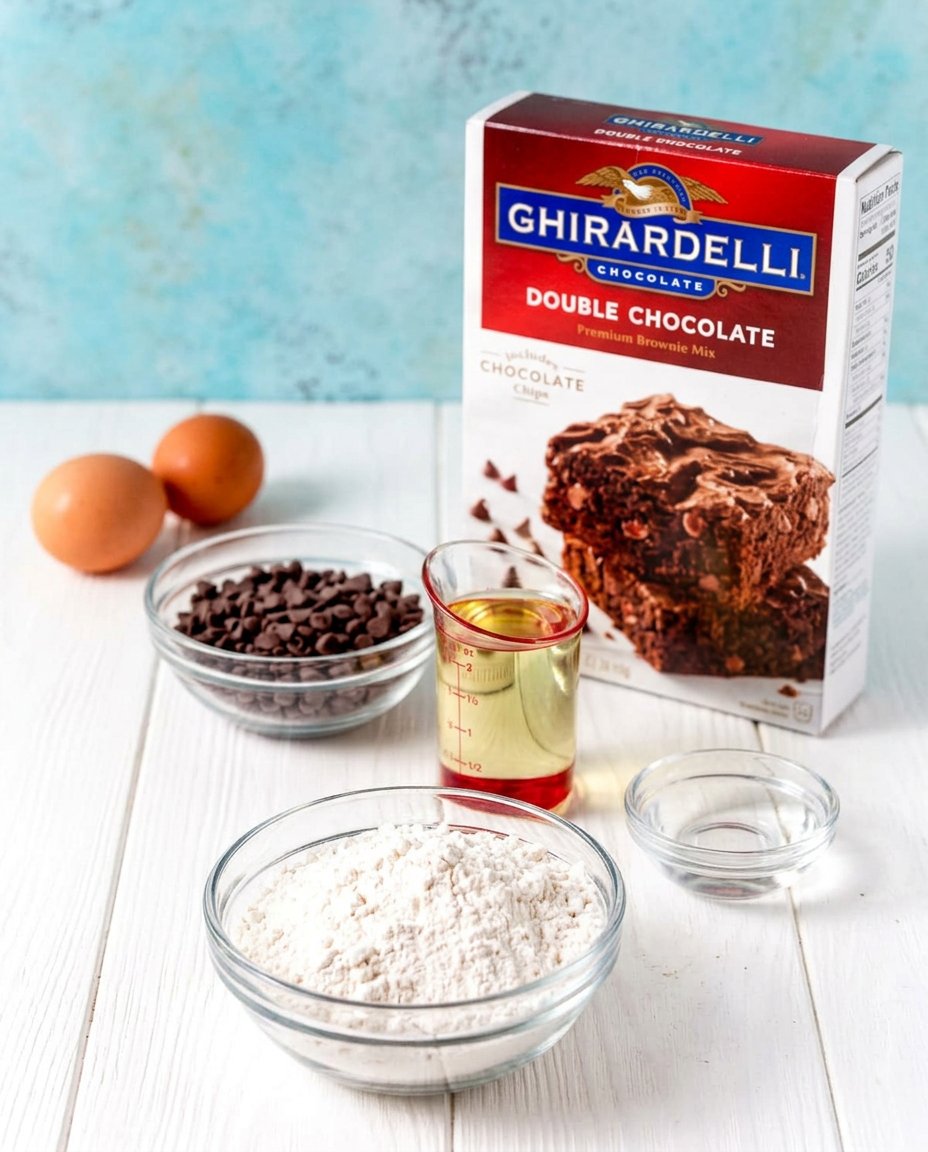
- 18 oz Ghirardelli Double Chocolate Brownie Mix
- 1/2 cup (60g) all-purpose flour
- 5 tablespoons (75ml) vegetable oil
- 2 large eggs
- 1 tablespoon (15ml) water
- 1/2 cup mini chocolate chips
- 3/4 cup chopped walnuts (optional)
Instructions
- Preheat your oven to 350°F (175°C) and line a heavy-bottomed baking sheet with parchment paper.
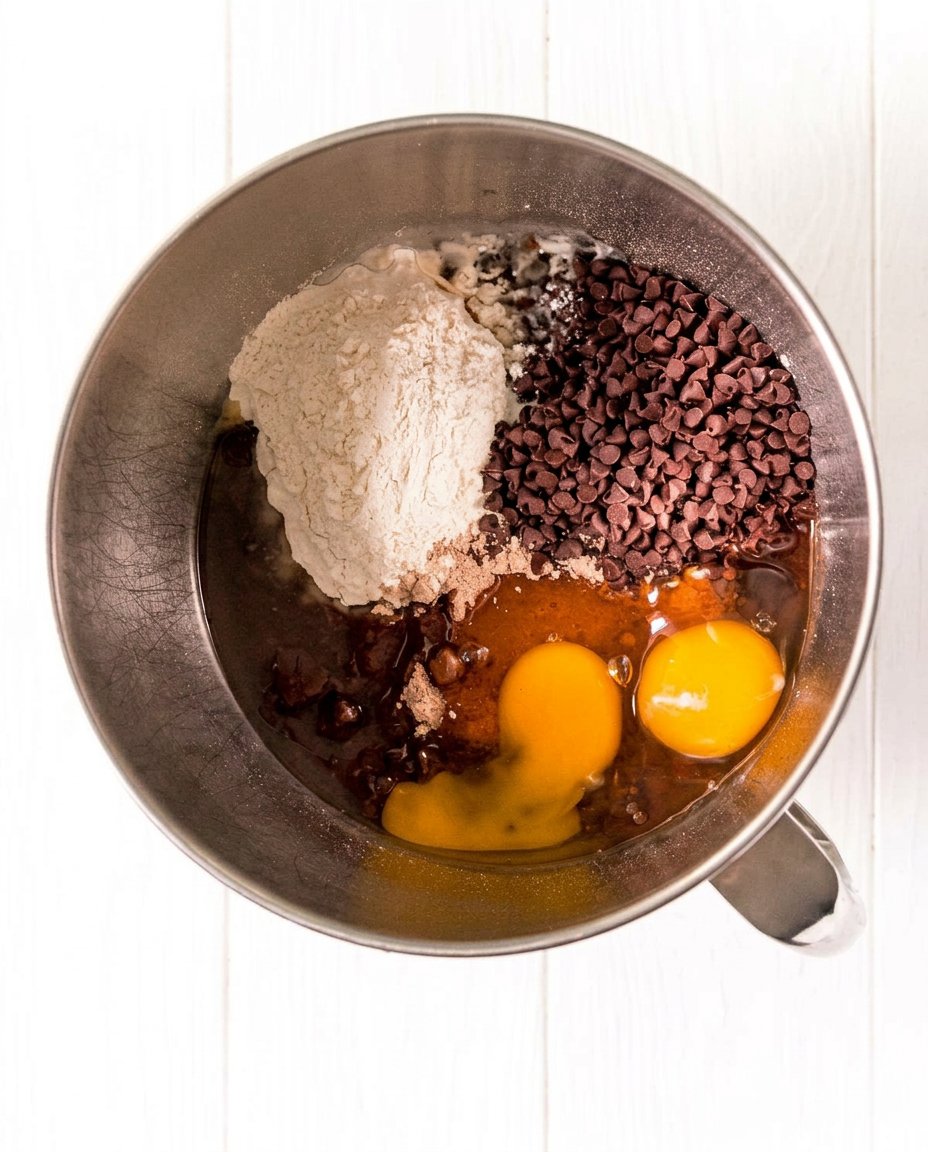
- In a large bowl or stand mixer with a paddle attachment, combine the brownie mix, flour, oil, eggs, and water on low speed until a thick, sticky dough forms.
- Gently fold in the mini chocolate chips and chopped walnuts until just combined, being careful not to overwork the dough.
- Using a small cookie scoop, portion the dough onto the baking sheet, ensuring each mound is spaced exactly 2 inches apart.
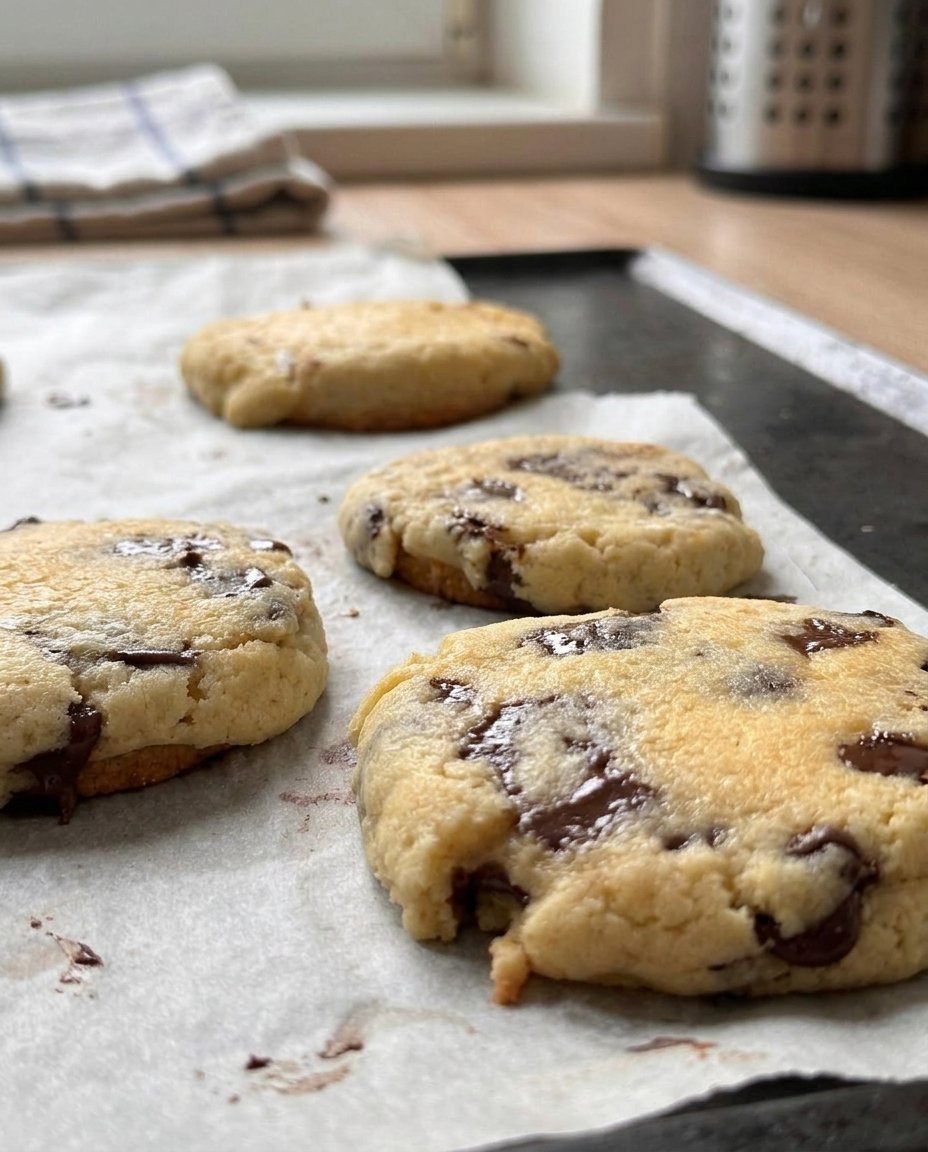
- Bake for 8 to 10 minutes until the tops appear dull rather than glossy; let the cookies rest on the pan for 2 minutes to set before transferring.
Notes
To ensure consistent results, use a kitchen scale for the flour and always perform a test bake with two cookies to calibrate the timing for your specific oven. If you switch to a mix that lacks leavening agents, such as certain basic brands, remember to add one teaspoon of baking soda to the dry ingredients.
- Prep Time: 15 mins
- Cook Time: 10 mins
- Category: Dessert
- Method: Baking
- Cuisine: American
Chemistry Ingredients
Ghirardelli Double Chocolate Brownie Mix (18 oz): This serves as your base structure. We strongly recommend this brand or Duncan Hines. These specific mixes contain the correct balance of baking soda and cocoa powder to provide the necessary lift.
All-Purpose Flour (1/2 cup / 60g): This is the structural anchor. The brownie mix alone does not contain enough flour to maintain a cookie shape. The additional starch and protein provide the necessary framework to prevent excessive spreading.
Vegetable Oil (5 tablespoons / 75ml): Unlike butter, which contains water, vegetable oil is 100% fat. This coats the flour proteins, inhibiting gluten formation just enough to keep the interior tender and fudgy rather than tough.
Large Eggs (2): Eggs act as the primary binding agent. The proteins in the eggs coagulate during baking, setting the cookie’s structure, while the yolks add richness and emulsify the batter.
Water (1 tablespoon / 15ml): A highly precise amount of water is required to hydrate the starches and activate the leavening agents without turning the dough into a batter.
Mini Chocolate Chips (1/2 cup): These provide concentrated pockets of fat and sugar that melt during baking, contributing to the gooey interior texture.
Chopped Walnuts (3/4 cup, optional): Nuts introduce structural barriers in the dough, breaking up the crumb and adding contrasting crunch. Their natural oils also lend a subtle depth to the chocolate.
Scientific Process
Step 1: Calibrate Your Equipment
Preheat your oven to 350°F (175°C). Always use an independent oven thermometer, as built-in sensors are frequently inaccurate. Line a heavy-bottomed, light-colored baking sheet with parchment paper. Parchment prevents sticking and provides a microscopic barrier that regulates heat transfer to the bottom of the cookies.
Step 2: Combine the Matrix
In a large bowl or the bowl of a stand mixer fitted with a paddle attachment, combine the brownie mix, flour, eggs, oil, and water. Mix on low speed until the dry ingredients are fully hydrated. The dough will be exceptionally thick and sticky; this is scientifically correct. Do not use a whisk, as the resistance will damage the wire structure.
Step 3: Fold in the Additions
Once the primary dough is cohesive, gently fold in the mini chocolate chips and chopped walnuts (if using). Over-mixing at this stage can overwork the developed gluten, so mix only until the additions are evenly distributed throughout the matrix.
Step 4: Portion with Precision
Using a small mechanical cookie scoop, portion the dough and drop the mounds onto the prepared baking sheet, spacing them exactly 2 inches apart. This spacing allows adequate air circulation around each cookie, promoting even heat absorption and preventing them from merging as they spread.
Step 5: Execute the Bake
Bake for exactly 8 minutes to start. Visually inspect the cookies: they should possess a thin, dull film on top, and the batter should no longer look glossy, though you may see small ripples of darker, softer batter in the center. Do not overbake. Pull them immediately, as the residual heat from the baking pan will complete the protein coagulation as they cool.
Lauren’s Lab Notes
Temperature regulation is the most critical variable in this formula. These cookies are highly sensitive to thermal exposure because of their high sugar content. If you are baking in a gas oven, the 8-minute mark is typically perfect. However, an electric oven provides a different radiant heat environment, meaning you might need exactly 9 or 10 minutes.
Always bake a test batch of two cookies before committing your entire bowl of dough. This scientific approach allows you to adjust the timing based on your specific appliance’s behavior. If you want to study more about how oven dynamics affect cookie structure, read through our Artisan Cookie Collection.
When you remove the baking sheet from the oven, the cookies will look underdone. Resist the urge to keep baking them. The carryover cooking that occurs while they rest on the hot pan for two minutes is factored into the total structural development. Moving them too soon will cause the weak, hot matrix to collapse.
Scientific Options
Once you master the base ratio, flavor manipulation becomes a matter of balancing fat and moisture. You can swap the mini chocolate chips for peanut butter chips, which possess a slightly different melting point but will not negatively alter the cookie’s spread.
If you prefer a bolder flavor profile, adding 1 teaspoon of high-quality espresso powder to the dry ingredients will amplify the bitter notes of the cocoa without adding unwanted liquid. For further inspiration on creative flavor adjustments, review our Trending Cookie Creations library.
An important note on substitutions: if you choose to use a Betty Crocker brownie mix instead of Ghirardelli or Duncan Hines, your cookies will likely bake flat. The Betty Crocker formula lacks baking soda. To correct this chemical imbalance, you must add exactly 1 teaspoon of baking soda to your dry ingredients before mixing.
Flavor Science and Serving

Timing your service impacts the tasting experience. These cookies are spectacular when served slightly warm, roughly 15 minutes after exiting the oven. At this temperature, the chocolate chips remain in a molten state, and the interior crumb is exceptionally tender.
Interestingly, the flavor profile actually deepens after 24 hours. As the cookies sit in an airtight container, the moisture from the center redistributes outward, softening the crisp edges slightly and allowing the cocoa notes to mature.
If you are designing a complete dessert presentation, these pair beautifully with lighter options from our Seasonal Cookie Design archives. The contrasting textures create a balanced tasting menu. For a slightly different methodology regarding boxed mix adaptations, you might find this alternative approach to brownie cookies mathematically fascinating. Serve with cold milk to cleanse the palate between the dense, chocolate bites.
Keep Testing
Mastering these Brownie Mix Cookies proves that understanding ingredient ratios allows for incredible flexibility and reliability in the kitchen. By tweaking hydration levels and reinforcing the starch network, we successfully transformed a standard pan dessert into a perfectly portioned, structurally sound cookie. This is the power of baking chemistry applied practically.
I encourage you to use this formula as a baseline for your own flavor experiments. Try different chip varieties or test how different nut oils change the final mouthfeel. For more guidance on finishing touches, browse through our Cookie Decorating Studio to see how visual appeal matches scientific execution.
We want to see the results of your kitchen tests! Share your structural successes and photos with us on Instagram, pin your flavor modifications on Pinterest, or join our rigorous testing community over on Facebook. Keep documenting your variables, keep your measurements precise, and happy baking.
