I remember standing in a small spice market years ago, where the scent of freshly roasted legumes mingled with the sweet fragrance of local cane sugar. It was a flavor discovery moment that changed how I viewed the humble peanut, moving it from a simple snack to a complex, aromatic star. This specific Gluten Free Peanut Butter recipe captures that exact sensory revelation, blending the deep, earthy richness of roasted nuts with a delicate, melt-in-the-mouth texture.

These cookies represent a beautiful intersection of tradition and modern baking techniques, proving that omitting gluten never means sacrificing flavor. The secret lies in the balance of creamy textures and the unexpected warmth of high-quality vanilla extract. Every bite offers a soft, tender crumb and a signature cracked top that signals a perfectly baked treat.
Aromatic Magic
There is something truly captivating about the way these cookies fill your home with the scent of toasted peanuts and warm butter. This isn’t just a snack; it is an aromatic adventure that celebrates the natural oils and fragrant potential of the peanut. You will love how the light brown sugar creates a subtle molasses undertone, providing a beautiful contrast to the savory notes of the nut butter.
Beyond the flavor, the texture is a remarkable feat of gluten-free engineering. Many GF recipes result in gritty or dry bakes, but this method yields a soft, fudgy center that rivals any traditional bakery offering. The addition of room-temperature eggs provides the necessary structure, while the chilling time allows the flavors to meld and the fats to solidify, preventing excessive spreading. It is a reliable, comforting recipe that invites you to appreciate the simple joy of a well-crafted cookie.
Print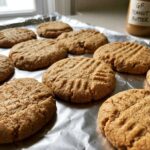
Gluten Free Peanut Butter Cookies
- Total Time: 59 mins
- Yield: 24 cookies
- Diet: Gluten-Free
Description
These gluten-free peanut butter cookies deliver a nostalgic, rich flavor with a perfectly tender crumb and signature cracked tops. By combining creamy nut butter with a hint of vanilla and a necessary chill time, you will achieve a bakery-quality treat that satisfies every craving.
Ingredients
- 1 cup creamy peanut butter (stabilized)
- 1/2 cup butter, melted
- 1/2 cup light brown sugar, packed
- 1/2 cup granulated sugar
- 2 large eggs, room temperature
- 1 teaspoon vanilla extract
- 1 1/2 cups gluten-free all-purpose flour blend (such as Cup4Cup)
- 1 teaspoon baking soda
- 1/2 teaspoon salt
Instructions
- Line heavy-duty baking sheets with parchment paper or silicone mats and set aside.
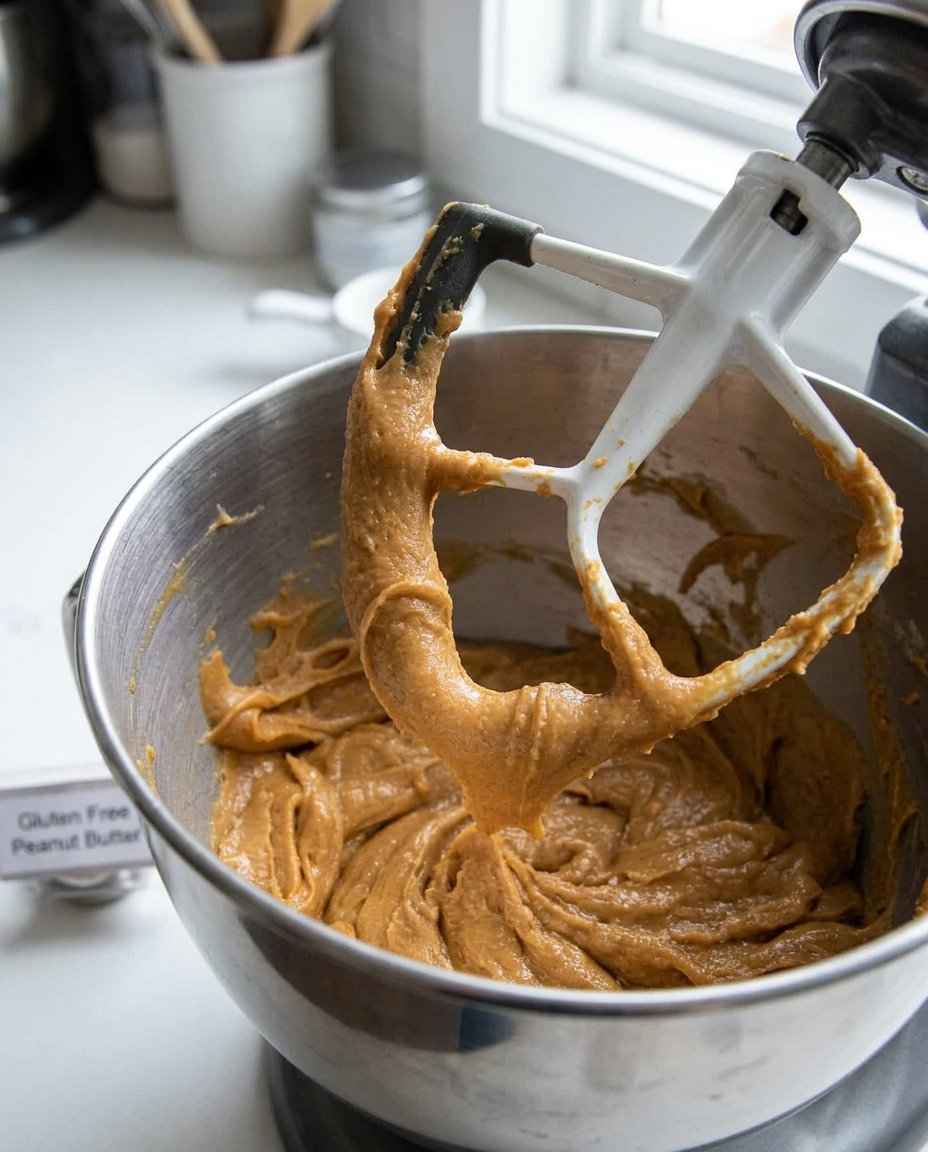
- In a large glass bowl, whisk together the creamy peanut butter, melted butter, light brown sugar, and granulated sugar until the mixture is smooth and glossy.
- Add the room-temperature eggs one at a time, followed by the vanilla extract, and mix until the batter is uniform and creamy.
- On low speed, blend in the baking soda and salt, then gradually add the gluten-free flour blend until no white pockets remain.
- Cover the bowl tightly with plastic wrap and refrigerate the dough for at least 30 minutes; meanwhile, preheat your oven to 325ºF (163°C).
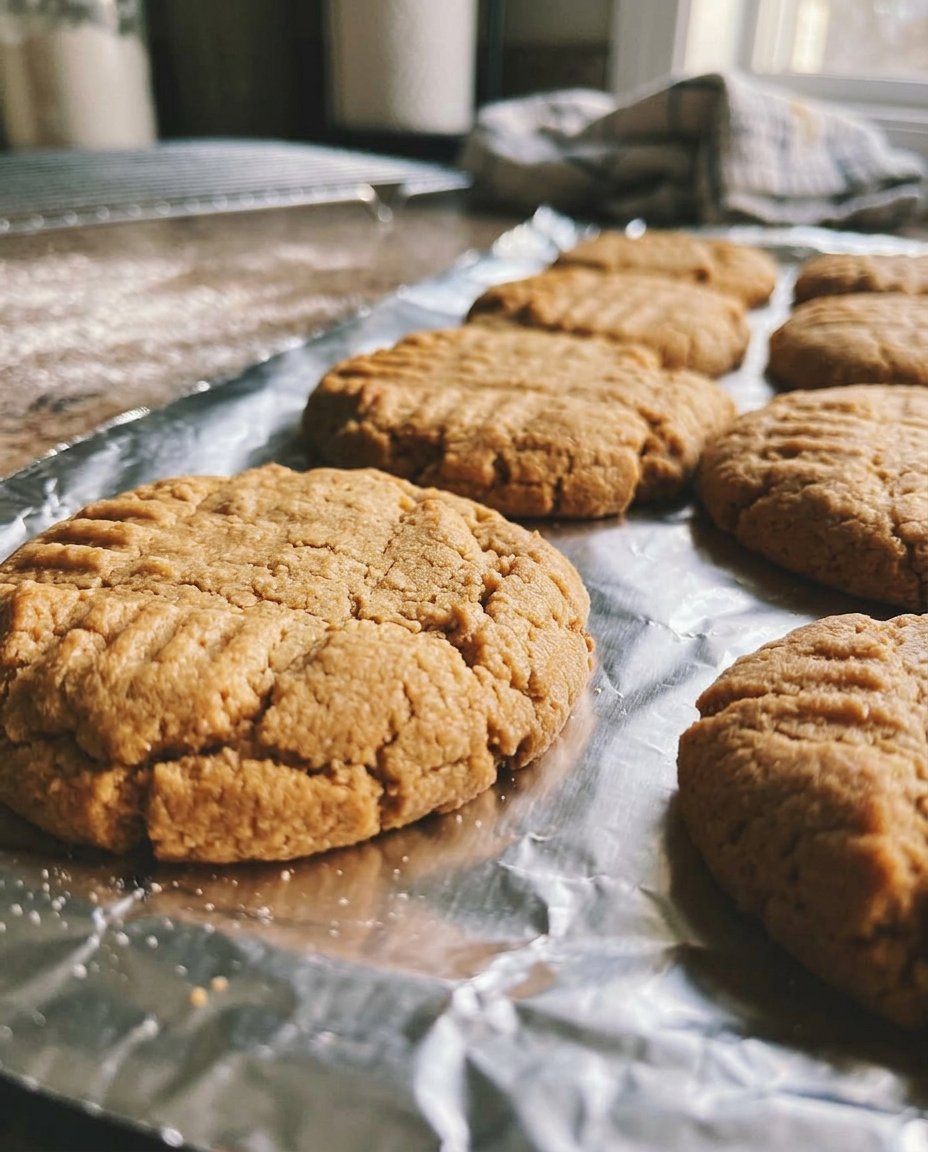
- Using a medium cookie scoop, portion the dough into two-tablespoon balls and roll them gently between your palms before placing nine on each baking sheet.
- Bake for 12-14 minutes, rotating the pans halfway through, until the tops are set and show characteristic cracks; allow to cool completely on the sheet to firm up.
Notes
For the best results, ensure your eggs are truly at room temperature to prevent the melted butter from seizing during the emulsion process. If you prefer a more decorative look, use the tines of a fork to create a classic crosshatch pattern on the dough balls before sliding them into the oven.
- Prep Time: 15 mins
- Cook Time: 14 mins
- Category: Dessert
- Method: Baking
- Cuisine: American
The Spice Pantry
To achieve the perfect balance in these Gluten Free Peanut Butter cookies, every ingredient must play its part in the aromatic symphony. We focus on natural flavor sources that provide depth and character to the finished product.
- Creamy Peanut Butter: Avoid natural varieties that separate. We need the stabilized, creamy kind to maintain the structural integrity and smooth mouthfeel of the dough.
- Melted Butter: Slightly warm butter helps dissolve the sugars and integrates seamlessly with the peanut fats, creating a rich base.
- Light Brown and Granulated Sugars: This combination offers both the moisture of molasses and the clean sweetness needed to let the peanut flavor shine.
- Large Eggs: Using room-temperature eggs is vital for a smooth emulsion, preventing the batter from breaking.
- Vanilla Extract: A high-quality extract adds a floral, sweet top note that rounds out the savory edges of the nuts.
- Gluten-Free All-Purpose Flour: I highly recommend Cup4Cup for its superior texture, though you must be aware it contains milk powder. For a dairy-free option, King Arthur Measure-for-Measure is a fantastic alternative.
- Baking Soda and Salt: These essentials provide the lift and the flavor contrast necessary to make the sugars pop.
The Method
Step 1: Prepare the Foundation
Begin by lining your heavy-duty baking sheets with parchment paper or professional-grade silicone mats. This step is crucial for preventing the bottom of your cookies from browning too quickly and makes cleanup a breeze. If you prefer, ungreased sheets work well due to the high fat content in the dough.
Step 2: Create the Emulsion
In a large glass bowl, combine your creamy peanut butter, melted butter, light brown sugar, and granulated sugar. Use a whisk or electric mixer to beat these together until the mixture is perfectly smooth and glossy. This process aerates the fats and begins to dissolve the sugar crystals, setting the stage for a tender crumb.
Step 3: Integrate Aromatic Liquids
Add the room-temperature eggs one at a time, followed by the vanilla extract. Mix again until the batter is uniform and creamy. You will notice the color lighten slightly and the scent of vanilla become prominent. This stage is where the “what if” of flavor experimentation begins to take shape as the liquids bind the sugars.
Step 4: Blend the Dry Components
Switch your mixer to a low speed and blend in the baking soda and salt. Gradually add the gluten-free flour blend. Continue mixing just until no white pockets of flour remain. The resulting dough should be shiny, soft, and incredibly fragrant, indicating a perfect distribution of the fats and dry ingredients.
Step 5: The Essential Chill
Cover the bowl tightly with plastic wrap and place it in the refrigerator for at least 30 minutes. This rest period is non-negotiable; it allows the gluten-free flours to fully hydrate and the butter to firm up. While the dough chills, preheat your oven to 325ºF (163°C).
Step 6: Portion and Shape
Using a medium cookie scoop, portion out dough balls roughly the size of two tablespoons. To achieve that professional, perfectly round look, gently roll the balls between your palms. Place nine balls on each sheet, giving them plenty of space to breathe and expand.
Step 7: The Aromatic Bake
Slide the pans into the oven and bake for 12-14 minutes. I recommend rotating the pans halfway through to account for any hot spots in your oven. Watch for the tops to set and develop those beautiful, characteristic cracks. Avoid overbaking; the cookies will firm up significantly as they cool on the sheet.
Jasmine’s Flavor Tips

When working with Gluten Free Peanut Butter dough, patience is your best friend. The chilling phase is where the magic happens, allowing the starches in the GF flour to soften and absorb the moisture from the eggs and butter. If you find the dough too sticky to roll even after chilling, dampen your hands slightly with water rather than adding more flour, which can lead to a dry cookie. For those looking for even more depth, try toasting your own peanuts and grinding them into a paste for a truly authentic touch.
To keep your baking journey inspired, I suggest looking through our Artisan Cookie Collection for more ideas on how to use nut butters in unique ways. For a detailed guide on the chemistry of these ingredients, this resource on gluten free cookies provides excellent technical insights. Always use fresh baking soda to guarantee those beautiful cracks on top of your cookies.
Other Flavor Twists
While the classic peanut flavor is timeless, I often think “what if we add a hint of the unexpected?” To give this recipe a global twist, consider adding a teaspoon of ground cardamom for an Indian-inspired aromatic profile, much like a traditional nankhatai. You can also press a single sea salt flake into the center of each cookie before baking to create a sophisticated sweet-and-salty balance. If you are baking for the holidays, check out our Seasonal Cookie Design category for ways to decorate these with botanical glazes.
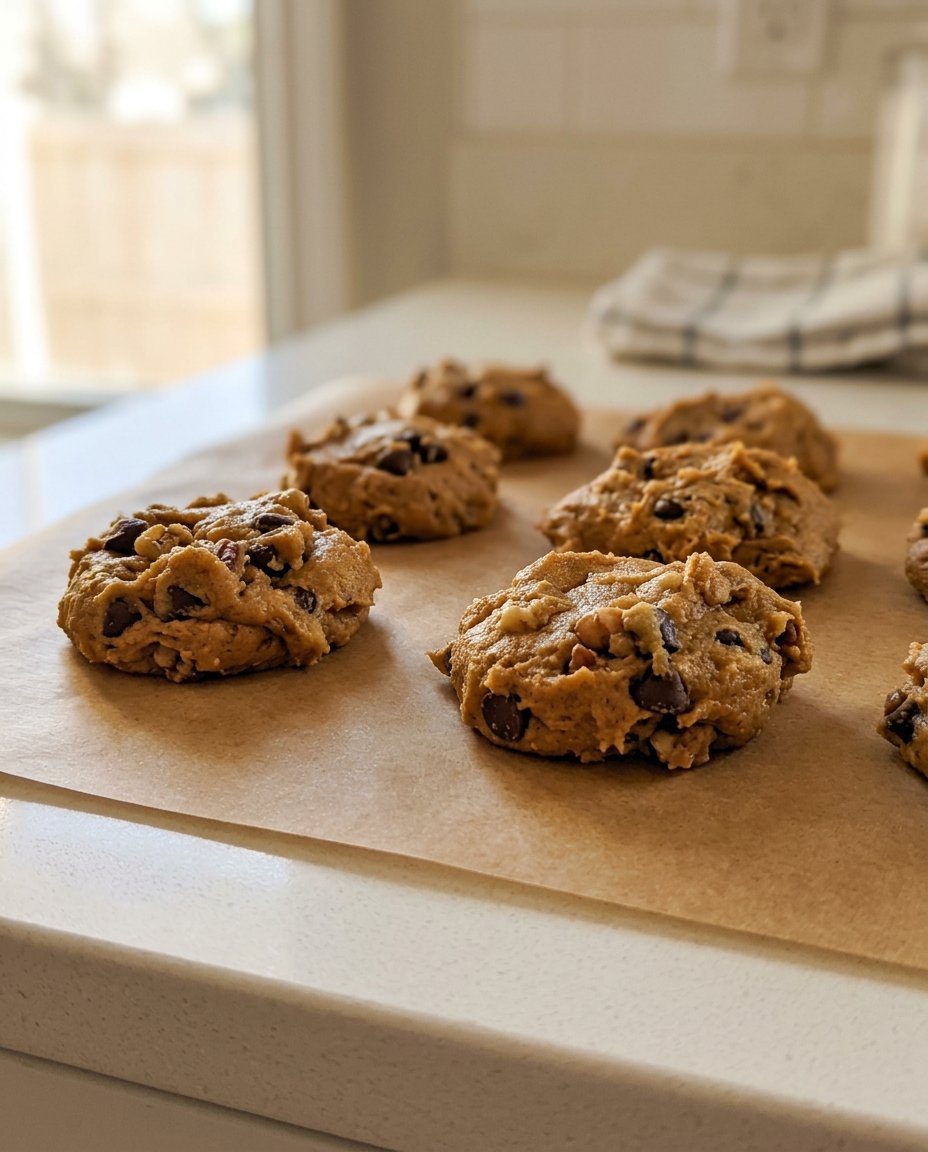
For a chocolate-forward variation, fold in a half cup of dark chocolate chips or chunks. The bitterness of the cocoa perfectly complements the roasted notes of the peanut butter. If you prefer a crunchier experience, you can substitute half of the creamy peanut butter for a crunchy variety, though this may slightly alter the spread of the cookie during the baking process.
Aromatic Enjoyment
These Gluten Free Peanut Butter cookies are best enjoyed alongside a steaming cup of Masala Chai or a fragrant Earl Grey tea. The tannins in the tea cut through the richness of the peanut butter, creating a balanced and sophisticated afternoon snack. For a truly indulgent experience, serve them warm with a scoop of vanilla bean gelato, allowing the ice cream to slightly melt into the cookie’s cracks.
If you are hosting a gathering, these cookies look stunning on a rustic wooden board. You can find more presentation ideas in our Effortless Cookie Elegance section. Their earthy tones pair beautifully with fresh berries or a drizzle of wildflower honey for a touch of natural brightness.
The Flavor Truth
Baking these cookies is more than just following a recipe; it is an act of flavor discovery. Whether you are baking for a celiac friend or simply want a more flavorful peanut butter cookie, this version offers a surprising depth that will leave your guests asking for the secret ingredient. I invite you to stay curious and keep experimenting with your spice cabinet to find your own signature twist. For more inspiration on aromatic bakes, visit our Trending Cookie Creations page. Don’t forget to share your aromatic results with us on Instagram and Pinterest. Happy baking!
