I remember standing in a sun-drenched kitchen, watching a simple dough transform into a hypnotic spiral. It was a flavor discovery moment that changed how I view baking—could a single dough hold two distinct personalities? These pinwheel cookies capture that aromatic revelation perfectly, blending deep cocoa with nostalgic vanilla in a dance of texture and scent.

These buttery slice-and-bake treats are a beautiful swirl of chocolate and vanilla, starting with one versatile base dough. The patience required for the chilling process is rewarded with a cookie that is as visually stunning as it is delicious. By mastering the rhythm of rolling, you create a treat that feels like a handcrafted gift from the oven.
The Hypnotic Flavor Twist
There is something deeply satisfying about the visual geometry of a spiral. These cookies offer more than just a pretty face; they provide a layered sensory experience where the bitterness of the cocoa meets the floral sweetness of vanilla. It is a classic pairing, yet the pinwheel format makes every bite a balanced adventure between the two worlds.
When you bite into these, the texture is the first thing you notice. They are sturdy enough to hold their shape but possess a tender, melt-in-your-mouth quality thanks to the extra egg yolk. The addition of espresso powder in the chocolate half is my favorite secret—it does not make the cookie taste like coffee, but it heightens the aromatic depth of the cocoa, making it taste like the best version of itself.
Baking these is a lesson in mindfulness. As you roll the two layers together, you are creating a map of flavor that will be revealed only when you slice the log. It is a moment of pure culinary magic. Whether you are sharing these at a global holiday gathering or enjoying them with a quiet afternoon tea, they bring a sense of wonder and tradition to the table.
Print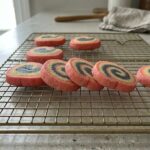
Pinwheel Cookies
- Total Time: 4 hours
- Yield: 28 cookies
- Diet: Vegetarian
Description
These eye-catching pinwheel cookies feature a mesmerizing spiral of buttery vanilla and rich cocoa dough. With a tender texture enhanced by an extra egg yolk and a hint of espresso, they are as delightful to look at as they are to eat.
Ingredients
- 3 cups all-purpose flour
- 1/2 teaspoon baking powder
- 1/4 teaspoon salt
- 1 cup unsalted butter, softened
- 1 cup granulated sugar
- 1 large egg plus 1 egg yolk
- 2 teaspoons pure vanilla extract
- 3 tablespoons unsweetened cocoa powder (natural or Dutch-process)
- 1 tablespoon milk
- 1/2 teaspoon espresso powder (optional)
Instructions
- In a medium bowl, whisk together the all-purpose flour, baking powder, and salt; set aside.
- In a large bowl, cream the softened butter and granulated sugar on medium-high speed for about 3 minutes until pale and fluffy.
- Incorporate the whole egg, extra egg yolk, and vanilla extract, beating on high speed for 1 minute until cohesive.
- Turn the mixer to low and gradually add the flour mixture, mixing just until no streaks of white remain.
- Divide the dough into two equal portions.
- Place one half of the dough back into the mixer and add the cocoa powder, milk, and espresso powder; mix on low until the color is uniform.
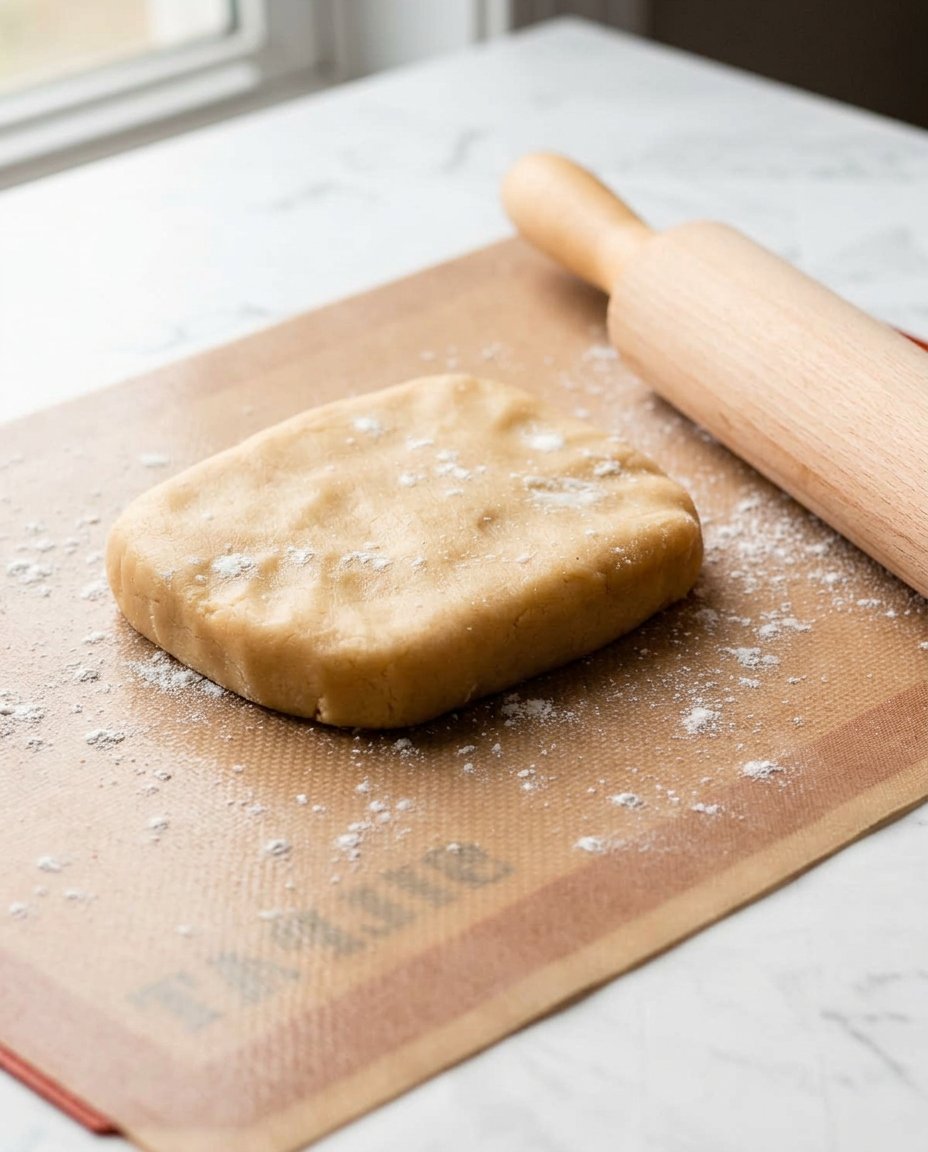
- Shape both dough portions into 1-inch thick rectangles, wrap in plastic, and refrigerate for 60 to 90 minutes.
- Roll the vanilla dough on parchment paper into an 8×14-inch rectangle; repeat this process with the chocolate dough on a separate piece of parchment.
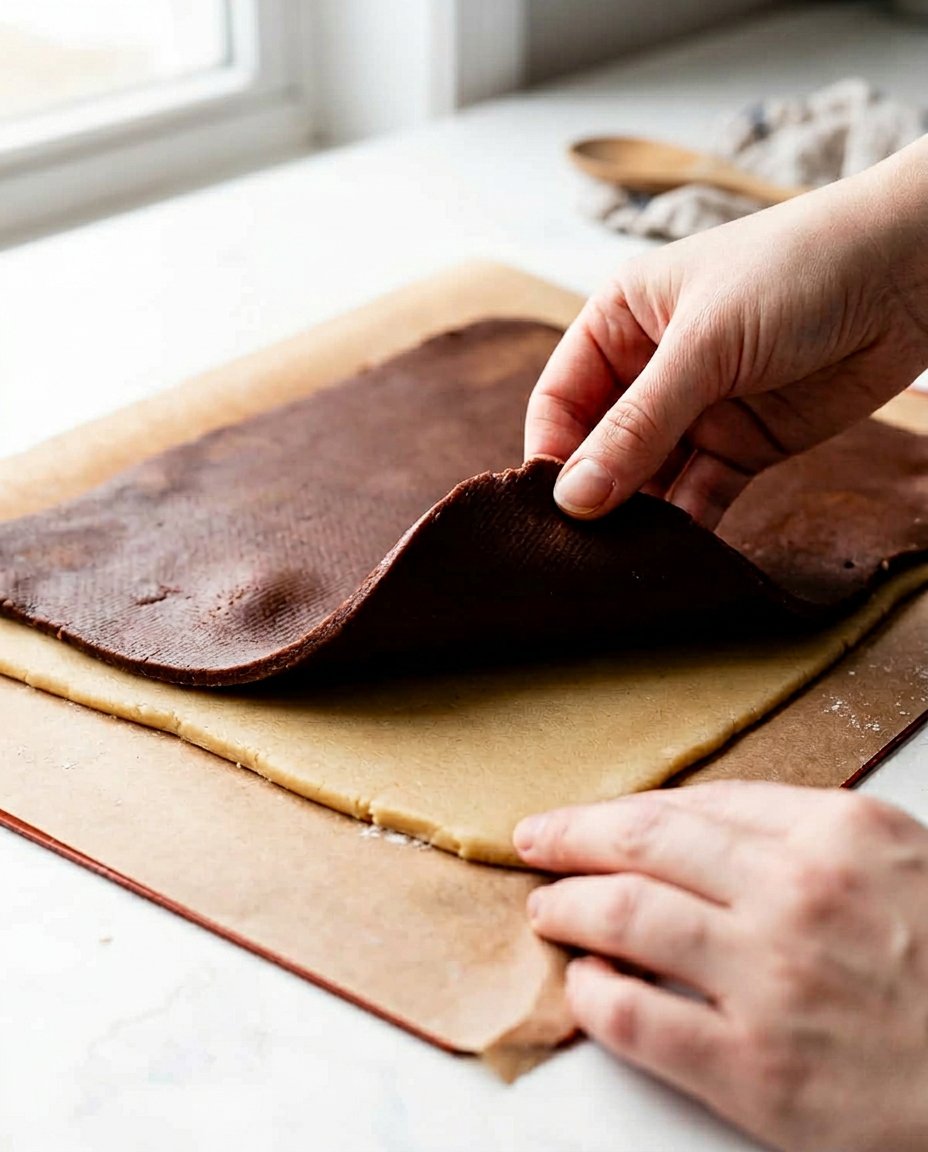
- Flip the chocolate dough onto the vanilla dough, peel away the top parchment, and press gently to remove air bubbles.
- Starting from a long side, tightly roll the doughs into a log, then cut the log in half to create two 7-inch logs.
- Wrap the logs in plastic and refrigerate for at least 2 hours to firm up.
- Preheat your oven to 350°F (177°C) and line baking sheets with parchment paper.
- Slice the chilled logs into 1/2-inch thick rounds and place them 2 inches apart on the prepared sheets.
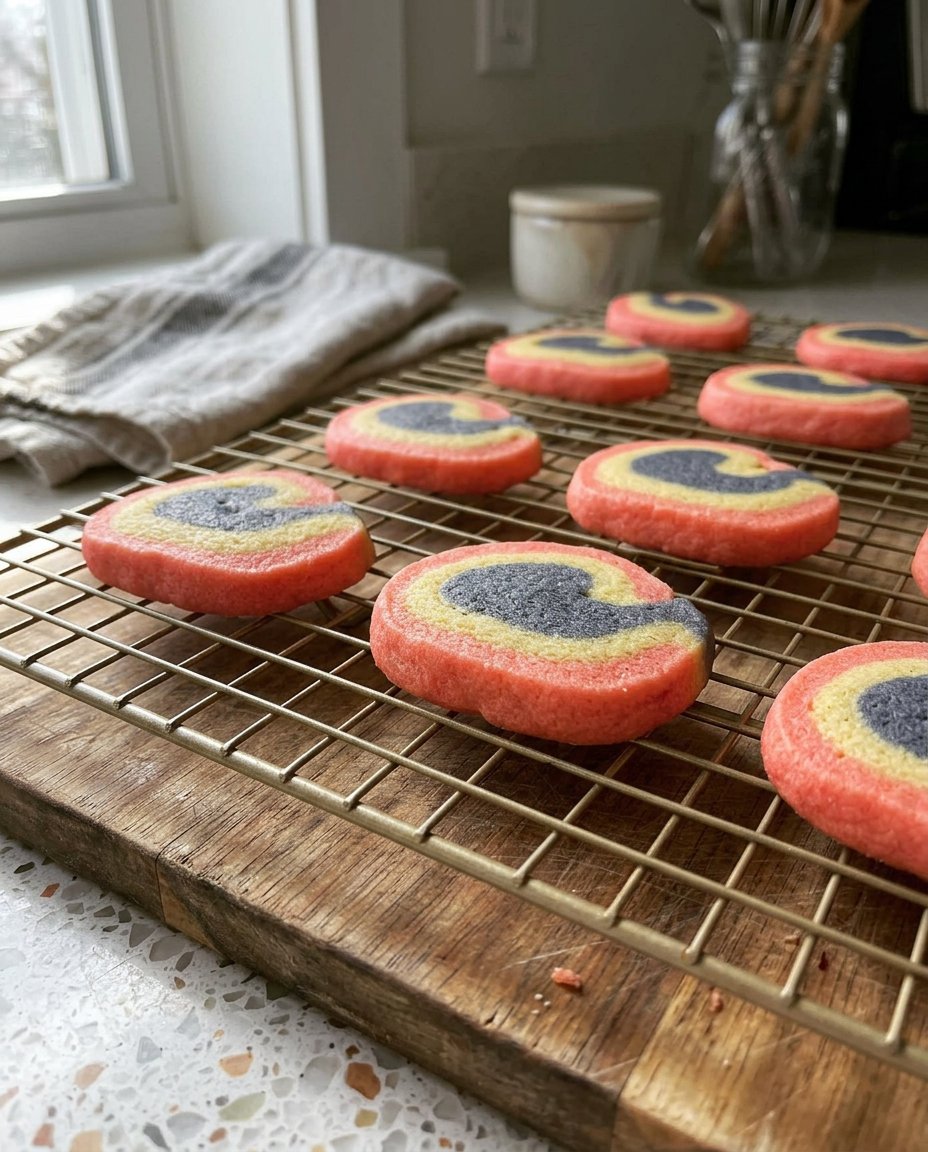
- Bake for 14 to 15 minutes until set, then cool on the pan for 5 minutes before moving to a wire rack.
Notes
To achieve perfectly round cookies without flat edges, rotate the dough log a quarter turn after every few slices. If the dough becomes too soft to handle during the rolling process, simply slide it into the freezer for 5-10 minutes to restore its firm texture before continuing.
- Prep Time: 45 mins
- Cook Time: 15 mins
- Category: Cookies
- Method: Baking
- Cuisine: American
The Spice Pantry and Flavor Stars
To create the perfect spiral, we start with high-quality staples that transform into an extraordinary dough. The foundation is built on fresh, aromatic ingredients that provide the structure and scent these cookies are known for.
- Unsalted Butter: Use butter softened to room temperature. This allows for a smooth creaming process, which is vital for the cookie’s final crumb. Quality butter provides a rich, creamy backbone that carries the other flavors.
- Granulated Sugar: Beyond sweetness, sugar helps in the creaming process to create tiny air pockets, ensuring the cookies are light rather than dense.
- Egg and Egg Yolk: The addition of a whole egg plus an extra yolk is a flavor twist that provides incredible richness and a soft, supple texture that makes rolling the dough much easier.
The Aromatic Contrast
- Pure Vanilla Extract: Look for a high-quality extract or even vanilla bean paste. The floral notes of vanilla are the perfect foil for the earthy cocoa.
- Unsweetened Cocoa Powder: You can use natural or Dutch-process cocoa. Dutch-process will give you a darker, more intense chocolate color and a smoother flavor profile.
- Espresso Powder: This is my aromatic secret. A small amount intensifies the chocolate dough, giving it a sophisticated depth that keeps you coming back for another bite.
- All-Purpose Flour: Properly measured flour (using the spoon and level method) makes sure the dough is not too dry. We want a dough that is pliable enough to roll without cracking.
The Flavor Process
Step 1: Prepare the Aromatic Base
In a medium bowl, whisk together the all-purpose flour, baking powder, and salt. This ensures the leavening agent is evenly distributed, so your cookies rise consistently. Set this dry mixture aside while you move to the wet ingredients.
Step 2: Creaming for Texture
In a large bowl, beat the softened butter and granulated sugar on medium-high speed. Aim for about 3 minutes of beating until the mixture looks pale and fluffy. This step is essential for creating the delicate structure of the cookie. Scrape down the sides of the bowl to make sure every bit of sugar is incorporated.
Step 3: Add the Liquid Gold
Incorporate the whole egg, the extra yolk, and the vanilla extract. Beat on high speed for about 1 minute. The mixture should look cohesive and glossy. The extra yolk adds a beautiful golden hue and a tender mouthfeel that distinguishes these from standard sugar cookies.
Step 4: Combine the Dough
Turn your mixer to low and gradually add the flour mixture. Mix just until no streaks of white remain. The dough will be thick and quite sticky at this stage, which is exactly what we want for a tender result. Do not overmix, as this can lead to a tough cookie.
Step 5: Divide and Conquer
Remove the dough from the bowl and weigh it if you have a scale. You should have roughly 800-900 grams. Divide the dough into two equal portions. If one is slightly smaller, designate that one for the chocolate half. Keep one half in a separate bowl for now.
Step 6: Create the Chocolate Swirl
Place one half of the dough back into the mixer. Add the cocoa powder, milk, and the optional espresso powder. Mix on low speed until the color is uniform. The milk helps keep the chocolate dough as moist as the vanilla dough, preventing the layers from separating later.
Step 7: The Initial Chill
Place each dough portion on a lightly floured surface. Shape them into 1-inch thick rectangles, about 4×5 inches. Wrap them tightly in plastic wrap. Refrigerate for 60 to 90 minutes. This makes the dough less sticky and much easier to handle without losing its pliability.
Step 8: Rolling the Vanilla Layer
Remove the vanilla dough from the fridge. On a piece of parchment paper, roll the dough into an 8×14-inch rectangle. Use your hands to straighten the edges. If it sticks, a light dusting of flour helps. Slide the parchment onto a tray and pop it back in the fridge while you work on the chocolate.
Step 9: Rolling the Chocolate Layer
Roll the chocolate dough on a second piece of parchment to an 8×14-inch rectangle. Using cocoa powder instead of flour for dusting helps maintain that rich dark color. Aim for a thickness of about 1/8 to 1/4 inch.
Step 10: The Great Alignment
Remove the vanilla dough from the fridge. Carefully flip the chocolate dough on top of the vanilla dough. Peel away the top parchment paper. Gently press down to remove any air bubbles. This creates a solid bond between the two aromatic layers.
Step 11: The Spiral Roll
Starting from a long side, tightly roll the doughs together into a log. Use the bottom parchment paper to help lift and guide the roll. Go slowly and keep the tension tight. If the vanilla dough cracks, simply pinch it back together with your fingers. Cut the long log in half to make two 7-inch logs.
Step 12: Final Chilling
Wrap the logs in plastic and refrigerate for at least 2 hours. This firming up is crucial for getting clean, sharp slices that show off the beautiful pinwheel design. You can even leave them in the fridge for up to four days.
Step 13: Slicing and Baking
Preheat your oven to 350°F (177°C). Slice the chilled logs into 1/2-inch thick rounds. Place them on lined baking sheets, leaving 2 inches of space between them. Bake for 14 to 15 minutes. They should look set but only very lightly browned at the edges.
Step 14: Cooling and Dipping
Let the cookies rest on the baking sheet for 5 minutes before moving them to a wire rack. Once completely cool, you can melt some high-quality baking chocolate and dip half of each cookie for an extra layer of decadence. Add sprinkles while the chocolate is wet for a festive touch.
Jasmine’s Aromatic Wisdom
When working with these doughs, temperature is your best friend. If the dough becomes too warm while you are rolling, do not hesitate to slide it back into the refrigerator for ten minutes. A cool dough holds its shape and prevents the colors from bleeding into one another. For more advanced techniques on maintaining dough integrity, see our Artisan Cookie Collection.
Another secret for a clean spiral is using cocoa powder to dust your surface when rolling the chocolate dough. This keeps the dark layer vibrant and avoids the white dusty look that flour can leave behind. If you are looking for more inspiration on how to handle delicate doughs, you might find this guide on pinwheel cookies very helpful for visual learners. Remember to slice with a very sharp, thin knife and wipe the blade between cuts to keep the vanilla part pristine.
Other Flavor Twists
While the chocolate and vanilla combination is a timeless choice, this base dough is a canvas for global flavor exploration. You can replace the cocoa powder with matcha powder for a vibrant green tea swirl that offers an earthy, aromatic adventure. This pairing works beautifully with white chocolate dipping.
For a bright, citrusy version, add two tablespoons of fresh orange zest to the vanilla dough and a teaspoon of almond extract to the other half. This creates a flavor profile reminiscent of Mediterranean sweets. If you love experimenting with seasonal themes, check out our Seasonal Cookie Design section for more ideas. You can even add warm spices like cardamom or Ceylon cinnamon to the vanilla dough to bring an unexpected warmth to every bite.
Aromatic Enjoyment
These cookies are a visual treat, making them perfect for gifting in clear cellophane bags tied with a silk ribbon. They pair wonderfully with a hot cup of Earl Grey tea, where the bergamot notes complement the vanilla and cocoa layers. For a more intensive flavor experience, serve them alongside a spiced chai or a thick Turkish coffee.
If you are hosting a gathering, arrange these on a white marble platter to let the spirals pop. For more ideas on how to present your bakes with style, look through our guide on Effortless Cookie Elegance. They also make a fantastic addition to a dessert charcuterie board, paired with fresh raspberries and toasted hazelnuts to highlight the chocolate notes.
Aromatic Joy
Baking these pinwheel cookies is a journey into the heart of flavor and design. While they require a bit of patience and a few hours of chilling, the moment you slice into the log and reveal that perfect spiral makes every second worth it. It is a reminder that some of the most beautiful things in life require a slow, steady hand and a bit of curiosity.
I hope this recipe inspires you to bring a bit of aromatic magic into your own kitchen. For more innovative ideas and to see what our community is baking, visit our Trending Cookie Creations. We would love to see your beautiful swirls, so please share your results with us on Instagram, Pinterest, and Facebook. Keep experimenting and happy baking!

