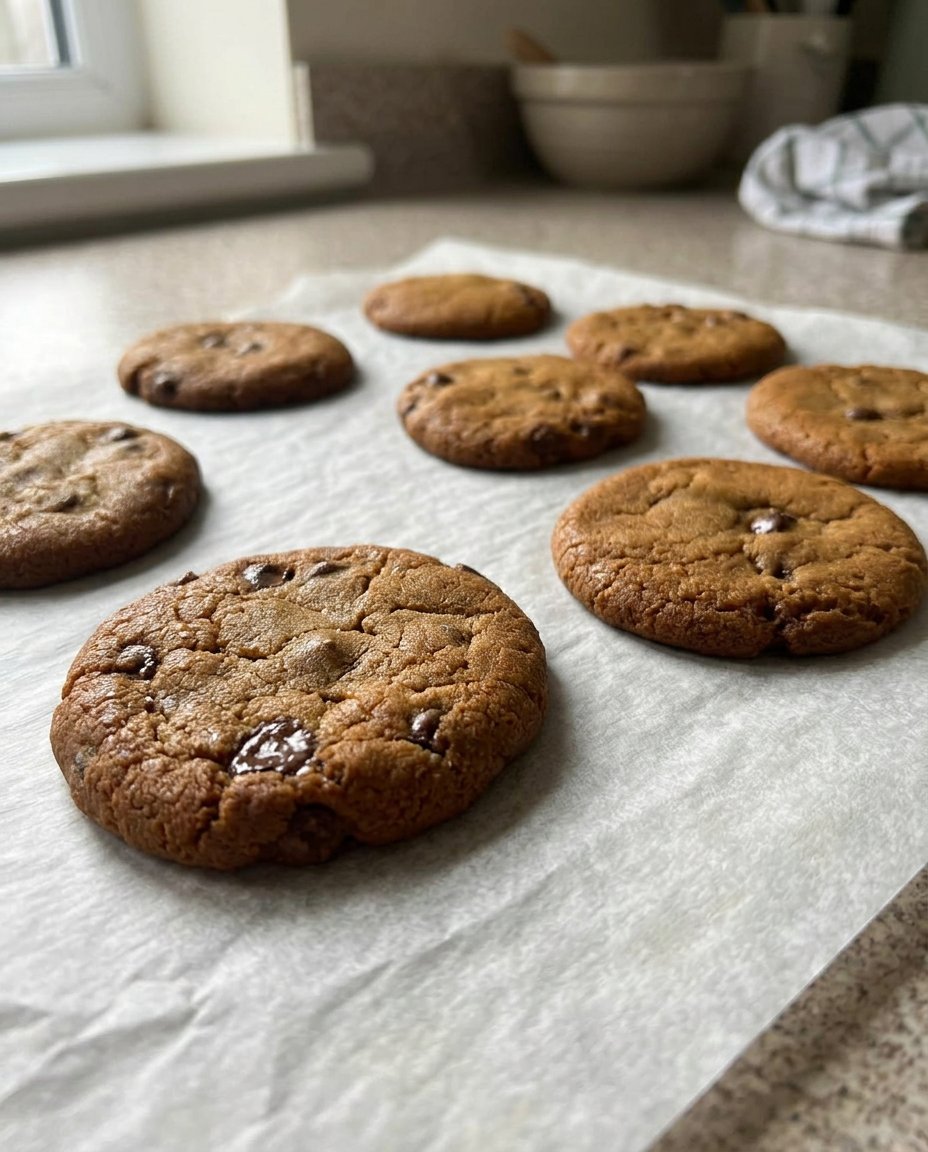
Growing up in a kitchen filled with the scent of darkening sugar and rich cocoa was a gift I didn’t fully appreciate until I was much older. My grandmother taught me that a cookie isn’t just a simple treat; it’s a small piece of home you can share with anyone who walks through your back door. These caramel thumbprints are the result of that Southern hospitality, blending deep chocolate with a buttery, homemade caramel that feels like a warm hug on a cold afternoon.

There is something truly special about the contrast between a soft, cocoa-infused cookie and a pool of golden, salted caramel. While they look like they belong in a high-end bakery window, the process is straightforward and deeply rewarding for any home baker who values the honest flavors of butter and sugar. These cookies remain a staple in my kitchen because they prove that you don’t need fancy gadgets to create a masterpiece.
Comfort in Every Single Bite
The magic of this recipe lies in the balance of simple, honest ingredients coming together to create something that feels truly special. You will love how the slight bitterness of the cocoa powder plays against the intense, buttery sweetness of the homemade caramel. It is a timeless combination that feels familiar yet exciting, making it a perfect addition to your holiday spread or just a quiet afternoon tea with friends.
Texture is another reason why this recipe stands out among the crowd. The cookie itself has a tender, shortbread-like crumb that melts away, leaving you with the chewy, decadent pull of the caramel center. This isn’t just a snack; it’s an experience that hits every sensory note from the crunch of the salt to the aroma of the vanilla. It’s a way to bring a bit of Southern warmth into your own home, regardless of where you are located.
Furthermore, this recipe respects the time-honored tradition of slowing down. In a world that moves too fast, taking the hour to chill the dough and the fifteen minutes to watch a pot of sugar turn to amber is a form of meditation. You aren’t just making food; you are crafting a memory. That sense of accomplishment when you place the final grain of sea salt on the caramel is what baking is all about.
Print
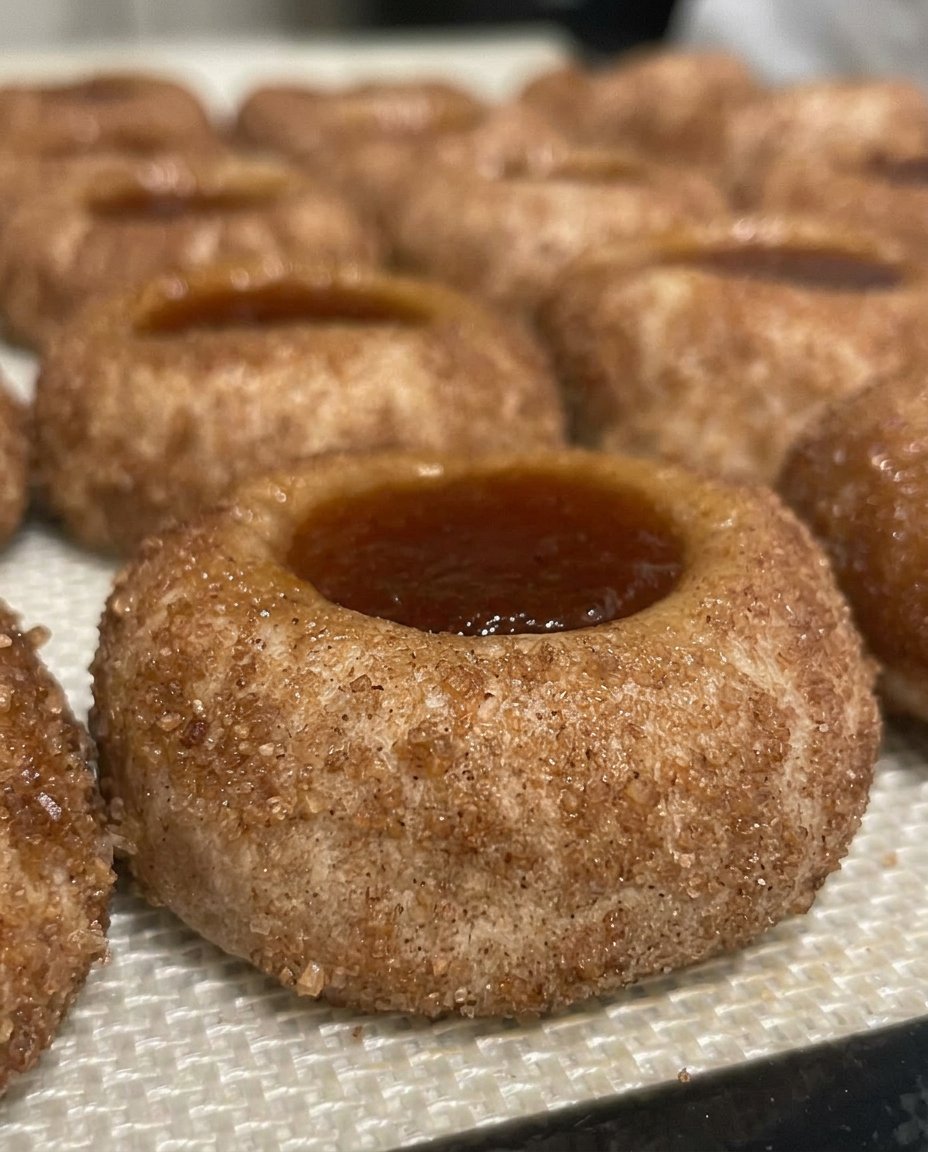
Caramel Thumbprint
- Total Time: 2 hours 45 mins
- Yield: 24 cookies
- Diet: Vegetarian
Description
A sophisticated blend of deep chocolate and buttery salted caramel, these tender cookies offer a melt-in-your-mouth experience perfect for any occasion. The slight bitterness of the cocoa powder balances the rich, golden sweetness of the homemade filling for a truly professional finish.
Ingredients
- 1 cup unsalted butter, softened
- 2/3 cup granulated sugar
- 1 large egg, room temperature
- 1 teaspoon vanilla extract
- 1 1/2 cups all-purpose flour
- 1/2 cup cocoa powder
- 1/2 teaspoon baking powder
- 1/4 teaspoon salt
- 1 cup granulated sugar (for caramel)
- 1/4 cup water
- 1/2 cup heavy cream
- 2 tablespoons unsalted butter (for caramel)
- 1/2 teaspoon vanilla extract (for caramel)
- Flaky sea salt
Instructions
- Cream the softened butter and granulated sugar together until light, fluffy, and frosting-like.
- Beat in the room-temperature egg followed by the vanilla extract until well combined.
- Sift together the flour, cocoa powder, baking powder, and salt to remove lumps and aerate.
- Gradually mix the dry ingredients into the butter mixture until a cohesive dough forms, being careful not to overwork it.
- Roll dough into tablespoon-sized balls, press a deep indentation into each, and refrigerate for at least one hour.
- Bake at 350 F for 10-12 minutes, then immediately re-press the centers down with a spoon and let cool.
- Heat sugar and water in a heavy-bottomed pot until medium amber, then remove from heat and whisk in heavy cream, butter, and vanilla.
- Spoon the cooled, thickened caramel into the cookie centers and finish with a sprinkle of flaky sea salt.
Notes
For the smoothest caramel, avoid stirring the sugar while it is melting to prevent unwanted crystallization. If your kitchen is warm, consider chilling the baking sheet itself before placing the dough on it to help the thumbprint indentations keep their shape perfectly during the baking process.
- Prep Time: 2 hours 20 mins
- Cook Time: 25 mins
- Category: Dessert
- Method: Baking
- Cuisine: Southern
What You Will Need for Cookie Magic
To start this journey, you’ll need standard pantry staples that transform into a decadent base. We use high-quality ingredients because when the list is short, every item has to pull its weight in flavor and texture. This recipe relies on the moisture of the butter and the richness of the cocoa to create a dough that is as easy to work with as it is delicious to eat.
- Unsalted Butter: Make sure it is softened to room temperature so it creams perfectly with the sugar. This creates the airy structure needed for a tender bite.
- Granulated Sugar: This provides the sweetness and helps the cookies achieve that classic crisp edge.
- Cocoa Powder: Use a high-quality cocoa for a deep, earthy base that makes the golden caramel pop visually and taste-wise.
- Heavy Cream: The secret to a velvety caramel sauce that stays soft and approachable even after it cools.
- Flaky Sea Salt: Just a pinch on top to bring all the flavors into sharp focus and balance the sweetness.
Having your egg and butter at room temperature is vital for a smooth emulsion. If your ingredients are too cold, the dough might break or become clumpy, which affects the final shape of the thumbprint. Take the time to set your ingredients out on the counter an hour before you plan to start your baking session. It’s a small step that makes a world of difference in the final product.
How to Make It
Step 1: Cream the Butter and Sugar
Start by creaming together the softened butter with the granulated sugar in a large bowl. You want to beat them until the mixture lightens in color and takes on a soft, creamy texture that looks almost like frosting. If you are using an electric mixer, this could take up to five minutes of steady work. This step is where you build the foundation of the cookie’s texture.
Step 2: Add the Wet Ingredients
Once the butter and sugar are fluffy, add your room-temperature egg. Mix it in completely before adding the vanilla extract. The vanilla acts like a bridge, connecting the chocolate of the cookie with the richness of the caramel you’ll make later. Make sure everything is well-combined before moving on to the dry ingredients.
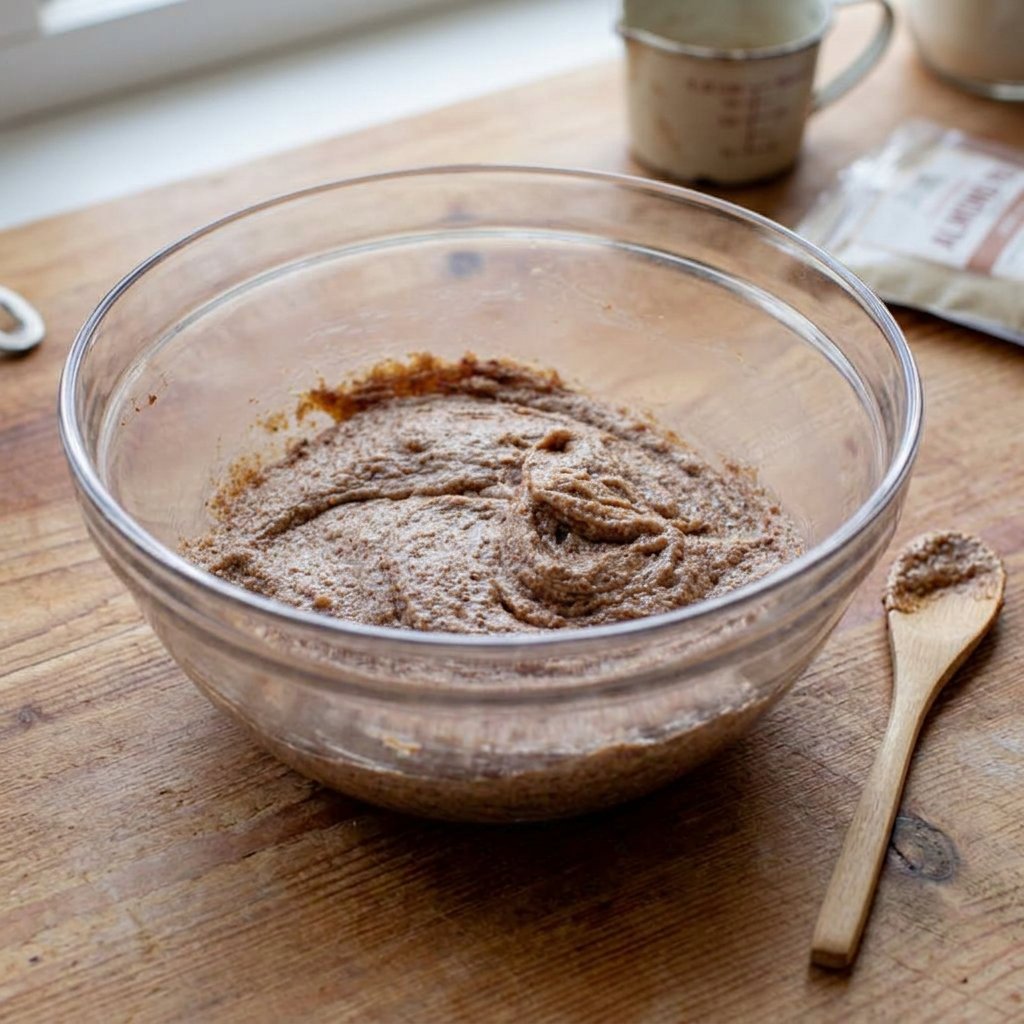
Step 3: Sift the Dry Ingredients
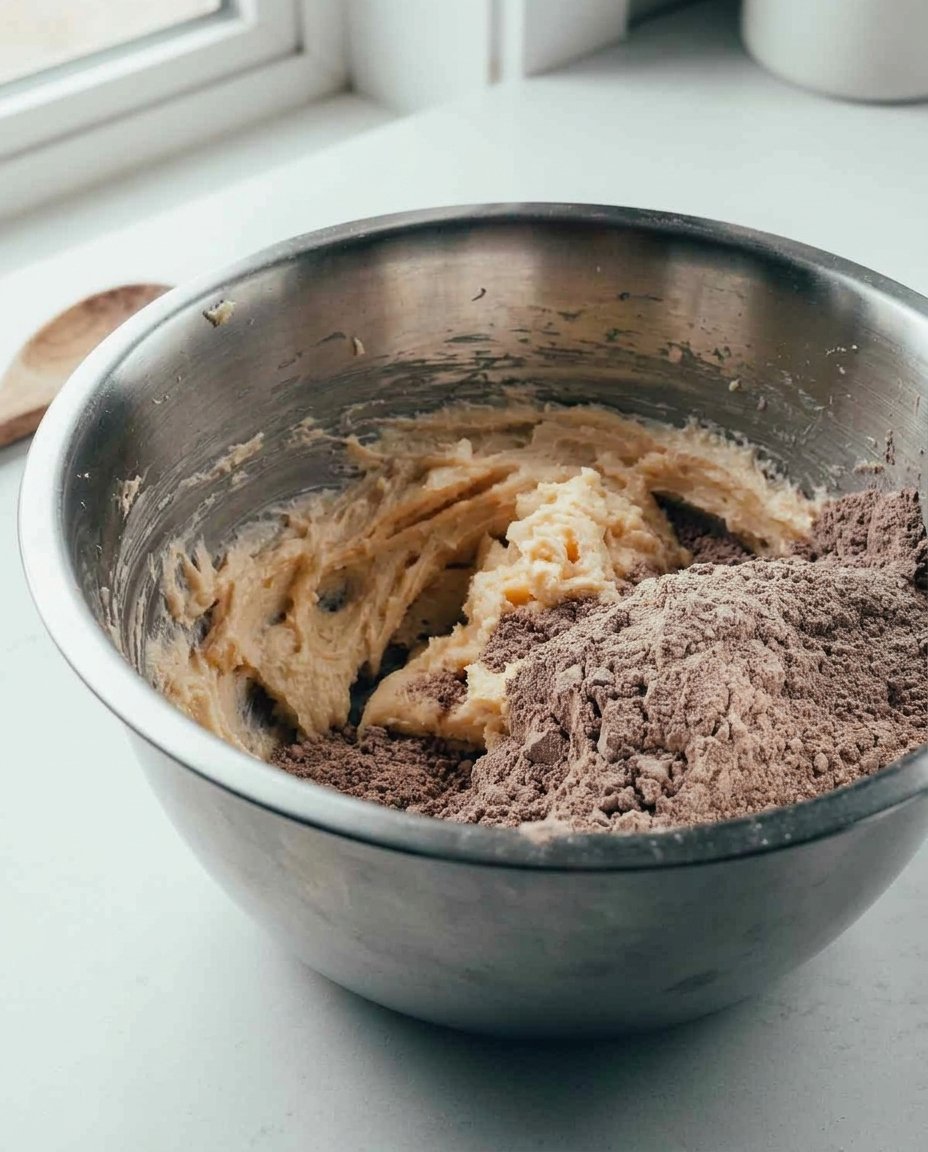
In a separate large bowl, measure out your flour, cocoa powder, baking powder, and salt. Sift these together to remove any lumps, which is particularly important for cocoa powder as it tends to clump up in the pantry. Sifting also helps aerate the flour, leading to a lighter cookie.
Step 4: Combine and Chill
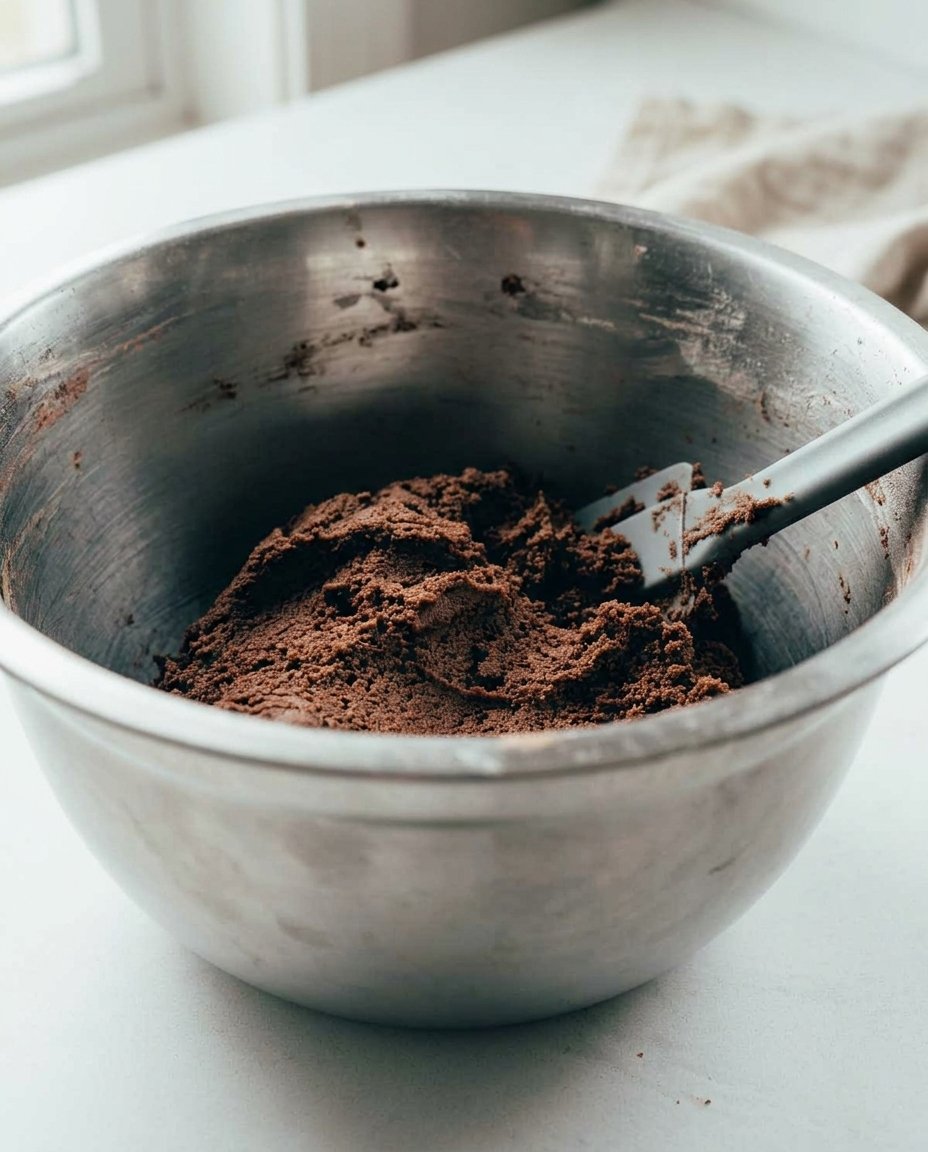
Add the dry ingredients into the wet mixture in three parts. Mix completely between each addition but be careful not to overwork the dough. Over-mixing can lead to a tough cookie. Once a cohesive dough forms, wrap it and let it rest. This allows the flour to hydrate and the flavors to meld together beautifully.
Step 5: Shape the Cookies
Roll the dough into balls about the size of a tablespoon. Using your thumb or the back of a small measuring spoon, press a deep indentation into the center of each ball. Place them on a baking sheet and refrigerate the shaped cookies for at least one hour. This chilling time prevents the cookies from spreading too much in the oven.
Step 6: Bake and Re-indent
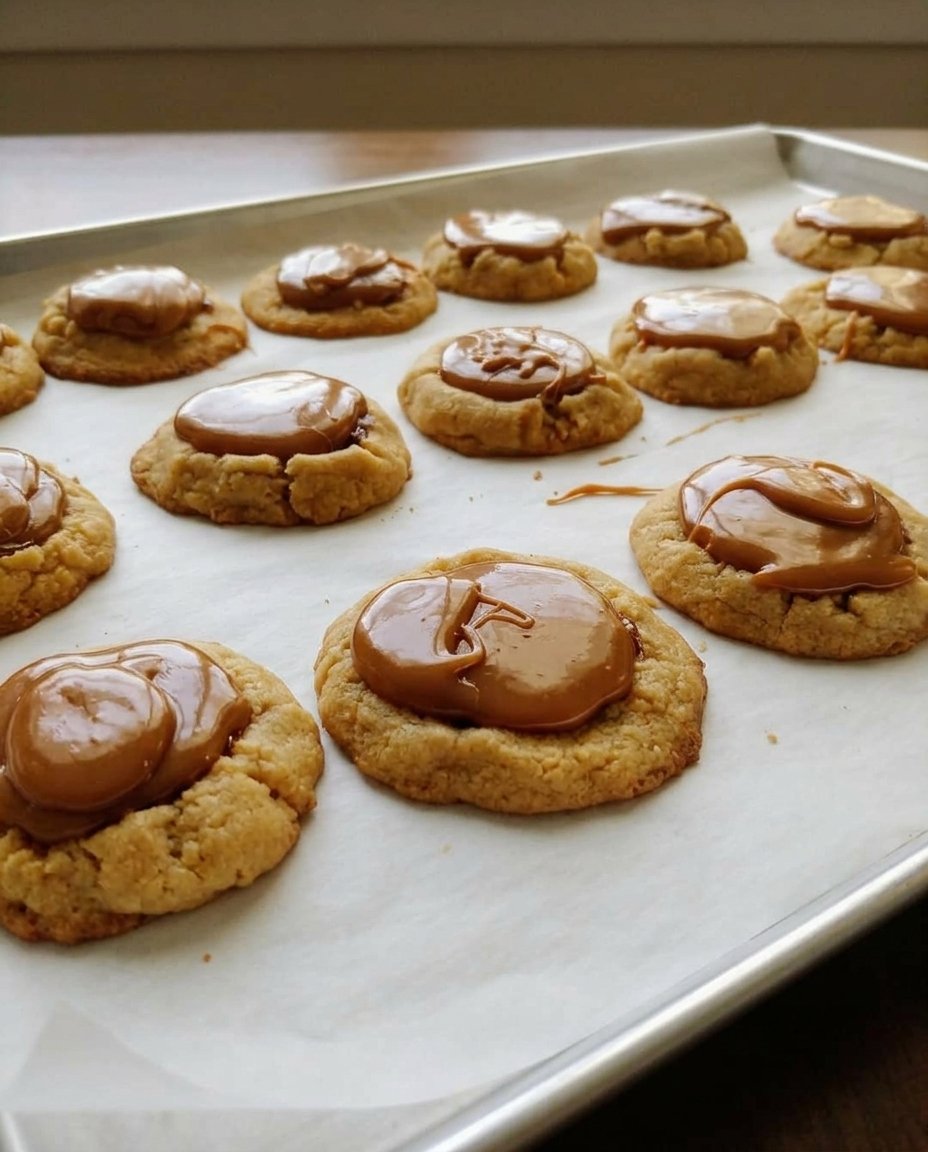
Preheat your oven to 350 F (175 C) and bake for 10-12 minutes. The cookies will puff up during this time, so as soon as you pull them out of the oven, use your spoon to gently press the centers down again. This makes sure there is plenty of room for that glorious caramel filling. Let them cool completely before you even think about the caramel.
Step 7: Craft the Caramel
Combine sugar and water in a heavy-bottomed pot over medium heat. Watch it closely for 10 to 15 minutes without stirring. You are looking for a medium amber color. Once it reaches that golden hue, remove it from the heat and whisk in the heavy cream and butter. It will bubble up, so stay calm and keep stirring. Add the vanilla and let it cool until it reaches a thick, pourable consistency.
Step 8: Fill and Garnish
Spoon the cooled caramel into the center of each chocolate cookie. Finish them off with a light sprinkle of flaky sea salt. The salt is the final touch that makes these cookies taste professional and balanced. Allow the caramel to set for a few minutes before serving to your lucky guests.
Jesse’s Secrets for Success
One of the most important things to remember is that caramel is a true test of patience. Don’t be tempted to stir the sugar while it is melting, or you might end up with unwanted crystals that ruin the smooth texture. If you find your caramel is too thin, you can return it to the heat for a minute or two, but be very careful not to burn it. For more techniques on creating beautiful bakes that stand the test of time, check out our Artisan Cookie Collection.
Another trick for the perfect shape is to keep the dough cold right up until it hits the oven. If your kitchen is particularly warm, you might even want to put the baking sheet in the freezer for five minutes before sliding it into the oven. This helps the ‘thumbprint’ keep its definition so your caramel doesn’t spill over the edges. Always use a heavy-bottomed pot for the sugar; thin pots have hot spots that can cause the sugar to burn before the rest of it has even melted.
Creative Twists on a Classic
If you want to try something a little different, you can swap the vanilla extract in the caramel for a splash of bourbon to give it a truly Southern soul. For those who enjoy a bit of texture, rolling the dough balls in crushed pecans or walnuts before baking adds a wonderful crunch that reminds me of traditional turtle candies. You can find more inspiration for your next project in our Seasonal Cookie Design section.
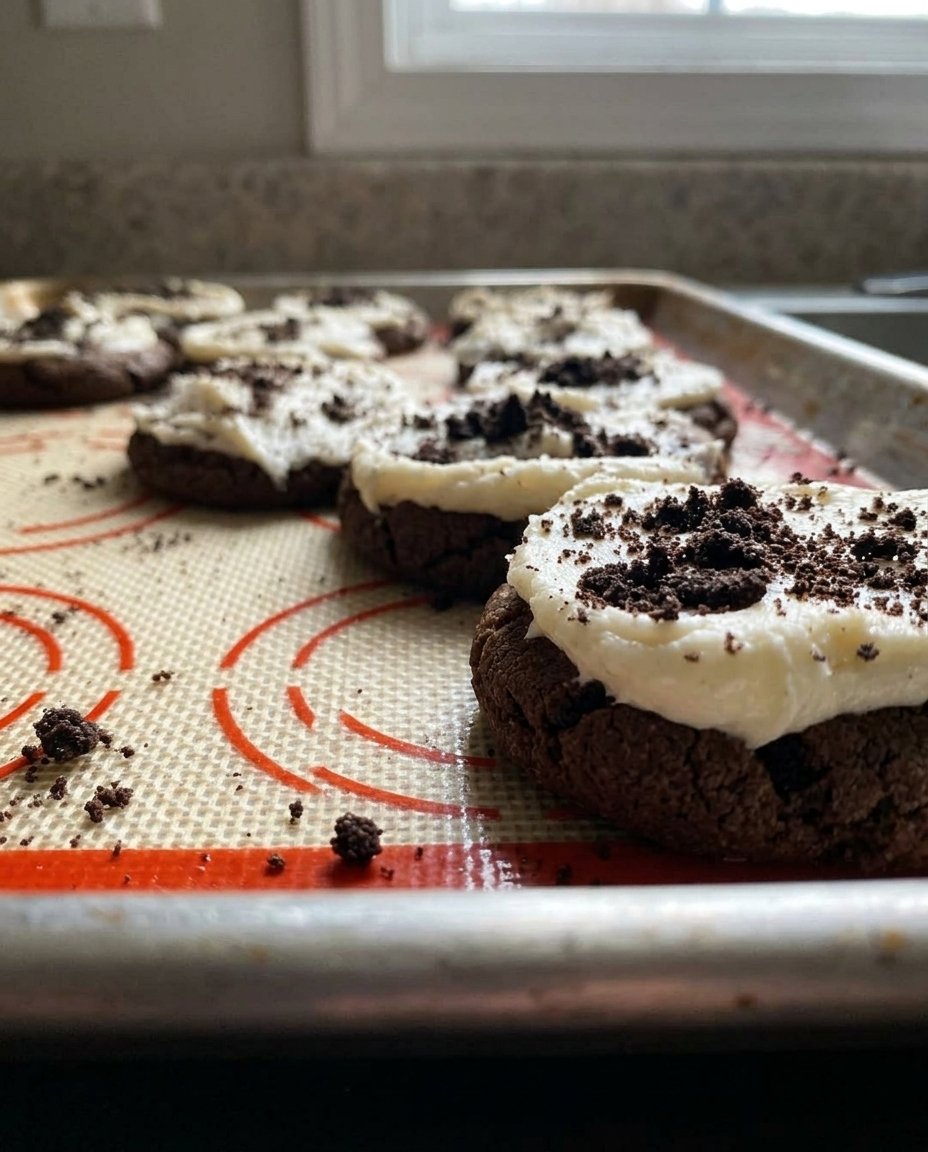
You might also want to try these chocolate thumbprint cookies if you prefer a different type of chocolate base. Another lovely idea is to drizzle a bit of melted white chocolate over the finished cookies for a striking visual contrast. If you are feeling adventurous, a tiny bit of orange zest rubbed into the sugar before creaming the butter adds a bright, citrusy note that cuts through the richness of the cocoa and caramel perfectly.
Sharing the Joy
These cookies are best served alongside a tall glass of cold milk or a steaming mug of dark roast coffee. They make a beautiful gift when tucked into a decorative tin with a bit of parchment paper between the layers to keep things tidy. For more presentation ideas that make your treats look as good as they taste, visit our Cookie Decorating Studio.
If you are hosting a gathering, try serving these on a wooden platter to lean into that rustic, Southern aesthetic. They are often the first thing to disappear at a potluck because they look so inviting. You can also serve them slightly warm if you are enjoying them at home; just five seconds in the microwave makes the caramel center gooey and extra decadent. It is the perfect way to end a family meal or celebrate a small victory during the week.
The Heart of the Kitchen
Baking is about more than just the end result; it is about the memories made while the oven is warm and the house smells like heaven. These caramel thumbprints have been a staple in my family for years, and I hope they find a permanent place in your heart as well. If you are looking for more ways to stock your pantry with wonderful treats, browse our Trending Cookie Creations. We would love to see your bakes, so please share them with us and join our community of home bakers. You can find us on Pinterest, Instagram, and Facebook for more recipes and stories from my Southern kitchen.
