Growing up, the cookie jar was the heart of the kitchen, always filled with something sweet to welcome you home. While I love a traditional thin crisp, there is something special about these bakery-style chocolate chip cookies—thick, chewy, and unapologetically comforting. I like to add just a whisper of extra vanilla or a pinch of nutmeg to the dough, giving that familiar chocolate sweetness a warm, Southern hug.

These aren’t your average flat cookies; they are substantial, golden-edged treats that stay soft in the center for days. The secret lies in using plenty of brown sugar and letting the dough rest, allowing the flavors to meld into a deep, caramel-like richness. It is a recipe that proves patience is the most delicious ingredient of all.
Comfort Meets Flavor
You will love this recipe because it strikes the perfect balance between a crisp edge and a gooey center, just like the ones behind the glass counter at your favorite bakery. It takes the familiar comfort of a classic chocolate chip cookie and adds a depth of flavor thanks to dark brown sugar and a generous splash of vanilla. Plus, the dough is sturdy enough to hold plenty of chocolate, ensuring every single bite is packed with sweetness.
Print
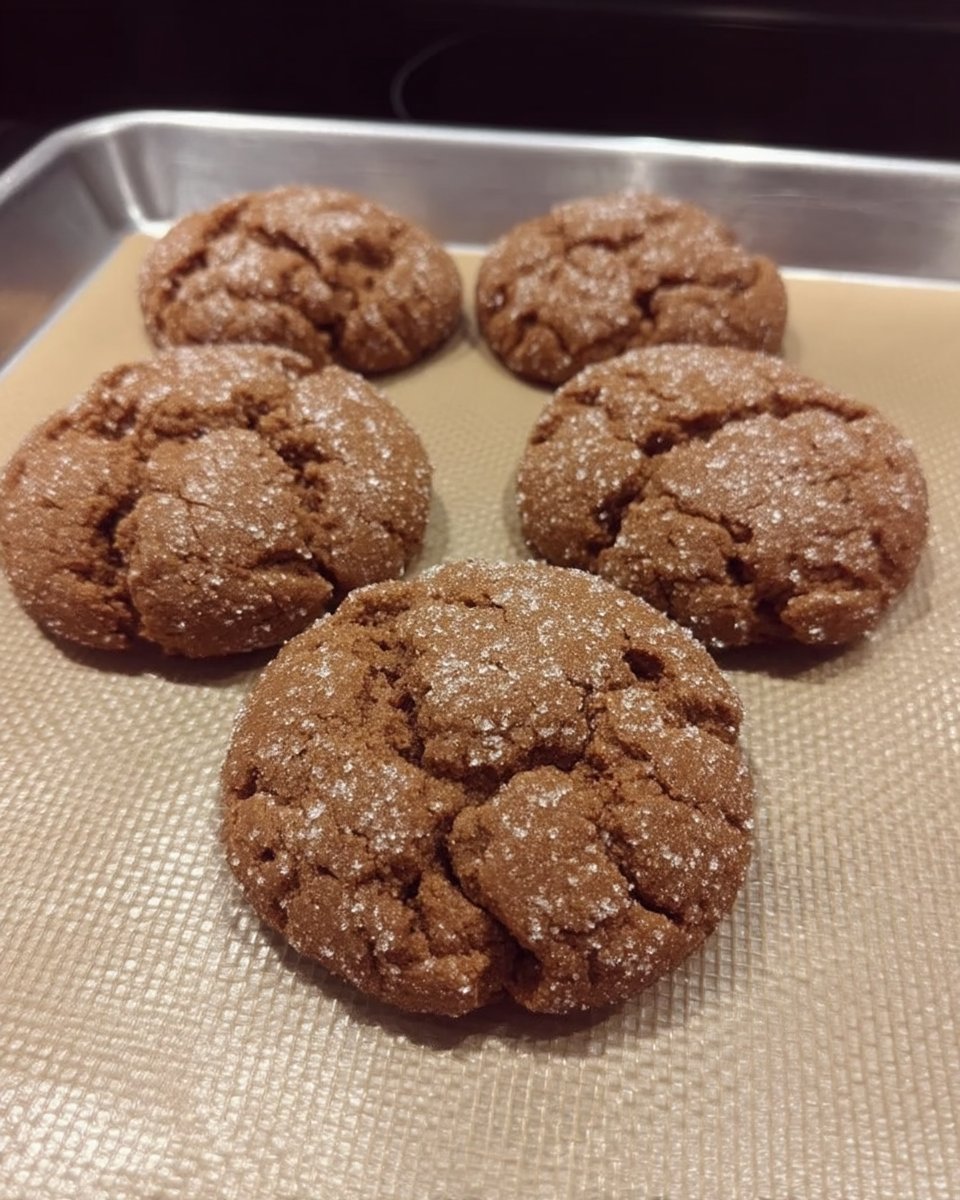
Bakery Style Chocolate Chip Cookies
- Total Time: 2 hours 27 mins
- Yield: 20 cookies
- Diet: Vegetarian
Description
These thick and chewy bakery-style chocolate chip cookies offer a perfect balance of golden edges and soft, gooey centers. Infused with dark brown sugar and a generous splash of vanilla, they are a comforting classic that stays fresh and delicious for days.
Ingredients
- 1 cup unsalted butter, room temperature
- 1/2 cup granulated sugar
- 1 cup dark brown sugar, packed
- 1 tablespoon pure vanilla extract
- 2 large eggs
- 3 cups all-purpose flour, spooned and leveled
- 1 teaspoon baking soda
- 1/2 teaspoon baking powder
- 1/2 teaspoon salt
- 2 cups semi-sweet chocolate chips
Instructions
- In a medium bowl, whisk together the flour, baking soda, baking powder, and salt; set this mixture aside.
- Using a stand mixer or hand mixer, cream the room-temperature butter, granulated sugar, and dark brown sugar together until smooth, creamy, and pale.
- Add the vanilla extract and eggs to the butter mixture and mix well, scraping down the sides of the bowl to ensure even incorporation.
- With the mixer on low speed, slowly add the dry ingredients and mix just until the flour streaks disappear, then gently fold in the chocolate chips by hand.
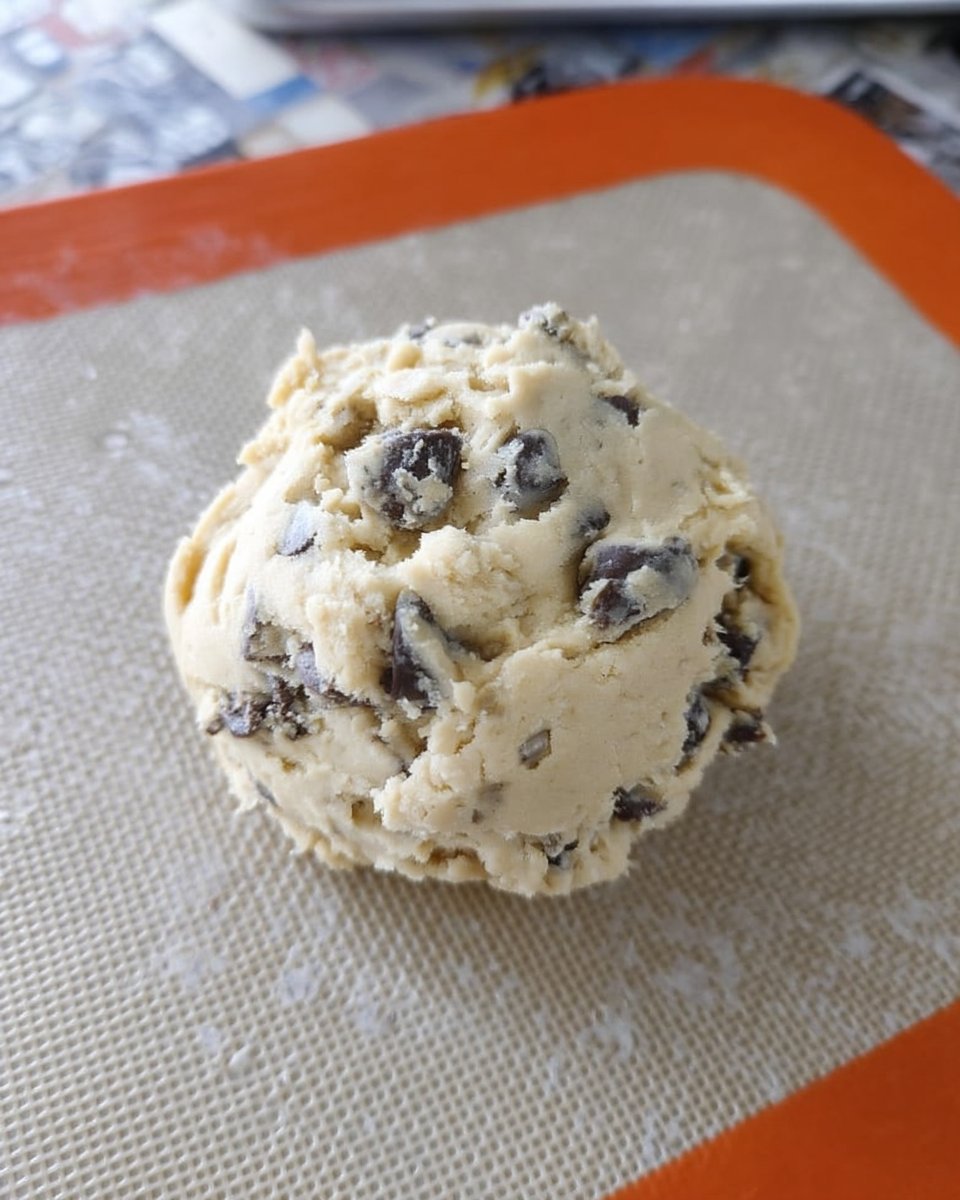
- Measure out large scoops of dough (about 3 tablespoons each), place them on a tray, cover, and refrigerate for at least 2 hours.
- Preheat your oven to 375°F (190°C) and bake the chilled dough balls on parchment-lined sheets for 9 to 12 minutes until the edges are golden.
Notes
To achieve the signature bakery look, try pressing a few extra chocolate chips into the top of each dough ball right before baking. If you have the time, allowing the dough to chill for a full 24 hours will deepen the caramel notes and improve the overall texture of the cookie.
- Prep Time: 15 mins
- Cook Time: 12 mins
- Category: Dessert
- Method: Baking
- Cuisine: American
The Pantry Classics
To make these thick, chewy treats, you will need a few standard staples. I stick to the basics but focus on quality to get that comforting bakery taste.
- Unsalted Butter: Make sure it is at room temperature so it creams perfectly with the sugars. I prefer unsalted so I can control the salt level myself.
- Sugars: A mix of granulated sugar and dark brown sugar is key. The dark brown sugar adds moisture and that deep molasses flavor that makes these feel like home.
- Pure Vanilla Extract: We use a full tablespoon here. It adds a warm aromatic backdrop that balances the chocolate.
- Dry Ingredients: All-purpose flour, baking soda, baking powder, and salt. Spoon and level your flour to keep the cookies from getting too cakey.
- Chocolate: Semi-sweet chocolate chips are the classic choice, balancing the sweet dough with rich cocoa notes.
How to Bake Comfort
Step 1: Prep Your Dry Mix
In a medium bowl, whisk together the flour, baking soda, baking powder, and salt. Set this aside. Getting your dry ingredients ready first ensures you don’t overmix the dough later.
Step 2: Cream the Butter and Sugars
Using a stand mixer fitted with a paddle attachment (or a hand mixer), cream the room-temperature butter, granulated sugar, and dark brown sugar together. Beat them until the mixture is smooth, creamy, and pale. This usually takes a couple of minutes and is the foundation of a good texture.
Step 3: Add Wet Ingredients
Add the vanilla extract and the eggs to the butter mixture. Mix well until the dough looks smooth and pale, scraping down the sides of the bowl as necessary to incorporate everything evenly.
Step 4: Combine and Fold
With the mixer on low speed, slowly add the dry ingredients. Mix just until the flour streaks disappear—do not overmix, or the cookies might end up tough. Gently stir in the chocolate chips by hand.
Step 5: Chill the Dough
This is the secret to bakery-style thickness. Measure out large scoops of dough (about 3 tablespoons each) and place them on a tray. Cover and refrigerate for at least 2 hours. Chilled dough spreads less and concentrates the flavor.
Step 6: Bake and Shape
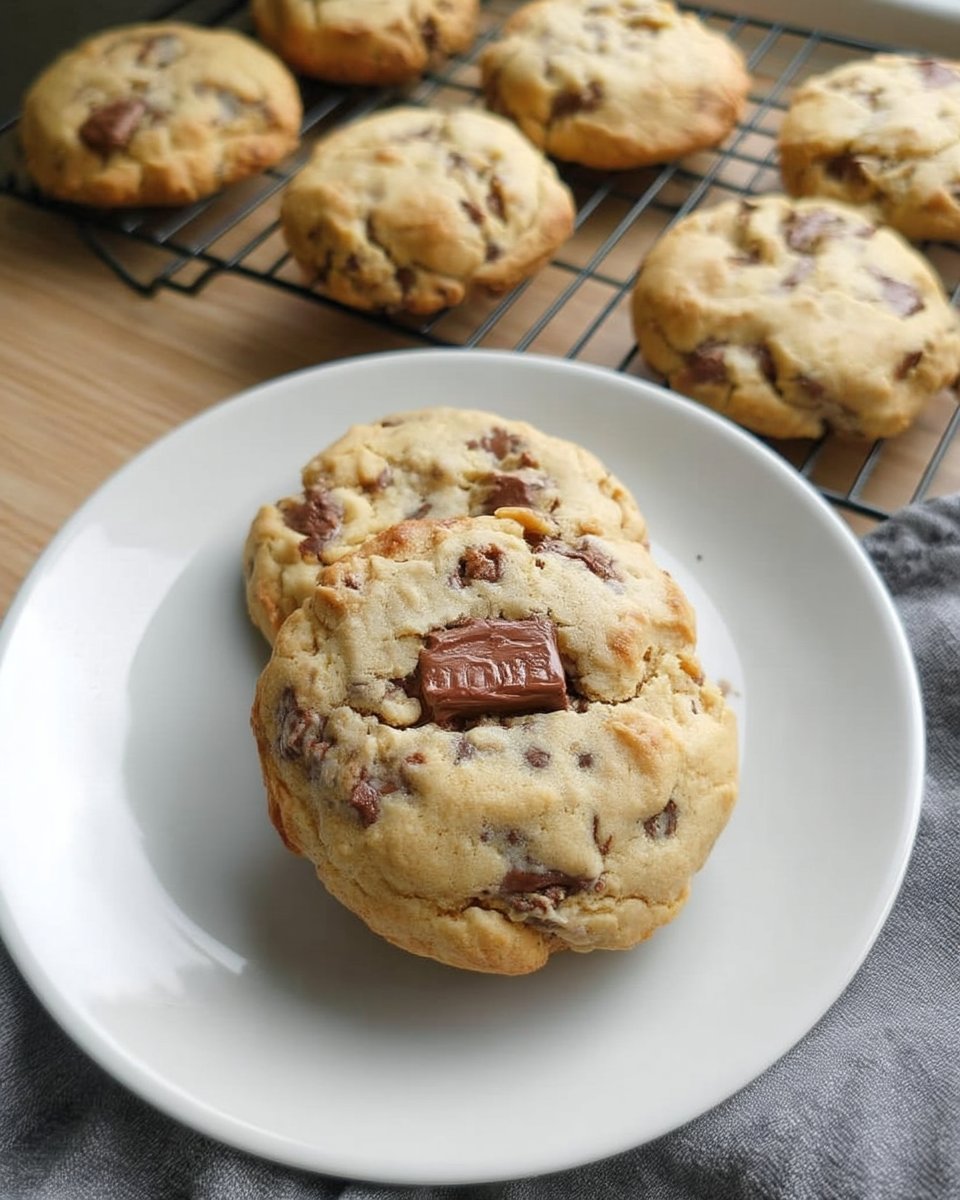
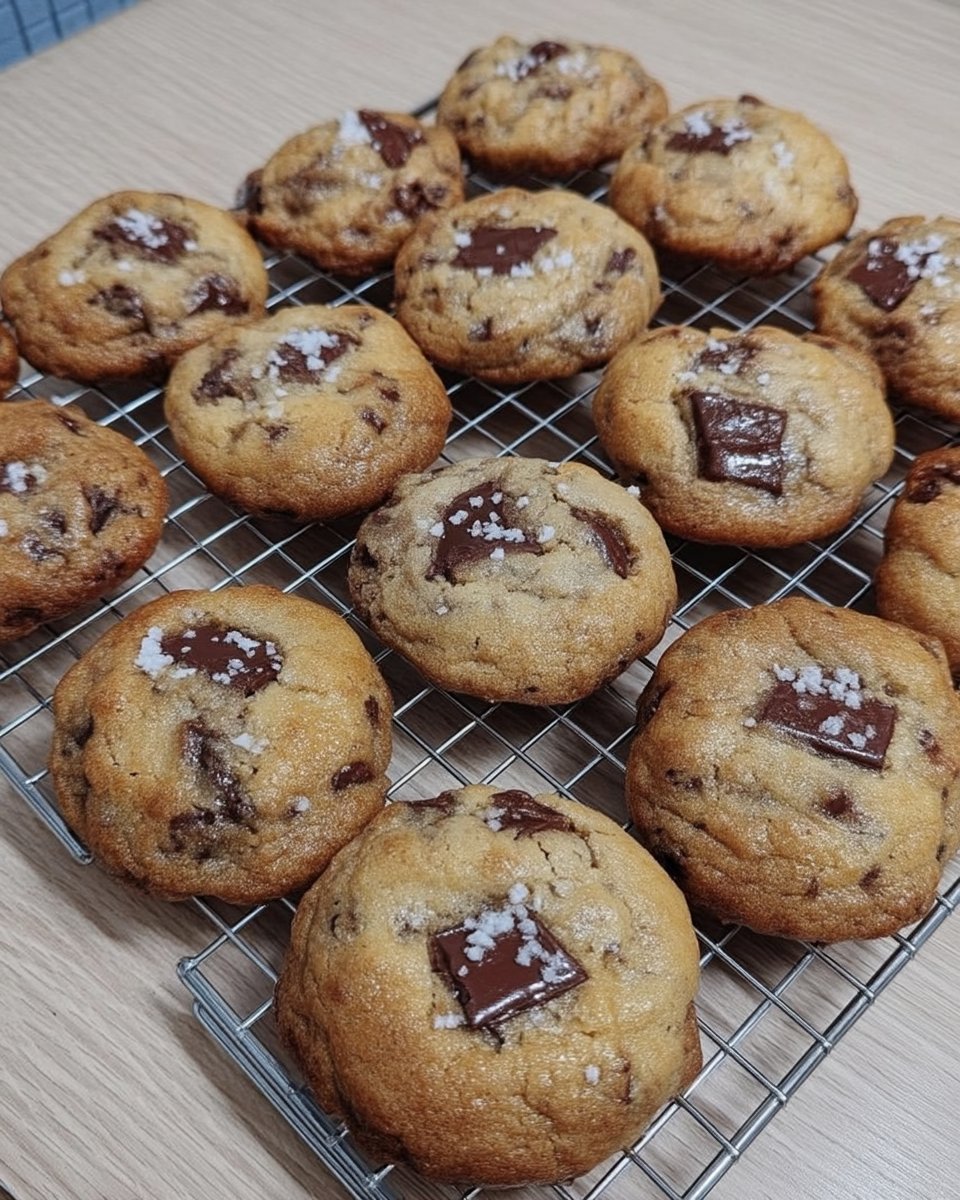
Preheat your oven to 375°F (190°C). Place the chilled dough balls on a parchment-lined baking sheet, spacing them out. Bake for 9–12 minutes until the edges are golden but the centers are still pale. If they look a bit uneven, use a large round cutter to gently swirl around the hot cookies to reshape them into perfect circles. Let them cool on the sheet for 5 minutes before moving to a rack.
Jesse’s Secrets for Success
- The Scoop and Level: When measuring flour, avoid scooping directly from the bag, which packs it down. Instead, spoon it into the cup and level it off. Too much flour makes for a dry cookie.
- Don’t Skip the Chill: I know it is tempting to bake right away, but chilling the dough solidifies the butter. This prevents the cookies from spreading into puddles and gives you that thick, bakery-style center.
- The Swirl Trick: If your cookies come out less than round, immediately place a glass or biscuit cutter over the hot cookie and gently swirl it. This tucks in the edges for a professional look.
- Explore More: If you love mastering textures and techniques, check out our Artisan Cookie Collection for more detailed guides on perfecting your bake.
Twists on a Classic
- Spiced Warmth: Add a 1/2 teaspoon of cinnamon or a pinch of cardamom to the dry ingredients for a subtle spice kick that warms up the flavor profile.
- Salted Finish: Sprinkle flakey sea salt on top of the dough balls just before baking. The salt cuts through the sweetness and adds a sophisticated crunch.
- Nutty Crunch: Fold in 1/2 cup of toasted pecans or walnuts along with the chocolate chips for added texture and a Southern touch.
- Design Ideas: For a festive look during the holidays, you might draw inspiration from our Seasonal Cookie Design ideas, swapping chips for seasonal colored candies.
Sharing the Warmth
Nothing beats a warm cookie served with a tall glass of cold milk—it is the ultimate comfort pairing. For a cozy evening treat, try warming a cookie slightly in the microwave and topping it with a scoop of vanilla bean ice cream. These also make fantastic gifts; stack them in a cellophane bag tied with ribbon for a touch of homemade hospitality. Serve these alongside treats from our Cookie Decorating Studio for a diverse and impressive dessert spread at your next gathering.
A Final Sweet Note
Baking these cookies is about more than just the result; it is about the aroma filling your home and the joy of sharing something handmade. Whether you stick to the recipe or add your own little flavor twist, these bakery-style chocolate chip cookies are sure to become a favorite in your rotation. I’ve tweaked my ratios over the years, inspired by classics and great resources like Stuck on Sweet, to bring you this reliable favorite. Keep baking and explore our Trending Cookie Creations for your next kitchen adventure.
Share your bake with us on Pinterest, Instagram, or Facebook—we love seeing your sweet creations!
